Advertisement
Quick Links
Order No. 9353
BUILDING INSTRUCTIONS
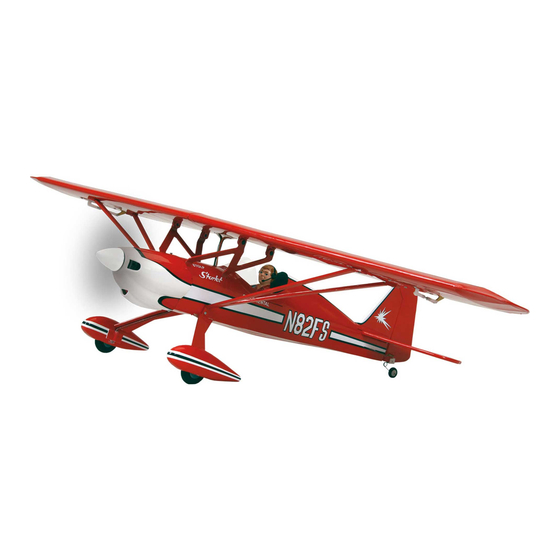
STARLET
RC electric model for three 650 mAh LiPo cells
This model requires a four-function HoTT radio control system
GRAUPNER GmbH & Co. KG D-73230 KIRCHHEIM/TECK GERMANY
Modifications reserved. No liability for printing errors.
08/2011
- 1 -
Advertisement

Summary of Contents for GRAUPNER STARLET
- Page 1 BUILDING INSTRUCTIONS STARLET RC electric model for three 650 mAh LiPo cells This model requires a four-function HoTT radio control system GRAUPNER GmbH & Co. KG D-73230 KIRCHHEIM/TECK GERMANY Modifications reserved. No liability for printing errors. 08/2011 - 1 -...
- Page 2 Introduction The STARLET is an attractive electric-powered RC model aircraft which is easy to transport thanks to its compact dimensions. However, do not let its small size deceive you: the model requires some prior modelling experience if you are to assemble and operate it successfully.
- Page 3 Complete the aileron pushrods as shown, connect the linkages, then glue the aileron horns in the slots. GRAUPNER GmbH & Co. KG D-73230 KIRCHHEIM/TECK GERMANY Modifications reserved. No liability for printing errors. 08/2011...
- Page 4 (included in Order No. 7731) over the three wires. Tin all the bare wire ends before soldering the pairs together in any order. Slip GRAUPNER GmbH & Co. KG D-73230 KIRCHHEIM/TECK GERMANY Modifications reserved. No liability for printing errors.
- Page 5 The position of the bottom two screws can be seen in a later picture; please refer to the section entitled “The undercarriage”. GRAUPNER GmbH & Co. KG D-73230 KIRCHHEIM/TECK GERMANY Modifications reserved. No liability for printing errors. 08/2011...
- Page 6 This picture shows the servos installed in the servo plate, one with the pushrod connected, one ready to be connected. Unscrew the output levers to allow the push- GRAUPNER GmbH & Co. KG D-73230 KIRCHHEIM/TECK GERMANY Modifications reserved. No liability for printing errors.
- Page 7 “square”. Cut a slit in the fuselage to accept the bottom rudder hinge, then glue the fin to the tailplane and fuselage, again keeping it exactly central and vertical. GRAUPNER GmbH & Co. KG D-73230 KIRCHHEIM/TECK GERMANY Modifications reserved. No liability for printing errors.
- Page 8 Sand the joint surface of the brackets before gluing them in place, after removing the film over the joint area of the strut fairing. GRAUPNER GmbH & Co. KG D-73230 KIRCHHEIM/TECK GERMANY Modifications reserved. No liability for printing errors.
- Page 9 2: left aileron servo; socket 3: elevator servo; socket 4: rudder servo, socket 5: right aileron servo; socket 6: speed controller. It is a good GRAUPNER GmbH & Co. KG D-73230 KIRCHHEIM/TECK GERMANY Modifications reserved. No liability for printing errors.
- Page 10 It is essential al- ways to land straight into wind. All of us at GRAUPNER Modellbau wish you many fine flights with your new STARLET The prototype: a full-size STARLET, built in 1980 GRAUPNER GmbH &...
- Page 11 You will find information on this in the operating instructions supplied with your radio control system. It is important to use only those parts included in the kit, together with other genuine Graupner accessories and replacement parts as recommended expressly by us. Even if you change a single component, you can no longer be sure that the whole system will work reliably, and such changes also invalidate your guarantee.
- Page 12 Remove the flight battery from the model after each flying session, and store it at a temperature of around +5° C to +25° C, well out of the reach of children. GRAUPNER GmbH & Co. KG D-73230 KIRCHHEIM/TECK GERMANY Modifications reserved. No liability for printing errors.
- Page 13 If material defects or manufacturing faults should arise in a product distributed by us in the Federal Republic of Germany and purchased by a consumer (§ 13 BGB), we, Graupner GmbH & Co. KG, D-73230 Kirchheim/Teck, Germany, acknowledge the obligation to correct those defects within the limitations described below.


Need help?
Do you have a question about the STARLET and is the answer not in the manual?
Questions and answers