Table of Contents
Advertisement
Quick Links
Advertisement
Table of Contents

Related Manuals for Advantech TREK-306DH


Summary of Contents for Advantech TREK-306DH
- Page 1 User Manual TREK-306DH 10.4” In-Vehicle Smart Display...
- Page 2 No part of this manual may be reproduced, copied, translated or transmitted in any form or by any means without the prior written permission of Advantech Co., Ltd. Information provided in this manual is intended to be accurate and reliable. How- ever, Advantech Co., Ltd.
-
Page 3: Declaration Of Conformity
Consult the dealer or an experienced radio/TV technician for help. Technical Support and Assistance Visit the Advantech web site at http://support.advantech.com where you can find the latest information about the product. Contact your distributor, sales representative, or Advantech's customer service center for technical support if you need additional assistance. -
Page 4: Packing List
Please download driver and related documents from http://support.advantech.com Ordering Information Description TREK-306D-HA0E TREK-306DH, 10.4" XVGA in-vehicle Smart Display 1700020007 M Cable SCSI 36P(M)/SCSI 36P(M) 200cm (LVDS Cable) 1700020008 M Cable SCSI 36P(M)/SCSI 36P(M) 500cm (LVDS Cable) 1700020329-01 M Cable SCSI 36P(M)/SCSI 36P(M) 800cm (LVDS Cable) RAM-MOUNT-06E VESA RAM mount w/VESA base, 1.5"... -
Page 5: Safety Instructions
Do not make connections while the power is on. Sensitive electronic com- ponents can be damaged by sudden power surges. CAUTION: Any unverified component could cause unexpected damage. To ensure the correct installation, please always use the components (ex. screws) provided with the accessory box. TREK-306DH User Manual... - Page 6 (e.g. TREK-550, TREK 668) via a Smart Display cable. Make sure the TREK computing box is power off when you installing TREK-306DH. After connecting the Smart Display cable, you could turn on/off TREK-306DH by its power button or via the ignition signal from TREK computing box.
-
Page 7: Table Of Contents
Pin Assignments .......11 Smart Display Connector ................ 12 Figure 3.1 Smart Display Port Connector on TREK-306DH ..12 Table 3.1: Pin assignment for Smart Display Ports ....12 Smart Display Cable ................12 Table 3.2: Ordering Information for Smart Display Cable (Option- al)................ - Page 8 TREK-306DH User Manual viii...
-
Page 9: Chapter 1 General Information
Chapter General Information This chapter gives background information on the TREK-306DH In-Vehicle Computing Box. Sections include: Introduction General Specifications Dimensions... -
Page 10: Introduction
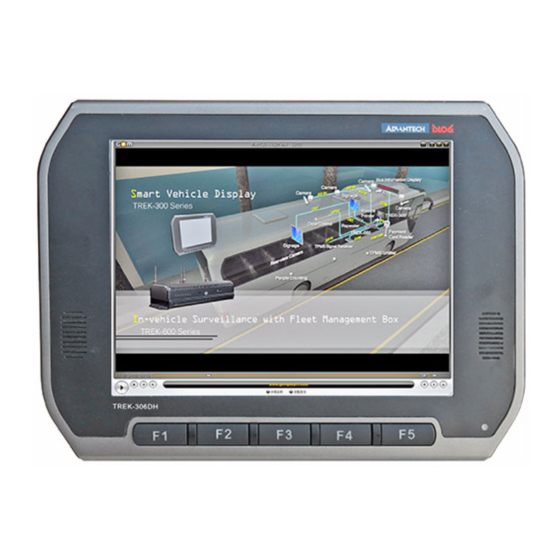
1.1 Introduction TREK-306DH is a stylish, 10.4" In-Vehicle Smart Display which can be paired with all TREK X86 computing boxes (refer to Table 1.1) with a “One-Cable-Connection” (easy for installation). Its excellent display performance, combined with higher resolu- tion XGA (1024 x 768) and higher brightness (400 cd/m2), and a reliable 5-wire resis- tive touchscreen, make it ideal for fleet management as well as in-vehicle surveillance applications in trucks and buses. -
Page 11: Table 1.2: Trek-306Dh Product Specification
Specifications Table 1.2: TREK-306DH Product Specification Active Area (LCD Size) 210.4 (H) x 157.8 (V) (10.4" diagonal) Resolution XGA (1024 x 768) Video Input Single channel, 18 bit LVDS Pixel /Pitch 0.2055 (H) x 0.2055 (V) Brightness (cd/m 2 ) -
Page 12: Dimensions
1.3 Dimensions 302.6 Figure 1.1 TREK-306DH Dimensions TREK-306DH User Manual... -
Page 13: Chapter 2 System Setup
Chapter System Setup This chapter details system setup on TREK-306DH. Sections include: A Quick Tour of the system Overview of hardware installa- tion BIOS Setup on TREK computing Driver installation on TREK computing box... -
Page 14: A Quick Tour Of The System
2.1 A Quick Tour of the System Before starting to set up the TREK-306DH, take a moment to become familiar with the locations and functions of the connectors and features, which are illustrated in the figures below. A. B. Speaker D. -
Page 15: Figure 2.3 Side View Of Trek-306Dh
Figure 2.3 Side View of TREK-306DH Note! The I/O ports on the side of TREK-306DH (e.g. power button, reset but- ton, and USB 2.0 port) are designed to be routed to the TREK x86 com- puting box. The USB port, on the other hand, is for direct access to the TREK-306DH. -
Page 16: Overview Of Hardware Installation
To assure that the entire system is IP55 compliant, we recommend that when putting on the rear I/O Cover it is firmly sealed. Without the I/O Cover, TREK-306DH will still- work well but will not be guaranteed to be IP55 compliant. -
Page 17: Bios Setup On Trek Computing Box
2.4 Driver Installation on TREK Computing Box All the pre-requisite drivers related to TREK-306DH are already stored on each TREK computing box. Please download all the drivers for your TREK computing box from our website: http://support.advantech.com Note! The drivers and utilities used are subject to change without notice. - Page 18 TREK-306DH User Manual...
-
Page 19: Chapter 3 Pin Assignments
Chapter Pin Assignments This chapter explains pin assign- ments on the TREK-306DH. Sections include: Smart Display Port Connector Smart Display Cable... -
Page 20: Smart Display Connector
Mono. Line-out 3.2 Smart Display Cable TREK-306DH can be paired with TREK x86 computing box by a “Smart Display Port “Cable. Advantech provides a cable ordering list for customer reference. Contact your sales agent for details and choose the proper one to add into your order list. -
Page 21: Table 3.2: Ordering Information For Smart Display Cable (Option Al)
Yellow green blue purple grey Caution! To assure signal quality, the maximum cable length is limited to 10- meters. If longer cable length is desired, an additional signal booster box might be required. Please contact Advantech for further assistance. TREK-306DH User Manual... - Page 22 TREK-306DH User Manual...
-
Page 23: Chapter 4 Software Demo Utility Setup
Chapter Software Demo Utility Setup This appendix explains the soft- ware demo utility for TREK- 306DH. Sections include: Introduction Demo Utility for TREK-306DH How to write an App with the MRM SDK library... -
Page 24: Introduction
Advantech application engineers or visit our website: http://sup- port.advantech.com 4.2 Demo Utility for TREK-306DH This section explains how to install the Advantech demo utility in Windows XP Pro / Embedded. Execute IMC demo utility under the imc_demo_vX.X.X.X folder. Figure 4.1 IMC Demo Utility... -
Page 25: How To Write An App With The Mrm Sdk Library
Click on Hot Key, the Hot Key window will appear. Figure 4.9 Hotkey Utility The steps below guide you how to test the each function on TREK-306DH: – Brightness level: The panel’s brightness can set from level 0~10, a total of 10 levels. - Page 26 TREK-306DH User Manual...
- Page 27 No part of this publication may be reproduced in any form or by any means, electronic, photocopying, recording or otherwise, without prior written permis- sion of the publisher. All brand and product names are trademarks or registered trademarks of their respective companies. © Advantech Co., Ltd. 2014...
Need help?
Do you have a question about the TREK-306DH and is the answer not in the manual?
Questions and answers