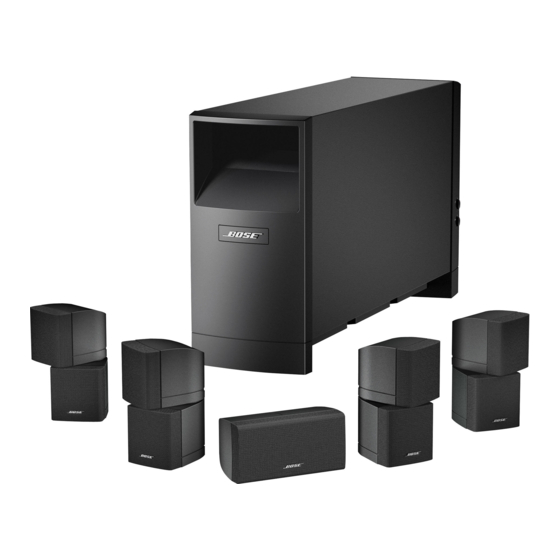
Bose Acoustimass 16 Series II Owner's Manual

Bose Acoustimass 16 Series II Owner's Manual

Home entertainment speaker system
Hide thumbs Also See for Acoustimass 16 Series II:

Advertisement

Acoustimass
Acoustimass
H O M E E N T E R T A I N M E N T S P E A K E R S Y S T E M
2ZQHU¶V *XLGH
*XtD GH XVDULR
1RWLFH G¶XWLOLWVDWLRQ
16
®
Series II
15
®
Series III

Advertisement

Table of Contents
loading
Need help?

Need help?

Do you have a question about the Acoustimass 16 Series II and is the answer not in the manual?

Questions and answers

Subscribe to Our Youtube Channel

Summary of Contents for Bose Acoustimass 16 Series II

  • Page 1 Acoustimass ® Series II Acoustimass ® Series III H O M E E N T E R T A I N M E N T S P E A K E R S Y S T E M 2ZQHU¶V *XLGH *XtD GH XVDULR 1RWLFH G¶XWLOLWVDWLRQ...
  • Page 2 Please keep your sales receipt and warranty card together with this owner’s guide. ©2006 Bose Corporation. No part of this work may be reproduced, modified, distributed or otherwise used without prior written permission. Manufactured under license from Dolby Laboratories. “Dolby” and the double-D symbol are trademarks of Dolby Laboratories. Confidential Unpub-...
  • Page 3: Table Of Contents

    English Español Français ONTENTS ETTING Unpacking the carton ................Choosing locations for your speakers .
  • Page 4: Setting Up

    If any parts appear damaged, do not use them. Instead, repack the system in the original carton and contact your authorized Bose dealer. Or, to contact Bose directly, refer to the address list included in the carton.
  • Page 5: Choosing Locations For Your Speakers

    To prevent this problem, rubber feet are provided for attachment to the bottom of the center front speaker. Note: You may order additional rubber feet, free of charge, by contacting Bose. Refer to the address list included in the carton.
  • Page 6: Placing The Center Front Speaker

    Français Español English ETTING Bose ® wall brackets and floor or table stands expand the options for placement of your speakers. For further information, see “Accessories” on page 14. Note: The Acoustimass ® 15 Series III system is designed for use with an optional center rear cube speaker array.
  • Page 7: Placing Your Acoustimass

    ® module ® ® Bose Acoustimass speaker technology makes it difficult to locate the source of low-frequency sound from this module. So feel free to hide it from view, and: • Locate the module at the same end of the room as the television screen.
  • Page 8 Français Español English ETTING 2. Use the supplied 50-ft (15.2 m) speaker cables for the speakers at the rear of your room (Figure 5). Insert them into the jacks on the module as follows: • RR goes into the jack labeled Right Rear. •...
  • Page 9: Connecting The Acoustimass

    English Español Français ETTING Connecting the Acoustimass ® module to the receiver The system input cable is 20 feet (6.1 meter) long and connects the Acoustimass module to your surround sound receiver. Unlike the speaker cables, this input cable has a multi-pin connector that inserts into the Audio Input jack on the module (Figure 6).
  • Page 10: Checking And Finalizing Connections

    To purchase the 6.1 upgrade kit in the same color as your current system, contact your local authorized Bose ® retailer. Or to contact Bose directly, see the address list included in the carton. When ordering, you will need to provide the serial number of your Acoustimass module.
  • Page 11: Using Your System

    English Español Français SING YOUR SYSTEM Getting the most from your home theater speakers ® With system connections completed and the module plugged in, your Acoustimass system is now ready for use. You may want to familiarize yourself with the controls and built-in protections that adjust the audio of this system (Figure 9).
  • Page 12: Setting Your Digital Surround Sound Receiver

    LARGE • LFE/Subwoofer * With an Acoustimass 16 Series II system or upgraded Acoustimass 15 Series IlI system only. Note: If your receiver provides it, the LFE or Subwoofer option setting should be ON and the crossover value at the lowest number possible, which is typically 80 Hz.
  • Page 13: Reference

    ® and try the following solutions. If you still have a problem, contact your Bose dealer to arrange for service. To contact Bose directly, refer to the address list included in the carton. Problem What to do System does not function •...
  • Page 14: Limited Warranty

    Details of the limited warranty are provided on the warranty card that came with your system. Please fill out the information section on the card and mail it to Bose. Failure to do so, however, does not affect your rights.
  • Page 15 English Español Français EFERENCE...
  • Page 16 ‹ %RVH &RUSRUDWLRQ 7KH 0RXQWDLQ )UDPLQJKDP 0$  86$ $0293692 5HY &&0...

This manual is also suitable for:

Acoustimass 15 series iiiAcoustimass16 series ii

Table of Contents

Save PDF