Table of Contents
Advertisement
Quick Links
Download this manual
See also:
User Manual
Advertisement
Table of Contents

Related Manuals for Unitech PA960


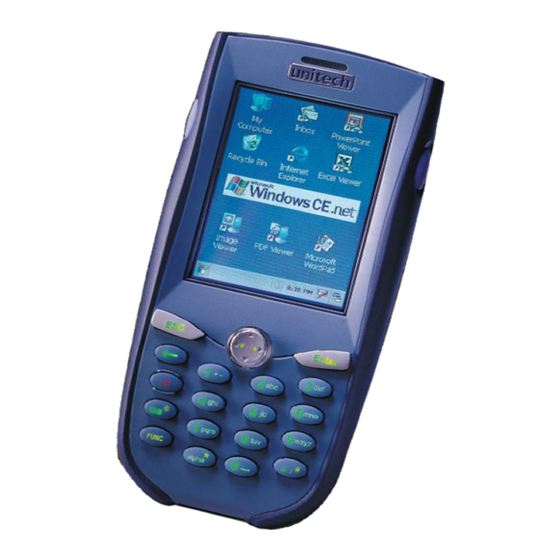
Summary of Contents for Unitech PA960
- Page 1 Unitech PA960 Product Reference Guide www.unitech-adc.com Unitech America Unitech APAC Unitech Europe Unitech Greater China Unitech Japan P/N 400277 REV.A Product Reference Guide...
-
Page 2: Table Of Contents
Tour of the Unitech PT930SA ..................7 PT930SA Front and Left Side ..................7 PT930SA Back ......................7 First Steps with the Unitech PT930SA ................8 Installing the Battery Pack ................... 8 Supplying Power to the PT930SA ................. 9 Charging the Main and Backup Batteries for the First Time ..........9 Using the Stylus ....................... - Page 3 Warm Boot / Cold Boot ..................... 21 Charging Considerations .................... 22 Storage and Safety Precautions ................. 22 Chapter 4. Communication ................ Introduction ......................23 Connecting ....................... 23 ActiveSync ....................... 24 Installing Microsoft ActiveSync ................... 24 Using the Mobile Devices Window ................28 Changing Communications Settings ................
-
Page 4: Chapter 1. Introduction
LCD with touch screen, keypad, IrDA interface, and wireless communication capability. It provides the user with a standard Windows-based environment for customizing and operating the device. This PA960 product reference guide will guide you to access your PA960. Unitech PA960 Unitech PA960... - Page 5 PA960 may not power-on due to battery discharge as a result of storage. In the above situation, plug the PA960 to the RS232 or USB cable which is with DC in port or put the unit into the Unitech PA960 Cradle (with 12V/2A AC-DC adapter), and recharge the unit for 16 hours in order to fully charge its backup battery.
- Page 6 Unitech PA960 & Accessories After opening the box, please make sure the following accessories for the PA960 are present: PA960 CD PA960 Main Body Unitech PA960 Quick Reference Guide Battery pack CF slot drawer for PA960 Stylus Pulling-tags RF Card Cushion...
-
Page 7: Tour Of The Unitech Pa
Tour of the Unitech PA960 Stylus Bar Code Laser Scanner This stylus is design for tapping screen and also for accessing batter door via the screw driver in the stylus. LED Indicator for scanning good and charging indica- tion Right Side Scanner... -
Page 8: Installing The Battery Pack
First Steps with the Unitech PA960 There are three ways to provide power to the PA960: Rechargeable Lithium-Ion battery pack RS232/Charging cable or USB/Charging cable Docking Station NOTE: Data you enter may not be properly stored until the built-in backup battery has been adequately charged. -
Page 9: Charging The Main And Backup Batteries For The First Time
It may take up to 16 hours to fully charge the empty backup battery. The first time charge should be for at least 16 hours to insure a proper charge. CAUTION: Operating the PA960 for the first time without the AC adapter, and without fully charging the backup battery may result in loss of data stored in RAM memory. -
Page 10: Using The Stylus
Using the Stylus CAUTION: Never use anything other than the PA960’ s stylus on the screen. Us ing another object as a stylus could cause permanent damage. Hold the stylus as you would a pencil. To m ake a c hoice from a menu, lightly tap the tip of the stylus on that choice. -
Page 11: Protective Screen Film
Protective Screen Film The PA960 screen ships with a protective plastic film. You may remove this if desired by peeling from one corner. The screen will be more susceptible to scratching without the film, but will be more readable. First Operation of the Unitech PA960 Pressing the ON/OFF Key The Unitech PA960 welcome screen appears. - Page 12 Tap here to popup list of months Or directly tap location of year or month to change the year or month setting. Exiting Date/Time Properties Settings Tap OK or X (cancel) button at upper-right corner to exit. Unitech PA960...
-
Page 13: Flash Memory
8 MB of programs and data files. The benefit of this feature is that files and programs saved in Flash Memory are unaffected by the PA960’ s power status. To access the contents of Flash Memory, simply select “My Computer”... -
Page 14: Chapter 2. Using The Keypad And Scanner
Chapter 2. Using the Keypad and Scanner Keypad The PA960 keypad contains 19 keys, including Cursor key, 0~9, Alpha key, ON/ OFF, Function, Escape, Backspace, and Enter key. Please refer to the picture below. Cursor Backspace Power On/Off Function Alpha ON/OFF When the unit is off, pressing the On/OFF key will turn the unit on. - Page 15 Press Cursor-UP to enter selected character. Useful hotkeys The PA960 provides eight combination hot keys to activate specified screen setting functions or programs. These hotkeys are useful for calibrating the touch screen, toggling the backlight, and adjusting screen contrast when the menu- driven operation is disabled.
-
Page 16: Software Keyboard (Windows Ce Keyboard)
Software Keyboard (Windows CE Keyboard) Since the PA960’ s keypad allows input of numeric characters only, the Windows CE Software provides a touch screen keyboard for input of other characters. The Windows based keyboard replicates the layout of a standard PC keyboard. -
Page 17: Using The Laser Scanner
Trigger keys are located on the left and right sides of the unit. Press either one to activate the laser scanner. Right The PA960 also has a built-in Scanner Setting. side exe program that allows the user to test the trigger barcode scan function. -
Page 18: Chapter 3. Power System
3 hours. Charging the Main and Backup Battery for the First Time Note: Before using the PA960 for the first time, charge the unit for 16 hours to fully charge the empty backup battery. Operating the PA960 for the first time without the AC adapter, and without fully charging the backup battery may result in loss of data stored in RAM memory. -
Page 19: Power Status Indication
Battery Very Low No icon: When displayed means there is no external power supply to the PA960 but its battery power status is good. “Backup Battery Low” icon: When displayed indicates the backup battery is low and needs to be charged. -
Page 20: Checking Main And Backup Battery Status
“GOOD”. It is necessary to charge the battery when “Low” or “Very Low” are displayed in bold characters. If “Low” or “Very Low” are still displayed after charging, please contact Unitech Technical Support. Unitech PA960... -
Page 21: How To Save Battery Power
How to Save Battery Power Automatic shut-down of the PA960 The PA960 will enter idle mode when there is no task, or all tasks are waiting for input. In default setting, the PA960 will automatically turn itself off if it remains idle for 3 minutes and when there is no external charging power applied. -
Page 22: Warm Boot / Cold Boot
Windows CE keyboard. Warm Boot / Cold Boot Warm Boot To perform a warm boot while the PA960 is operating, insert a pin (paper clip works well) into the reset hole on the back of the terminal, right below the PCMCIA cover. -
Page 23: Charging Considerations
Charging Considerations It is important to consider the environment temperature whenever you are charg- ing the Lithium-Ion battery pack. The process is most efficient at normal room temperature or slightly cooler. It is essential that you charge batteries within the °... -
Page 24: Chapter 4. Communication
Chapter 4. Communication Introduction The Unitech PA960 allows users to link to a host computer via RS-232,USB, IrDA, or RF connection for data communication. This chapter provides an overview of the communication of the PA960. The following subchapters cover these topics: ”Microsoft ActiveSync”... -
Page 25: Activesync
Because you will be restarting your computer during installation, save your work and quit all programs before you begin. To set up your communication settings, a PA960 serial cable is required to connect the PA960 to your host computer. ®... - Page 26 Change button. After you’ ve selected the folder, click Next to set up Microsoft ActiveSync. After you’ ve installed Microsoft ActiveSync and restarted your computer, you’ ll see the following screen: Unitech PA960...
- Page 27 Using the RS232 cable or USB, plug the PA960 into a communication port on your desktop computer. Turn the PA960 on. Click the Next button. Microsoft ActiveSync should recognize your PA960 and configure your communi- cation port. If a message appears indicating that it is unable to detect a connection, click the Cancel button and manually configure the communication settings.
- Page 28 Synchronization will be initialized and will take place if you’ ve chosen to synchro- nize periodically or upon connection. Note: Your desktop computer can create a partnership with multiple PA960. Also, a PA960 can create a partnership with up to two desktop computers.
-
Page 29: Using The Mobile Devices Window
Open the Explorer window by double-clicking your device icon in the Mobile Devices window. Use this window, which is the root window to the PA960, to copy and move files between the PA960 and your desktop computer, as de- scribed in the “Synchronization”... -
Page 30: Changing Communications Settings
Changing Communications Settings If Microsoft ActiveSync fails to detect the PA960 during installation, set up commu- nications manually instead. Make sure the following conditions are met: Verify that the correct communications port is selected for your desktop computer, and that it is free. -
Page 31: Synchronization
Tap the Change Connection button Select the baud rate from the list box. Synchronization You can synchronize information between the PA960 and your desktop computer to insure both computers have current information. First you’ ll need to install Microsoft ActiveSync on your desktop computer. -
Page 32: What Gets Synchronized
ActiveSync Help. Files All files you create on the PA960 are stored in a My Document/PA960 My Docu- ments folder (if the assigned Device Name is PA960). View those files by double- clicking the short-cut PA960 My Documents icon on your desktop computer. -
Page 33: Changing Synchronization Options
Options dialog box before the Option button is available for that service. Installing and Removing Software Any program created for your PA960 can be installed as long as there is sufficient memory or storage space. First install the software on your desktop computer and then connect the PA960 to your desktop computer. -
Page 34: Inbox
RAM or Flash Memory. InBox Following is an overview of InBox. Step-by-Step information on how to use this program can be found in the Help function on the PA960. To view Help, tap Start, and then Help. Sending and Receiving E-Mail with InBox... -
Page 35: Setting Up Remote Mail
Provider), the ISP must use a POP3 m ail server and an SMTP mail gateway. For dial-up connections, you’ ll require an internal PCMCIA type modem card or external modem for the PA960. You’ ll also need to set up the remote connection on the PA960 using the Connections program. -
Page 36: Receiving Messages
Options. (For the Options button to be available, you must have previously enabled message synchronization.) To change InBox delivery options for remote mail: in InBox on your PA960, tap Service and then tap the service name. Then tap Service again and tap Properties. -
Page 37: Sending Messages
To send your message, tap File and Send. Messages are placed in your OutBox folder on the PA960 and will be delivered to their destination in one of two ways: They are transferred to the OutBox folder in Exchange or Outlook on your desktop computer the next time you synchronize. -
Page 38: Installing The Wireless Local Area Network (Wlan) Card
PA960 is accidentally dropped. Re-attach cover to the PA960 Setting Up the Wireless Card The PA960 is pre-loaded with connection software from Cisco and Lucent WaveLAN (Agere Orinoco). The PA960 will automatically detect these RF cards and then display the following screen during the first-time installation. - Page 39 DHCP, and then tap the OK button. Specifying an IP Address If there is no DHCP server in your LAN environment, specify the individual IP address on each PA960 with the following steps: Tap the radio button Specify IP Address.
- Page 40 Select Aironet Client Utility.exe, Click OK. Click OK again. Select SSID. Click OK Cisco 350 Site Survey Tool: The Unitech PA960 includes the Cisco 350 Site Survey Tool pre-loaded. To access the Site Survey Tool: 1. Open My Computer (or use File Explorer).
- Page 41 Power Management (Required to prevent battery drainage due to extra power usage of RF cards.) Lucent WaveLAN (Agere Orinoco) Tap Start, Control Panel. Double-click the WaveLAN icon. Under the “Power Management” tab, select “Card Power Management”. Tap OK Cisco Tap Start. Run, Browse. Select the Windows directory.
-
Page 42: Chapter 5. Useful Application Program
When it is necessary for the user to change the default barcode symbology for a different application, Scanner Control Panel provides the ability to change default symbology, place delimiter characters behind scanned data, and save the settings. Run this program from \Windows\Scanner Setting.exe and Scanner Control Panel will be displayed. Unitech PA960... - Page 43 Barcode Symbologies: Set customization symbologies for each symbology including: Send Send Enable Max./Min Symbology Check Leading Other Disable Length Digit Digit Full ASCII Code 39 Send Start/Stop Character Send Start/Stop Character I 2 of 5 Fix Length S25/Toshiba Fix Length Send Leading Code Code 32 Send Trailing Code...
-
Page 44: Appendix A
Dual colors (green/red) for barcode good read indication Scan Engine Light Source: Visible Laser Dicode(VLD) 650nm. Scan Rate: 39+Scan/Sec Scan angle: +53 from normal ° Min. print contrast: 25% absolute dark/light reflectanceat 650nm Power Consumption: 65mA typicle@5V Depth of Field: See next page Unitech PA960... - Page 45 Laser Typical Depth of Field N e a r F a r 5 m i l 2 . 0 i n . ( 5 . 1 c m ) 5 . 2 i n . ( 1 3 . 2 c m ) 7 .
- Page 46 Standard 2 of 5 Code 93 Toshiba Code 128 Telpen Delta Code Toshiba EAN-8, 13 UPC-A, E OS and Software Programming Tools Microsoft Windows CE version 3.0 Development LanguageMicrosoft Embedded Visual Tool for VB and VC pro- gramming Unitech PA960...
-
Page 47: Docking Station
Mechanical and Environmental Dimensions Length: 7.28” (18.5cm) Width: 3.49” (8.76cm) Depth: 1.70” (4.33cm) Weight 15.59 oz. (442g) with battery pack IP Rating IP 54 Temperature ° ° Operation: -5 C to 50 ° ° Storage: -20 C to 60 Humidity 5% to 95% RH non-condensing Shock Multiple 4.0’... -
Page 48: Update Os Via Compact Flash (Ata Card)
Appendix B Update and Upgrade OS Update OS via Compact Flash (ATA card) In order to upgrade or re-install the PA960 OS via Com- pact Flash, you will require the NK.bin file (available from Unitech Technical Support): Note: File name must be “NK.bin” – do not rename it. - Page 49 OS will be written to FlashRom. Then you will see the system will automaticlly run the following steps.: (1). Image goint to Flash (2). Erasing Flash (3). New programming Flash After the OS is successfully updated, the PA960 will automatically cold-start with the new OS. Product Reference Guide...
-
Page 50: Appendix C
If terminal is connected to AC power, disconnect. Terminal will not shut off. Perform a warm boot - WARNING - Unsaved data will be lost. Perform a cold boot - WARNING - Terminal will be reset to default settings and data will be lost. Unitech PA960... -
Page 51: Fcc Statement
This does not include eye glasses worn by the user. The laser safety warning label required by the DHHS/IEC for the PA960’ s optional laser scanner module is located on the memory compartment cover, on the back of the unit.
Need help?
Do you have a question about the PA960 and is the answer not in the manual?
Questions and answers