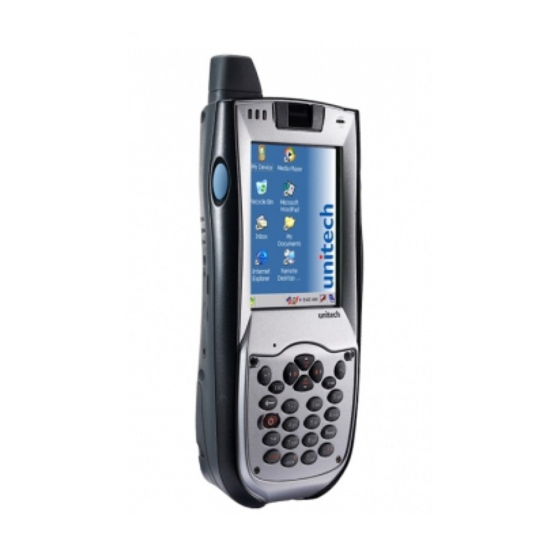
Unitech PA968 User Manual
Rugged mobile computer
Hide thumbs
Also See for PA968:
- Operation manual (117 pages) ,
- User manual (47 pages) ,
- Quick reference manual (12 pages)

Related Manuals for Unitech PA968


Summary of Contents for Unitech PA968
- Page 1 PA968 Rugged Mobile Computer Enter wxyz pqrs FUNC alpha User’s Manual 400648G Version 3.2 © Copyright 2010 unitech Electronics Co., Ltd.
-
Page 3: About This Manual
Preface About This Manual This manual explains how to install, operate and maintain the PA968 Rugged Mobile Computer. No part of this publication may be reproduced or used in any form, or by any electrical or mechanical means, without permission in writing from the manufacturer. This includes electronic or mechanical means, such as photocopying, recording, or infor- mation storage and retrieval systems. -
Page 4: Canadian Compliance Statement
Laser Information The Unitech PA968 series is certified in the U.S. to conform to the requirements of DHHS/CDRH 21CFR Subchapter J, and to the requirements of IEC 825-1. Class II and Class 2 products are not considered to be hazardous. The PA968 series contains an internal Visible Laser Diode (VLD) whose emissions do not exceed the maximum limits as set forth in the above regulations. -
Page 5: Battery Notices
This does not include eye glasses worn by the user. Battery Notices The PA968 is equipped with a Lithium-Ion battery pack and backup battery. Both batteries will discharge after an extended period of not being used. When both batteries are discharged, recharge the unit for 16 hours in order to fully charge the main battery and backup battery. -
Page 6: Battery Charge Notice
-20°C to 60°C, however they may deplete more rapidly at the higher temperature ranges. It is recommended to store batteries within normal room temperature ranges. Warranty The following items covered under Unitech Limited Warranty are free from defects during normal use: • PA968 – 1-year limited warranty. -
Page 7: Table Of Contents
Getting Started Introducing the PA968 ....................... 1 Features ........................... 2 Package Contents ....................... 3 A Tour of the PA968 ......................4 Front View..........................4 Back View ..........................5 Setting up the PA968 ......................6 Installing the Battery ....................... 6 Charging the Battery....................... 8 Charging the battery with USB charging cable.............. - Page 8 Using the Barcode Laser Scanner ................16 Chapter 3 Getting Connected Establishing Device-PC Connection ................18 Installing Microsoft ActiveSync ..................... 18 Connecting the Device to Your Computer ................19 Using ActiveSync to Exchange Files ................ 20 Bluetooth Connection ...................... 21 GPRS Connection ......................
-
Page 9: Getting Started
To reduce TCO, the PA968 is sealed to meet IP65 standards and has undergone multiple drop tests to prevent downtime. Copyright 2009 unitech Electronics Co., Ltd. All rights reserved. unitech is a registered trademark of unitech Electronics Co., Ltd. -
Page 10: Features
Chapter 1 Getting Started Features Powerful system Audio • Microsoft Windows CE 5.0 operat- • ing system • Speaker • Intel PXA270 processor with speed • Headset connector of up to 520 MHz • Receiver System memory Picture Capture • 128 MB SDRAM •... -
Page 11: Package Contents
After opening the box, ensure the following accessories for the PA968 are present: Enter wxyz pqrs FUNC alpha PA968 Battery Pack Stylus Elastic Stylus String CD-ROM Copyright 2009 unitech Electronics Co., Ltd. All rights reserved. unitech is a registered trademark of unitech Electronics Co., Ltd. -
Page 12: A Tour Of The Pa968
Chapter 1 Getting Started A Tour of the PA968 The following sections describe the main components and features of the PA968. Front View Component Description Status indicator Indicates the terminal operating statuses. LED indicators from left to right: - GPRS/GPS Communication... -
Page 13: Back View
LED Flash light Lights up images for camera. Memory card slot Accommodates SD memory card. Battery compartment Opens the battery compartment. Copyright 2009 unitech Electronics Co., Ltd. All rights reserved. unitech is a registered trademark of unitech Electronics Co., Ltd. -
Page 14: Setting Up The Pa968
Chapter 1 Getting Started Setting up the PA968 This section explains how to install and charge the battery, how to check battery sta- tus, how to turn on the terminal, and how to calibrate the screen. Installing the Battery WARNING! There is a risk of fire and burns if the battery pack is handled improp- erly. -
Page 15: Chapter 1 Getting Started
NOTE: Make sure the battery compartment cover is securely closed, or you may be unable to turn the terminal on. Copyright 2009 unitech Electronics Co., Ltd. All rights reserved. unitech is a registered trademark of unitech Electronics Co., Ltd. -
Page 16: Charging The Battery
Charging the battery with USB charging cable 1. Press and hold the release button on both sides of the USB charging cable and connect it to PA968 (1). 2. Plug the AC adapter cable into the power jack of the USB charging cable (2). -
Page 17: Checking The Led Status
1. Press and hold the release button on both sides of the USB charging cable and connect it to PA968 (1). Copyright 2009 unitech Electronics Co., Ltd. All rights reserved. unitech is a registered trademark of unitech Electronics Co., Ltd. -
Page 18: Turning The Terminal On For The First Time
1. Turn on your device by pressing the power button on the front panel. NOTE: The PA968 screen ships with a protective plastic film. You may remove it by peeling from the corner. The screen will be more susceptible to scratching without the film, but will be more readable. - Page 19 5. Continue tapping the cross hair until the screen has been calibrated. 6. Press Enter key to accept the new settings. Press Esc key to keep the old settings. Copyright 2009 unitech Electronics Co., Ltd. All rights reserved. unitech is a registered trademark of unitech Electronics Co., Ltd.
-
Page 20: Using The Hardware
Using the Hardware Using the SD/MMC Memory Card PA968 has an expansion slot compatible with a range of SD and MMC storage cards, which are primarily used to backup or transfer files and data. The slot also support SDIO cards for added connectivity options. -
Page 21: Using The Sim Card
SIM card. 5. Put the battery back into the battery com- partment and replace the battery compart- ment cover. Copyright 2009 unitech Electronics Co., Ltd. All rights reserved. unitech is a registered trademark of unitech Electronics Co., Ltd. -
Page 22: Using The Camera
4. Tap Capture → Start Video to start recording a video. Tap Capture → End Video to end the recording. Using the Fingerprint Reader PA968 equips a fingerprint reader using advanced biometric finger identification tech- nology. To launch the demo program, follow these instructions. -
Page 23: Chapter 2 Using The Hardware
Click OK. NOTE: Class A represents a high quality of the enrolled fingerprint data, while Class C a low quality. Copyright 2009 unitech Electronics Co., Ltd. All rights reserved. unitech is a registered trademark of unitech Electronics Co., Ltd. -
Page 24: Using The Barcode Laser Scanner
“Matching Success!” or “Matching Fail!”. Using the Barcode Laser Scanner PA968 has an integrated laser scanner which reads all major barcode labels with excellent performance. NOTE: The reading software must be enabled in order to operate the scanner. - Page 25 The scanned barcode data appears on the screen. 4. Tap Tools → Auto-Scan → Stop Auto-Scan. Copyright 2009 unitech Electronics Co., Ltd. All rights reserved. unitech is a registered trademark of unitech Electronics Co., Ltd.
-
Page 26: Getting Connected
Chapter 3 Getting Connected The PA968 enables users to link to a host computer using an RS-232, or Bluetooth, WiFi, and GPRS connection for data communication. This chapter provides an over- view of PA968 communication options. Establishing Device-PC Connection Installing Microsoft ActiveSync In order to exchange data between your computer and the PA968, Microsoft Active- Sync must be installed on your computer. -
Page 27: Connecting The Device To Your Computer
Your computer can create a partnership with multiple PA968s. Also, a PA968 can create a partnership with up to two computers. Copyright 2009 unitech Electronics Co., Ltd. All rights reserved. unitech is a registered trademark of unitech Electronics Co., Ltd. -
Page 28: Using Activesync To Exchange Files
Chapter 3 Getting Connected Using ActiveSync to Exchange Files You can use ActiveSync to exchange information from your device your computer and vice versa. Changes you make to the information on one location will not affect the information on the other one. If you want to automatically update information on both your device and computer, synchronize the information instead. -
Page 29: Bluetooth Connection
Follow these instructions to set up a Bluetooth connection. 1. Tap Start → Programs → Bluetooth → BTPowerON. 2. Check Bluetooth Module Power on. Tap OK. Copyright 2009 unitech Electronics Co., Ltd. All rights reserved. unitech is a registered trademark of unitech Electronics Co., Ltd. -
Page 30: Chapter 3 Getting Connected
Chapter 3 Getting Connected 3. Tap Start → Settings → Control Panel → Bluetooth Device Properties. 4. Tap Scan Device. Select a device you want to connect. Double tap the desired device and check Trusted and then Active. 5. On your computer, click Active- Sync →... - Page 31 9. Tap Inquiry. Select a device you want to syn- chronize. Tap OK. 10. Tap BTActiveSync icon again. Tap Sync. ActiveSync begins. Copyright 2009 unitech Electronics Co., Ltd. All rights reserved. unitech is a registered trademark of unitech Electronics Co., Ltd.
-
Page 32: Gprs Connection
Chapter 3 Getting Connected GPRS Connection Insert the SIM card in your terminal first. See Using the SIM Card on page 13. NOTE: Please turn off the SIM card lock if your SIM card is password protected. 1. Tap Start → Programs → GPRS → 32WANDEMO. - Page 33 6. The GPRS icon on the taskbar indicating the signal strength. Tap Disconnect Connection, you can end the GPRS connection. Copyright 2009 unitech Electronics Co., Ltd. All rights reserved. unitech is a registered trademark of unitech Electronics Co., Ltd.
-
Page 34: Wifi Connection
Chapter 3 Getting Connected WiFi Connection Unitech terminals come with built-in R F facility. A wireless network can be added either when the network is detected or by manually entering settings information. Before following these instructions, make sure if authentication information is needed. - Page 35 Tap Add New or double tap a preferred net- work. 6. Enter the Network name (SSID). Uncheck The key is provided automatically. Enter the network key. Tap OK. Copyright 2009 unitech Electronics Co., Ltd. All rights reserved. unitech is a registered trademark of unitech Electronics Co., Ltd.
- Page 36 Chapter 3 Getting Connected 7. The network icon appears on the taskbar when the RF is connected.
-
Page 37: Using The Summit Utilities
2. Enter the Admin Password. (Default pass- word: SUMMIT) Scan Available AP 1. Under Profile tab, tap Scan for available AP. Copyright 2009 unitech Electronics Co., Ltd. All rights reserved. unitech is a registered trademark of unitech Electronics Co., Ltd. -
Page 38: Commit And Activate
Chapter 3 Getting Connected 2. You may select a desired AP to create a new profile. Tap Configure. 3. Tap Yes to create the new profile. 4. Enter the WEP key or network key. Tap OK. Commit and Activate 1. Tap Commit to activate the setting. - Page 39 Utility. Tap Disable Radio, you can discon- nect the AP. Under Status tab, you can see the IP address, signal strength and quality. Copyright 2009 unitech Electronics Co., Ltd. All rights reserved. unitech is a registered trademark of unitech Electronics Co., Ltd.
-
Page 40: Sirf Instant Fixtm For Quick Gps Connection
Chapter 3 Getting Connected SiRF Instant Fix for Quick GPS Connection Before you start to use your device for GPS nevigation, use the GPSUtility program first to download ephemeris data (current satellite position and timing information) into your device. This data is needed to determine the GPS position of your current loca- tion. - Page 41 1. Tap Tool → Ephemeris → Download 2. A Download dialog box pops up. Tap OK. 3. Data download starts. Please wait a while. Copyright 2009 unitech Electronics Co., Ltd. All rights reserved. unitech is a registered trademark of unitech Electronics Co., Ltd.
- Page 42 4. When the “successful download” message appears, tap OK, 5. Tap Tools → Connect. Then you will see GPS data at the right side. 6. Tap Tools → Ephemeris → Provide to finish the GPS connection.
-
Page 43: Barcode Scanner Programs
(active/focused) text editor such as MS Mobile Word or a text box in an applicaton. Copyright 2009 unitech Electronics Co., Ltd. All rights reserved. unitech is a registered trademark of unitech Electronics Co., Ltd. -
Page 44: Barcode Symbologies
Barcode Symbologies Check Transmit Barcode Enable/ Char/Digit Check Others Symbology Disable verification Char/Digit Australian Post Send bar width data British Post Canadian Post Codabar Transmit start & stop char, *data length Code 11 *data length Code 128 / EAN *data length Code 39 For ASCII, Transmit start &... -
Page 45: Barcode Symbologies 2D
Chapter 4 Barcode Scanner Programs Barcode Symbologies 2D Check Transmit Barcode Enable/ Char/Digit Check Others Symbology Disable verification Char/Digit Aztec Runes, *data length Codablock F *data length Code 49 *data length Data Matrix *data length EAN-UCC UPC composite, *data length Composite MaxiCode *data length... -
Page 46: Advanced Settings
ActiveSync operation, you can restore any data that you previ- ously synchronized to your computer or you can restore data that you backed up to a storage card. Copyright 2009 unitech Electronics Co., Ltd. All rights reserved. unitech is a registered trademark of unitech Electronics Co., Ltd. -
Page 47: Method 1: From Wince
Chapter 5 Advanced Settings Method 1: From WinCE 1. Tap Start → Programs → Utilities → Boot- mode. The BootMode Screen appears. 2. Tap Cold Boot. The system is reset and you will lose all data including all files in the RAM memory. Method 2: From Hardware 1. -
Page 48: Appendix
Desktop USB Cradle USB communication and charging cable AC adaptor (with regional power cord) Vehicle Cradle Battery charger 4 slot Multi-Bay Ethernet Cradle Copyright 2009 unitech Electronics Co., Ltd. All rights reserved. unitech is a registered trademark of unitech Electronics Co., Ltd.
Need help?
Do you have a question about the PA968 and is the answer not in the manual?
Questions and answers