Table of Contents
Advertisement
Quick Links
Download this manual
See also:
User Manual
What is SELFSAT-H10D?
SELFSAT-H10D is a Horn Array Type Satellite Antenna with Dual Linear Polarization,
it can receive signal from major Satellites and would replace a normal former Parabolic
Dish. Small, discreet and easy to use, it can be installed in a few minutes and used as a
portable antenna for all satellite receptions. SELFSAT-H10D can be used for both free to
Air and encrypted (requiring a subscription with an operator) channel reception; it can also
receive all High Definition channels with a superior image quality. For the use and
installation, please read the following instructions and installation materials carefully.
Safety Instructions
Before using this product please read this manual carefully and follow exactly
all installation, mounting & orientation instructions.
All the instructions should be followed in order to avoid any technical problems.
Any electric or magnetic field close to the SELFSAT-H10D may cause a bad reception
or even cut off the signal completely.
Do not drill the plastic cover of the antenna, which seals the antenna from moisture.
Handle the antenna with care as any impact will cause damage to the electronics.
Do not open the cover, any attempt to repair by a non-qualified person can be
dangerous and void the warranty.
Any obstacle (buildings, trees, etc....) will block the reception of the signal from
the satellite to the antenna.
Do not paint or add any substance on the antenna cover, this will block the reception of
the signal from the satellite.
The cable between the antenna and the Satellite receiver should not exceed 30m as it
will decrease the quality of the signal.
The use of non- isolated jacks will result in a loss of the signal level.
For an optimum signal reception please use the Attenuation Thin Pad for the first
installation.(for more details, please refer to step 6)
Do not forget to adjust the antenna and the bracket to the cross-polarity (skew angle
please refer to step 5).
SELFSAT-H10D
Tighten all the screws of the antenna once you have finished the adjustments.
This product contains one universal LNB, it is forbidden to add, change or modify the LNB.
For more precise details on the above points or for any information, please ask your
retailer or customer service.
Antennas improperly installed or installed to an inadequate structure are very
susceptible to wind damage. This damage can be very serious or even life
threatening. The owner and installer assumes full responsibility that the installation is
structurally sound to support all loads (weight, wind & ice) and properly sealed against
leaks. The manufacturer will not accept liability for any damage caused by a satellite
system due to many unknown variable applications.
Warning!!!
Advertisement
Table of Contents

Related Manuals for SELFSAT H10D


Summary of Contents for SELFSAT H10D
-
Page 1: Safety Instructions
Dish. Small, discreet and easy to use, it can be installed in a few minutes and used as a For more precise details on the above points or for any information, please ask your portable antenna for all satellite receptions. SELFSAT-H10D can be used for both free to retailer or customer service. -
Page 2: Box Content
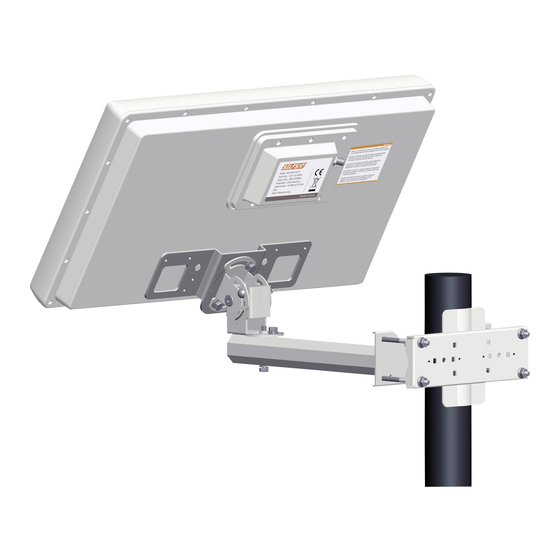
SELFSAT-H10D Symbol Part name Image Quantity Box Content Fix Bracket Symbol Part name Image Quantity Fix Bracket Antenna Body Spanner Attenuation Compass Screw M4x10 SEMS2 Hex Bolt Skew M6x12 SEMS2 Bracket Hex Bolt M6x20 SEMS2 Hex Bolt M6x45 SEMS2 Angle... -
Page 3: How To Install
Step 1: Where to Install? In order to receive a signal from the Satellite, SELFSAT-H10D is to be installed in an open Step 2: Installation Choice loop space (outside the house or the apartment), in the direction of the satellite towards the... -
Page 4: Wall Mounting Type
D) Window Type B) Wall Mounting Type Step 3: Connecting the Antenna and the Set top box Once you have installed the antenna in an open loop space and mounted the way you want it to be the next step is to connect it all together. In order to be able to watch your C) Clamp on Balcony Type favourite satellite programs, you need to connect your satellite antenna to a receiver by a cable. -
Page 5: B- How To Connect The Cable To The Antenna And The Set Top Box
Step 5: Pointing and locating the Signal B- How to connect the cable to the antenna and the set top box? (first without Attenuation Thin Pad) Once all installed and connected, you may take off the Attenuation Thin Pad from the antenna (and keep to one side for step 6) and then start adjusting your antenna in order to receive a signal. -
Page 6: B- Elevation Angle
B- Elevation Angle : Then obtain the Elevation angle according to the area location of the chosen satellite on the lists in this manual. Then move your antenna up or down according to the angle, you may use the graduated surface of the bracket in order to make sure that you are on the right position. -
Page 7: Troubleshooting Check List For Initial Installation
Skew angle at -19.7, Elevation angle at 30, and Azimuth angle at 149.6 (in reference to the angle table on the back page of this manual) SELFSAT-H10D Keep this Pad for the First installation and Pointing Troubleshooting Check List for Initial Installation <... -
Page 8: Installation Using Long Cable
Make sure the satellite cable is connected to Remove existing TV-specific components, Installation Using Long Cable such as TV splitter, etc; reduce the the "Sat In" jack, not the "Antenna In" jack. installation to the basic connections called The "Antenna In" jack at the back of the For installations where the RG 6 cable runs from the receiver(s) to the LNB far exceeds receiver is for off-air antenna input or cable out in this guide.
Need help?
Do you have a question about the H10D and is the answer not in the manual?
Questions and answers