Table of Contents
Advertisement
Available languages
Available languages
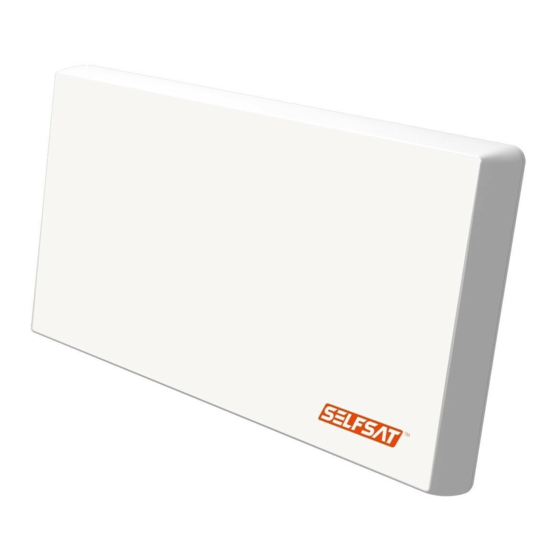
Flat Satellite Antenna
SELFSAT-H22dCSS+ Series
I DO IT CO., LTD.
#637, Smart-Hub Industry-University Convergence Center, 237 Sangidaehak-ro, Siheung-si, Gyeonggi-do, Korea (15073)
TEL +82 (0)31 8041 1500
FAX +82 (0)31 8041 1550
E-MAIL sales@selfsat.com
WEB www.selfsat.com
Flat Satellite Antenna
SELFSAT-H22dCSS+ Series
STB 4
STB 5
. . . . . . .
STB 6
User manual
Bedienungsanleitung
Manuel utilisateur
Manuale utente
www.selfsat.com
STB 1
STB 2
STB 3
ver 1.0
Advertisement
Chapters
Table of Contents

Related Manuals for SELFSAT H22dCSS+ Series


Summary of Contents for SELFSAT H22dCSS+ Series
- Page 1 Flat Satellite Antenna SELFSAT-H22dCSS+ Series Flat Satellite Antenna SELFSAT-H22dCSS+ Series STB 1 STB 2 STB 3 STB 4 STB 5 ..STB 6 User manual Bedienungsanleitung Manuel utilisateur Manuale utente ver 1.0 I DO IT CO., LTD.
-
Page 2: Table Of Contents
| Step 5 : SELFSAT-H22dCSS+ installation and how to use ........... . . -
Page 3: What Is Selfsat-H22Dcss+ Flat Antenna
SELFSAT flat antenna can be used for both free to air and encrypted (requiring a subscription with an operator) channel reception; it can also receive all high definition channels with a superior image quality. -
Page 4: Safety Instruction
• All the instructions should be followed in order to avoid any technical problems. • Any electric or magnetic field close to the SELFSAT-H22dCSS+ series may cause a bad reception or even cut off the signal completely. • Do not make any holes on the plastic antenna cover to prevent from water penetration. -
Page 5: Contents
Contents Flanged Nut M6 (×7) Antenna Angle Bracket Screw M4X10 SEMS2 (×4) Main Support Screw M6x18 SEMS2 (×3) Window Bracket A Window Bracket B Screw M6X50 SEMS2 Fix Bracket B Round Head Square Neck Bolt M6x30 Fix Bracket A Round Head Square Neck Bolt M6x50 (×3) Spanner Compass U-Bolt M6x85 (×2) -
Page 6: How To Install
Step 1: Where to install? In order to receive a signal from the Satellite, SELFSAT-H22dCSS+ has to be installed in an open space (outside the house or the apartment), in the direction of the satellite towards the equator, for which, you will need a compass to exactly orient SELFSAT-H22dCSS+ toward the satellite. -
Page 7: Step 2: Check Information
Step 2: Check information In order to install antenna, you need to find skew, elevation and azimuth angle by referring the table on the back of the manual. If you can’t find your location, please refer to the information of the nearest area from your location. -
Page 8: Wall Mounting Type
Step 4: Installation fix bracket Select the preferred mounting type among included in the package and make sure that the correct components are used to assemble antenna and bracket as labeled in the images. 1) Table stand type (on a horizontal plain) 2) Wall mounting type Use anchor bolt. -
Page 9: Clamp On Balcony Type
3) Window type 4) Clamp on balcony type... -
Page 10: Step 5: Selfsat-H22Dcss+ Installation And How To Use
RG6 Coaxial cable (HF 17VATC or 19VATC cable), in order to minimize a signal loss. Just connect the RF coaxial cable from the SELFSAT-H22dCSS+ antenna to your STB. - How to prepare the cable? - Page 11 2) How to connect the cable to the antenna and the STB? dCSS output is only used for connection to dCSS compatible STB. dCSS 1 dCSS Config : Manaul IF Channel = CH 1 dCSS 2 dCSS Config : Manaul IF Channel = CH 2 dCSS 3 dCSS Config : Manaul...
-
Page 12: Satellite Searching And Fixing The Antenna
3) Satellite searching and fixing the antenna ① Once all connected, turn on the TV and the STB. Select the antenna / LNB setting menu on your STB. ② Setting of dCSS compatible STB Select the LNB setting menu on your dCSS STB. Set LNB type to dCSS(Unicable2 or JESS) setting and confirm the IF channel and the center frequency as below. - Page 13 ③ The signal level and quality is indicated on the TV screen and will fluctuate and change color according to the adjustment & movement of the antenna while you are pointing & finding (azimuth, elevation angle). The level indicates the power of the signal and the color is the signal reception quality from the chosen satellite.
-
Page 14: Troubleshooting
Troubleshooting If the signal is not found, be sure the STB user manual and the antenna user manual have been followed closely, check the following: • Make sure all cable connections are correct and each connection is seated / tightened properly. •... - Page 16 ..........1) Anschliessen der SELFSAT-H22dCSS+ antenne an die STB .
-
Page 17: Was Ist Die Selfsat-H22Dcss+ Flachantenne
Bitte lesen sie die folgende anweisung um die antenne richtig zu installieren. 1 dCSS ausgäng STB 1 STB 2 STB 3 STB 24 STB 4 (MAX) Hinweis Für ein Vielfaches von dCSS STB ist ein Splitter erforderlich, um SELFSAT-H22dCSS+ betreiben zu können. Der Splitter ist nicht im Lieferumfang enthalten. -
Page 18: Sicherheitsanweisungen
• Alle Anweisungen sollten befolgt werden, um technische Probleme zu vermeiden. • Elektrische oder magnetische Felder nahe des SELFSAT-H22dCSS+ können zu schlechtem Empfang führen oder sogar den Empfang des Signals ganz verhindern. • Machen Sie keine Löcher in die Kunststoffabdeckung der Antenne, da diese die Antenne vor Feuchtigkeit schützt. -
Page 19: Lieferumfang
Lieferumfang Geflanschte Mutter M6 (×7) Antennen Hauptteil Winkelhalterung Schraube M4X10 SEMS2 (×4) Hauptstütze Sechskantschraube M6x18 SEMS2 (×3) Fensterhalterung A Fensterhalterung B Sechskantschraube M6X50 SEMS2 (×1) Fixierungshalterung A Halbrund-Vierkant-Halsschraube M6x30 (×1) Fixierungshalterung B Halbrund-Vierkant-Halsschraube M6x50 (×3) Schraubenschlüssel Kompass U-Bolzen M6x85 (×2) -
Page 20: Schritt 1: Wo Wird Es Installieren
Gefahren für die Montage, auswählen. Überlegen Sie sich einen Weg, um Ihr Kabel auf diskrete Weise vom SELFSAT-H22dCSS+ zu Ihrer STB zu führen. Die Antenne sollte sich nicht zu weit entfernt von Ihrem STB befinden; Mehr als 30 Meter Kabellänge können die Qualität des Signals vermindern. -
Page 21: Schritt 2: Information Überprüfen
Schritt 2: Information überprüfen Um die antenne zu montieren, müssen sie die richtige schrägstellung (Skew), elevationwinkel (Elevation) und den azimutwinkel mit hilfe der tabelle auf der rückseite des handbuchs ermitteln. Wenn sie Ihren ort nicht finden können, nehmen sie bitte die Informationen des nächstgelegenen ortes. Dieses handbuch wird Ihnen die montage am beispiel des empfangs des ASTRA1 satelliten in der region von Brest in frankreich zeigen. -
Page 22: Schritt 4: Wahl Der Installation
Schritt 4: Wahl der installation Wählen sie die gewünschte montagetyp unter den in dem paket enthaltenen varianten und stellen sie sicher, dass die richtigen komponenten verwendet werden, um antenne und halterung zu montie- ren. (siehe abb.) 1) Tischstand-typ (auf einer waagrechten ebene) 2) Wandmontage-typ Verwenden Sie Dübel &... -
Page 23: Fenster-Typ
3) Fenster-typ 4) Balkonklammer-typ... -
Page 24: Schritt 5: Selfsat-H22Dcss+ Installation Und Gebrauch
Kabels und / oder unisolierten Buchsen können zur Absenkung des Signalpegels führen. Wäre es vorzuziehen, ein RG6 Koaxialkabel (HF 17VATC oder 19VATC Kabel) zu verwenden, um Signalverlust zu minimieren. Schließen Sie einfach das HF-Koaxialkabel aus der SELFSAT-H22dCSS+ Antenne an Ihren STB. - Wie bereitet am das Kabel vor Anschlussabdeckung... - Page 25 2) Wie wird das kabel mit der antenne und der STB zu verbinden? dCSS ausgäng-port ist nur für verbindungen zu dCSS kompatiblen STB geeignet. dCSS 1 dCSS Config : Manuell IF Channel = CH 1 dCSS 2 dCSS Config : Manuell IF Channel = CH 2 dCSS 3 dCSS Config : Manuell...
-
Page 26: Satelliten-Suche Und Der Befestigung Des Antennen
3) Satelliten-suche und der befestigung des antennen ① Sobald alles angeschlossen ist, schalten sie den fernseher/STB ein. Wählen sie das menü für die antennenausrichtung auf Ihrer STB aus. ② Einstellung abhängig vom STB-Typ Das LNB-Einstellungsmenü auf Ihrem dCSS STB auswählen. Den LNB-Typ zum dCSS-Einstellung (Unicable2 oder JESS) einstellen und den IF-Kanal sowie die Mittenfrequenz wie unten bestätigen. - Page 27 ③ Die signalstärke und qualität sind auf dem fernsehbildschirm dargestellt und werden schwanken und die farbe wechseln, je nach einstellung & bewegung der antenne während sie die ausrichtung vornehmen (azimutwinkel, elevationwinkel). Die balkenhöhe zeigt die stärke des signals an und die farbe die signalempfangsqualität des gewählten satelliten.
-
Page 28: Störungsbehebungs
Störungsbehebungs Wenn das Signal nicht gefunden wird, dann stellen Sie sicher, dass die Anweisungen in der STB-Bedienungsanleitung und der Antennen-Bedienungsanleitung genau befolgt worden sind, dazu prüfen Sie bitte Folgendes: • Stellen Sie sicher, dass alle Kabelverbindungen korrekt sind und jede Verbindung sitzt / richtig angezogen ist. •... - Page 30 | Etape 5: SELFSAT-H22dCSS+ Installation et mise en marche ....... .
- Page 31 Petite, discrète et facile d’utilisation, elle peut être installé en quelques minutes et également être utilisée comme antenne portable pour toutes réceptions satellites. SELFSAT antenne série peut être utilisé aussi bien pour la réception de chaînes en clair qu’en crypter (ces dernières exigeant la souscription d’un abonnement auprès d’un opérateur); Elle peut aussi recevoir toutes les chaînes Haute Définition avec une qualité...
-
Page 32: Consignes De Sécurité
• Les instructions doivent être respectées afin d’éviter tout problème technique. • Tout champ électrique ou magnétique situé près du SELFSAT-H22dCSS+ peut entraîner une mauvaise réception voire même couper complètement le signal. • Ne percez pas la protection en plastique de l’antenne qui la rend étanche et la protège de l’humid- ité. -
Page 33: Contenu De La Boite
Contenu de la boite Ecrou à Collet carré M6 (×7) Corps de l’Antenne Equerre de Support Vis M4x10 SEMS2 (×4) Support Principal Ancrage Hexagonal M6x18 SEMS2 (×3) Support de Fenêtre A Ancrage Hexagonal M6x50 SEMS2 (×1) Support de Fenêtre B Support de Fixation A Vis à... -
Page 34: Comment L'installer
Etape 1 : Où l’installer? Afin de recevoir un signal provenant du Satellite, SELFSAT-H22dCSS+ doit être installé dans un espace à ciel ouvert (à l’extérieur de la maison ou de l’appartement), en direction du satellite vers le sud. Vous aurez besoin d’une boussole afin d’orienter avec exactitude SELFSAT-H22dCSS+ vers le satellite. -
Page 35: Etape 2 : Pour Information
Etape 2 : Pour information Afin d’installer correctement votre antenne, vous devez trouvez les angles d’inclinaison, azimut et élévation en se référant au tableau à la fin du manuel. Si vous ne trouvez pas dans la liste votre ville exacte, merci de choisir la ville la plus proche qui est citée dans le tableau. -
Page 36: Etape 4 : Choix D'installation
Etape 4 : Choix d’Installation Sélectionnez le type de montage préféré et assurez-vous que les bonnes composants sont utilisés pour assembler l'antenne et le support comme marqué dans les images. 1) Type position tableau (sur un support horizontal) 2) Type montage sur mur Utilisez des écrous à... - Page 37 3) Type fenêtre 4) Type fixation sur balcon...
-
Page 38: Etape 5: Selfsat-H22Dcss+ Installation Et Mise En Marche
RG6 ( HF 17VATC ou câble 19VATC ), afin de minimiser la perte de signal. Il suffit de connecter le câble coaxial RF de l'antenne SELFSAT-H22dCSS+ à votre STB. - Comment préparer le câble ? - Page 39 2) Comment connecter le câble à l'antenne et le STB? dCSS est utilisé uniquement avec des boites de dCSS compatible. dCSS 1 dCSS Config : Manaul IF Channel = CH 1 dCSS 2 dCSS Config : Manaul IF Channel = CH 2 dCSS 3 dCSS Config : Manaul IF Channel = CH 3...
- Page 40 3) Satellite recherche et fixer l’antenne ① Lorsque tout est connecté, allumez la TV et le STB. Sélectionnez le Menu Pointage de l’Antenne sur votre STB. ② Le réglage est en fonction du type de STB Réglage du STB compatible dCSS Sélectionnez le menu de réglage LNB de votre dCSS STB.
- Page 41 ③ Le niveau et la qualité du signal sont indiqués sur l’écran de TV ; ils fluctueront et changeront de couleur en fonction du réglage et du mouvement de l’antenne pendant que vous serez en train de pointer et de constater (azimut, angle d’élévation et angle de déflexion). Le niveau indique la puissance du signal et la couleur correspond à...
- Page 42 Dépannage Si aucun signal n’est perçu, assurez-vous que les manuels d’utilisation du STB et de l’antenne ont été suivis à la lettre. Vérifiez ce qui suit : • Assurez-vous que toutes les connections de câble sont correctes et que chaque connection est correctement placée et resserée.
- Page 44 | Passo 5: SELFSAT-H22dCSS+ installazione e modo di utilizzo ..........
-
Page 45: Che Cos'è L'antenna Piatta Selfsat-H22Dcss
Questa antenna piccola, capace e semplice può essere installata in pochi minuti. L’antenna piatta SELFSAT può essere utilizzata per la ricezione dei canali sia in chiaro che criptati (che richiedono un abbonamento con l'operatore); può anche ricevere tutti i canali ad alta definizione con una qualità... -
Page 46: Istruzioni Di Sicurezza
• Vi preghiamo di seguire le seguenti istruzioni per evitare ogni problema tecnico. • Qualsiasi campo elettrico o magnetico vicino alla serie SELFSAT-H22dCSS+ può causare una cattiva ricezione del segnale o addirittura comprometterla del tutto. • Non perforare l'involucro di plastica dell'antenna, che la sigilla contro l'umidità... -
Page 47: Contenuto
Contenuto Dado flangiato M6 (× 7) Antenna Staffa angolare Vite M4X10 SEMS2 (× 4) Supporto principale Vite M6x18 SEMS2 (× 3) Staffa finestra A Staffa finestra B Vite M6x50 SEMS2 Staffa di posizione B Bullone a testa tonda larga con quadro sottotesta M6x30 (× 1) Staffa di posizione A Bullone a testa tonda larga con quadro sottotesta M6x50 (×... -
Page 48: Come Installarla
È necessario riflettere a come far passare il cavo in modo discreto dal SELFSAT-H22dCSS+ fino alla vostra STB. L'antenna non va messa troppo distante dal STB ; un cavo lungo più di 30 metri diminuisce la qualità... -
Page 49: Passo 2: Controllare Le Informazioni
Passo 2: Controllare le informazioni Per installare l'antenna dovete innanzitutto procurarvi lo skew, l'elevazione e l'azimut facendo riferimento alla tabella che si trova alla fine di questo manuale. Se non è possibile trovare la vostra posizione, si prega di fare riferimento alle informazioni della zona più... -
Page 50: Passo 4: Installazione Della Staffa Di Posizione
Passo 4: Installazione della staffa di posizione Selezionare il tipo di montaggio preferito tra quelli inclusi nel pacchetto e fare in modo che i compo- nenti corretti vengano utilizzati per assemblare l'antenna e la staffa come dimostrato nelle immagini. 1) Supporto da tavolo (su un piano orizzontale) 2) Tipo di installazione a muro Tasselli di fissaggio non inclusi... - Page 51 3) Tipo da finestra 4) Tipo di fissaggio al balcone...
-
Page 52: Passo 5: Selfsat-H22Dcss+ Installazione E Modo Di Utilizzo
è preferibile utilizzare un cavo coassiale RG6 (cavo HF 17VATC o 19VATC) per ridurre al minimo la perdita di segnale. Basta collegare con il cavo coassiale RF l’antenna SELFSAT-H22dCSS+ al vostro STB. - Come preparare il cavo? CONNECTOR COVER... -
Page 53: Come Collegare Il Cavo All'antenna E Alla Stb
2) Come collegare il cavo all'antenna e alla STB? La porta di uscita dCSS viene utilizzata solo per le connessioni alla STB compatibile con dCSS. dCSS 1 dCSS Config : Manuale IF Channel = CH 1 dCSS 2 dCSS Config : Manuale IF Channel = CH 2 dCSS 3 dCSS Config : Manuale... -
Page 54: Ricerca Del Satellite E Fissaggio Dell'antenna
3) Ricerca del satellite e fissaggio dell'antenna ① Une fois toutes connectées, allumez le TV et le STB. Sélectionnez le menu de réglage antenne / LNB sur votre STB. ② Impostazione a seconda del tipo di STB Impostazione di STB compatibile con dCSS Selezionare il menu di impostazione LNB sul vostro STB dCSS. - Page 55 ③ Il livello e la qualità del segnale sono indicati sullo schermo del televisore e oscilleranno e cambieranno colore in funzione della regolazione e del movimento dell'antenna mentre si sta puntando e trovando (azimut, angolo di elevazione). Il livello indica la potenza del segnale ricevuto mentre il colore indica la qualità del segnale dal satellite prescelto.
-
Page 56: Risoluzione Dei Problemi
Risoluzione dei problemi Se il segnale non viene trovato e i manuali utente antenna e utente STB sono stati seguiti correttamente, effettuare i seguenti controlli: • Verificare che tutte le connessioni dei cavi siano corrette e che ogni connessione sia correttamente alloggiata/fissata. - Page 58 Flat Satellite Antenna Note As for an area not stated in the table, you can visit to www.selfsat.com and find it from the column of Satellite finder under Customer service.
- Page 59 Austria E=East Longitude W=West Longitude N= North Latitude S= South Latitude Az=Azimuth El=Elevation Sk=Skew Eutelsat SES 5 / Thor / ASTRA ASTRA ASTRA ASTRA Eutelsat Eutelsat Eutelsat Türksat Hotbird ASTRA Intelsat Hispasat 10-02 42.0° 31.5° 28.2° 23.5° 19.2° 16.0° 13.0° 9.0°...
- Page 60 Belgium E=East Longitude W=West Longitude N= North Latitude S= South Latitude Az=Azimuth El=Elevation Sk=Skew Eutelsat SES 5 / Thor / ASTRA ASTRA ASTRA ASTRA Eutelsat Eutelsat Eutelsat Türksat Hotbird ASTRA Intelsat Hispasat 10 02 42.0° 31.5° 28.2° 23.5° 19.2° 16.0° 13.0°...
- Page 61 Denmark E=East Longitude W=West Longitude N= North Latitude S= South Latitude Az=Azimuth El=Elevation Sk=Skew Eutelsat SES 5 / Thor / ASTRA ASTRA ASTRA ASTRA Eutelsat Eutelsat Eutelsat Eutelsat Eutelsat Hotbird ASTRA Intelsat 10 02 31.5° 28.2° 23.5° 19.2° 16.0° 13.0° 10.0°...
- Page 62 Finland E=East Longitude W=West Longitude N= North Latitude S= South Latitude Az=Azimuth El=Elevation Sk=Skew Eutelsat SES 5 / Thor / ASTRA ASTRA ASTRA ASTRA Eutelsat Eutelsat Eutelsat Eutelsat Eutelsat Hotbird ASTRA Intelsat 10 02 31.5° 28.2° 23.5° 19.2° 16.0° 13.0° 10.0°...
- Page 63 France E=East Longitude W=West Longitude N= North Latitude S= South Latitude Az=Azimuth El=Elevation Sk=Skew Eutelsat SES 5 / Thor / ASTRA ASTRA ASTRA ASTRA Eutelsat Eutelsat Eutelsat Hispasat Türksat Hotbird ASTRA Intelsat 10 02 42.0° 31.5° 28.2° 23.5° 19.2° 16.0° 13.0°...
- Page 64 Germany E=East Longitude W=West Longitude N= North Latitude S= South Latitude Az=Azimuth El=Elevation Sk=Skew Eutelsat SES 5 / Thor / ASTRA ASTRA ASTRA ASTRA Eutelsat Eutelsat Eutelsat Hispasat Türksat Hotbird ASTRA Intelsat 10 02 42.0° 31.5° 28.2° 23.5° 19.2° 16.0° 13.0°...
- Page 65 Great Britain E=East Longitude W=West Longitude N= North Latitude S= South Latitude Az=Azimuth El=Elevation Sk=Skew Eutelsat SES 5 / Thor / ASTRA ASTRA ASTRA ASTRA Eutelsat Eutelsat Eutelsat Hispasat Türksat Hotbird ASTRA Intelsat 10 02 42.0° 31.5° 28.2° 23.5° 19.2° 16.0°...
- Page 66 Italy E=East Longitude W=West Longitude N= North Latitude S= South Latitude Az=Azimuth El=Elevation Sk=Skew Eutelsat SES 5 / Thor / ASTRA ASTRA ASTRA ASTRA Eutelsat Eutelsat Eutelsat Hispasat Türksat Hotbird ASTRA Intelsat 10 02 42.0° 31.5° 28.2° 23.5° 19.2° 16.0° 13.0°...
- Page 67 Luxembourg E=East Longitude W=West Longitude N= North Latitude S= South Latitude Az=Azimuth El=Elevation Sk=Skew Eutelsat SES 5 / Thor / ASTRA ASTRA ASTRA ASTRA Eutelsat Eutelsat Eutelsat Eutelsat Eutelsat Hotbird ASTRA Intelsat 10 02 31.5° 28.2° 23.5° 19.2° 16.0° 13.0° 10.0°...
- Page 68 Netherlands E=East Longitude W=West Longitude N= North Latitude S= South Latitude Az=Azimuth El=Elevation Sk=Skew Eutelsat SES 5 / Thor / ASTRA ASTRA ASTRA ASTRA Eutelsat Eutelsat Eutelsat Eutelsat Eutelsat Hotbird ASTRA Intelsat 10 02 31.5° 28.2° 23.5° 19.2° 16.0° 13.0° 10.0°...
- Page 69 Norway E=East Longitude W=West Longitude N= North Latitude S= South Latitude Az=Azimuth El=Elevation Sk=Skew Eutelsat SES 5 / Thor / ASTRA ASTRA ASTRA ASTRA Eutels Eutelsat Eutelsat Eutelsat Eutelsat Hotbird ASTRA Intelsat at 16 10 02 31.5° 28.2° 23.5° 19.2° 16.0°...
- Page 70 Spain E=East Longitude W=West Longitude N= North Latitude S= South Latitude Az=Azimuth El=Elevation Sk=Skew Eutelsat SES 5 / Thor / ASTRA ASTRA ASTRA ASTRA Eutelsat Eutelsat Eutelsat Hispasat Türksat Hotbird ASTRA Intelsat 10 02 42.0° 31.5° 28.2° 23.5° 19.2° 16.0° 13.0°...
- Page 71 Sweden E=East Longitude W=West Longitude N= North Latitude S= South Latitude Az=Azimuth El=Elevation Sk=Skew Eutelsat SES 5 / Thor / ASTRA ASTRA ASTRA ASTRA Eutelsat Eutelsat Eutelsat Eutelsat Eutelsat Hotbird ASTRA Intelsat 10 02 31.5° 28.2° 23.5° 19.2° 16.0° 13.0° 10.0°...
- Page 72 Switzerland E=East Longitude W=West Longitude N= North Latitude S= South Latitude Az=Azimuth El=Elevation Sk=Skew Eutelsat SES 5 / Thor / ASTRA ASTRA ASTRA ASTRA Eutelsat Eutelsat Eutelsat Hispasat Türksat Hotbird ASTRA Intelsat 10 02 42.0° 31.5° 28.2° 23.5° 19.2° 16.0° 13.0°...
Need help?
Do you have a question about the H22dCSS+ Series and is the answer not in the manual?
Questions and answers