Advertisement
Quick Links
Download this manual
See also:
Owner's Manual
Advertisement

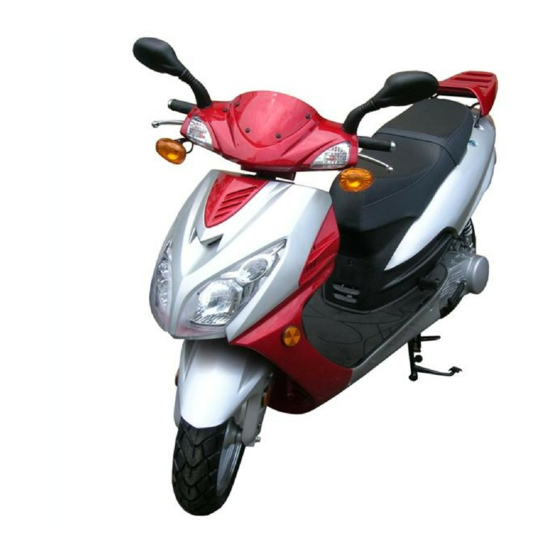
Summary of Contents for Baja motorsports SC150
- Page 1 SC150 Scooter Set up Instructions Removal from Carton 1. Remove cardboard carton. 2. Remove metal frame, plastic covering, hardware and all parts provided.
-
Page 2: Rear Shocks
Parts Headlight panel Hardware Tools Fender A Mirrors Front wheel Rear luggage carrier Battery Rear Shocks 3. Lift rear end to attach left and right rear shocks using bolts provided. Torque to 17 ft.lbs. - Page 3 Rear Luggage Carrier 6mm bolts Torque to 7 ft.lbs. 8mm bolts Torque to 17 ft.lbs. 4. Attach rear luggage carrier using hardware provided. Handlebar Bolt 6. Secure all wires with zip tie. 5. Remove hardware provided for assembly. Attach handlebar stem to steering stem. Torque to 33 ft.lbs.
-
Page 4: Front Fender
Front Fender Fender A Fender B 7. Attach fender A to fender B using 1 phillip head screw. Phillip head screw Fender A 8. Attach each side of front fender to fork with 4 phillip head screws, 2 on each side. - Page 5 Wheels Alignment tab on front fork Axle bolt Speed sensor 9. Align speed sensor between front wheel and front fork. Front wheel 10. Place front wheel spacer between disc spacer brake and fork on axle bolt. Attach front wheel with axle nut provided. Torque to 33ft.lbs.
- Page 6 Headlight panel Groove 12. Connect headlight wire. Align tabs on headlight panel with grooves on console. 13. Secure headlight panel using phillip head screws.
- Page 7 Mirrors Allen head screw Lock washer Spacer 14. Attach left and right mirrors to handlebar assembly using allen head screw, lock washer and spacer.
-
Page 8: Battery Installation
Battery Installation Battery located in floorboard under mat. WARNING The following procedure is very dangerous and should be performed with utmost care and attention. Wear protective eyewear, rubber gloves, and have water available should electrolyte come in contact with skin or eyes. - Page 9 Battery Installation Note: The following page is for vehicles with battery’s containing separate electrolyte pack. Most battery’s will come with the electrolyte already sealed into the battery. Preparing the battery: · Place battery on level surface. Remove sealing tape from top. (see figure 20) ·...
- Page 10 Battery Installation How to Initially Charge the battery: 1. Connect the red positive (+) cable to the red positive (+) pole of the battery. (see figure 23) 2. Connect the black negative (-) cable to the black negative (-) pole of the battery. (see figure 24) Figure 23 Note: The red positive (+) cable has a larger diameter than the black negative (-) cable.
- Page 11 Gas and Oil 13. Fill engine with correct amount of oil. Refer to owners manual for oil types and quantity. 14. Fill gas tank as specified in owners manual. !!WARNING!! Oil Plug. This engine may be shipped with packing oil. This oil should be drained and replaced with new oil as described in the owners manual.


Need help?
Do you have a question about the SC150 and is the answer not in the manual?
Questions and answers