Table of Contents
Advertisement
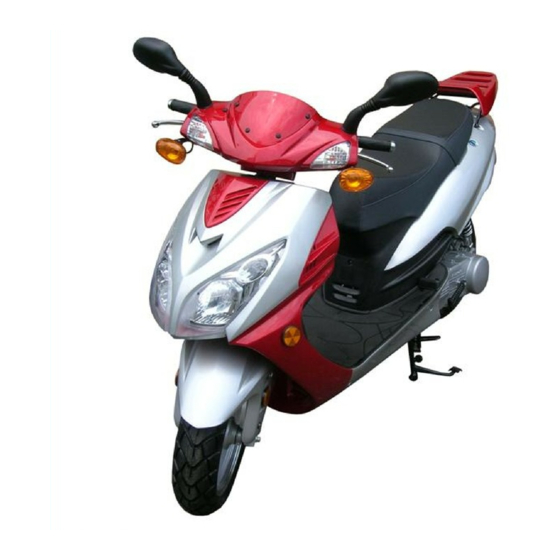
SC150 SCOOTER
Read this manual carefully. It contains important safety information.
No one under the age of 16 should operate this scooter.
OWNER'S MANUAL
Minimum Recommended Age
Requirement 16
Always wear a helmet; It could save your Life!
Do not remove this operator's manual from this vehicle.
Please obtain, review, and follow provincial / municipal government acts and
regulations pertaining to owning and operating this scooter.
Rev. B
030909
Advertisement
Table of Contents

Related Manuals for Baja motorsports SC150


Summary of Contents for Baja motorsports SC150
- Page 1 SC150 SCOOTER Read this manual carefully. It contains important safety information. No one under the age of 16 should operate this scooter. OWNER’S MANUAL Minimum Recommended Age Requirement 16 Rev. B 030909 Always wear a helmet; It could save your Life! Do not remove this operator’s manual from this vehicle.
- Page 2 Congratulations on your purchase of the BAJA INC. SC150 Scooter. Your Scooter is warranted to be free of manufacturing defects in material and workmanship for a period of 90 days from the date of purchase. During the warranty period BAJA INC. will at its option, repair, provide replacement parts or replace your BAJA INC.
- Page 3 WARNING This manual should be considered as a permanent part of the vehicle and should remain with the vehicle when resold or otherwise transferred to a new user or operator. The manual contains important safety information and instructions which should be read carefully before operating the vehicle.
-
Page 4: Table Of Contents
Table of Contents IMPORTANT ......................2 GENERAL PRECAUTIONS/WARNINGS ............3 NHTSA SAFETY NOTICE ..................8 PRE RIDE CHECK LIST ..................9 LOCATION OF WARNING LABELS..............12 OPERATION ......................13 STARTING THE ENGINE ................13 DRIVING SAFELY ..................14 SHUTTING OFF THE ENGINE ..............15 STOPPING THE VEHICLE ................ -
Page 5: Important
Please read this manual and follow all instructions carefully. To emphasize the special information, the symbol and the words WARNING or CAUTION have some special meanings. Pay attention to the messages. WARNING Indicates a potential hazard that could result in death or injury. CAUTION Indicates a potential hazard that could result in vehicle damage. -
Page 6: General Precautions/Warnings
General Precautions WARNING! FAILURE TO FOLLOW THESE INSTRUCTIONS CAN RESULT IN SEVERE INJURY OR DEATH. CAUTION: FAILURE TO FOLLOW THESE INSTRUCTIONS CAN ALSO RESULT IN DAMAGE TO THE VEHICLE AND/OR OTHER PROPERTY. ● Read and follow all instructions in this Owner’s/Operator’s Manual, any accompanying supplements. -
Page 7: Additional Warnings
Additional Warnings Protective Clothing/Equipment ● Most accident fatalities are due to preventable head injuries. Always wear a properly fitting motorcycle type helmet approved by agencies such as the Department of Transportation (DOT), Safety Helmet Council of America (SHCA), or Snell Memorial Foundation (SNELL). ●... - Page 8 Additional Warnings (continued) Traffic Safety (continued) ● Always obtain mature, supervised instruction and sufficient practice in an decongested area before operating this vehicle on any public thoroughfare. ● Excessive vehicle speed is a leading cause of accidents, which can cause death or serious harm to you, other people, and/or property. Always obey all applicable traffic safety laws while operating this vehicle, being sure to account for current weather and traffic conditions and slow down if necessary.
- Page 9 Additional Warnings (continued) Engine/Motor Safety ● Keep the engine/motor free of dirt and debris, especially in the throttle linkage area. ● Never start the engine/motor without checking to see that the throttle control is in the idle position. ● Never start the engine/motor unless you are properly seated with your hands firmly on the controls.
- Page 10 Additional Warnings (continued) Fueling (continued) ● Always use an original gas cap or an approved OEM replacement. Never fill fuel tank while the vehicle is inside a building. Gasoline vapors can cause injury or death and can pose a fire or explosion risk.
-
Page 11: Nhtsa Safety Notice
Additional Warnings (continued) Maintenance (continued) ● Store this vehicle in a place where gasoline fumes cannot reach an open flame, spark, or other source of ignition. Drain the fuel tank in a cool well-ventilated area prior to any long-term storage. Never store this vehicle in a close proximity to appliances such as water heaters or furnaces. -
Page 12: Pre-Ride Checklist
Pre-Ride Checklist WARNING! ALWAYS PERFORM THE ENTIRE PRE-RIDE CHECKLIST BEFORE USING THE VEHICLE AS THIS CAN HELP YOU SPOT PROBLEMS THAT COULD INTERFERE WITH SAFE VEHICLE OPERATION. FAILURE TO FOLLOW THIS ENTIRE CHECKLIST BEFORE EVERY RIDE CAN CAUSE DEATH, SERIOUS INJURY, AND/OR PROPERTY DAMAGE TO YOURSELF AND/OR OTHERS AIR FILTER LOCATED... - Page 13 Pre-Ride Checklist (continued) Before Starting the Engine/Motor 1. Engine oil level a) Check for leaks b) Tighten filler cap securely. c) Add oil if required. 2. Fuel level a) Add fuel as necessary. b) Do not overfill (no fuel in the filler neck). c) Do not mix oil with gas.
- Page 14 Pre-Ride Checklist (continued) Before Starting the Engine/Motor 6. Fasteners a) Check that axle nuts are secure. b) Check for missing fasteners. Replace as necessary. c) Check that all other fasteners are secure. Tighten as necessary. 7. Steering Make sure steering turns freely. 8.
-
Page 15: Location Of Warning Labels
Location of Warning Label Read and follow the warning label on your Scooter. Make sure you understand the label. Keep the label on the Scooter. Do not remove it for any reason. If the label comes off or becomes difficult to read, you should get a replacement by contacting BAJA INC. -
Page 16: Operation
Operation Starting the Engine WARNING! ALWAYS RETRACT THE SIDE STAND PRIOR TO STARTING THE VEHICLE If the engine is cold: Balance the scooter on its center stand (1) with the side stand (2) fully retracted. Make sure the ignition key is OFF, then rotate the throttle 5-8 times to prime the engine. -
Page 17: Driving Safely
Operation (continued) Driving Safely WARNING! FOLLOW ALL OF THE WARNINGS IN THIS OPERATOR’S MANUAL AT ALL TIMES WHILE OPERATING THE SCOOTER. IT IS YOUR RESPONSIBILITY TO KNOW AND OBEY ALL APPLICABLE LOCAL, STATE, AND FEDERAL LAWS. WARNING! NEVER OVERLOAD THE VEHICLE. THE CARRYING CAPACITY IS 330 POUNDS. -
Page 18: Shutting Off The Engine
Operation (continued) Shutting off the engine Always shut off the engine by turning the ignition switch to OFF. Stopping the vehicle WARNING! WET, OILY, OR SANDY ROADS REDUCE BRAKING EFFECTIVENESS. HARD BRAKING ON THESE SURFACES COULD LEAD TO LOSS OF CONTROL AND A SERIOUS ACCIDENT. -
Page 19: Ignition Switch
Operation (continued) Ignition switch The main ignition switch contains three positions: ● ON (2): The engine can start, the key (1) cannot be removed. ● OFF (3): This position shuts off the engine and allows the key to be removed. ●... -
Page 20: Right Brake/Switch Assembly
Operation (continued) Right switch assembly Light switch (1) ● The light switch must always be on while the vehicle is in operation. Slide light switch all the all the way to the left (2) to turn headlights ● For parking lights, slide headlight switch to the middle position (3). ●... -
Page 21: Kick Starter
Operation (continued) Kick starter Use the kick starter to start the engine if the battery is drained. Once started, leave the engine running until the battery recharges sufficiently to restart the scooter. Kick start Lever Left switch assembly ● High/low beam light switch (1): To activate the high beam, move the switch to position (2). -
Page 22: Instrument Panel
Operation (continued) Instrumental panel ● Speedometer (1): Indicates the current driving speed in both km/h and mph. ● High beam indication lamp (2): Illuminates when high beam is selected. ● Turn signal lamp (3): Indicates that the turn signal is activated. ●... -
Page 23: Seat Lock
Operation (continued) Seat lock ● To open: Insert the key just below the seat on the left side of the vehicle. Press the seat down slightly while turning the key clockwise to release the latch. Lift the seat. ● To close: Press down the seat until locked, then remove the key. -
Page 24: Battery Installation
BATTERY INSTALLATION INITIAL SERVICE AND INSTALLATION OF BATTERY: WARNING The following procedure is very dangerous and should be performed with utmost care and attention. Wear protective eye wear, rubber gloves, and have water available should electrolyte come in contact with skin or eyes. KEEP ALL CHILDREN AWAY FROM THE AREA WHILE THIS PROCEDURE IS BEING PERFORMED. - Page 25 BATTERY INSTALLATION (continued) Note: The following page is for vehicles with battery’s containing separate electrolyte pack. Most battery’s will come with the electrolyte already sealed into the battery. Preparing the battery: · Place battery on level surface. Remove sealing tape from top. (see figure 20) ·...
- Page 26 BATTERY INSTALLATION (continued) How to Initially Charge the battery: Connect the red positive (+) cable to the red positive (+) pole of the battery. (see figure 23) Connect the black negative (-) cable to the black negative (-) pole of the battery. (see figure 24) Figure 23 Note: The red positive (+) cable has a...
-
Page 27: Maintenance
Maintenance Spark Plug CHECK-UP OF SPARK PLUG Remove the cap of spark plug and spark plug. Clean spark plug all around or replace it if it is corroded or there is too much deposit on it. Regulate the gap of the spark plug to 0.6~0.7mm 0.6-0.7mm (.024”... -
Page 28: Engine Oil
Maintenance (continued) Engine Oil CHECK-UPS, ADJUSTMENT AND MAINTENANCE Checking the Oil Check the engine oil each time prior to operating the scooter. The oil level should be between the upper and lower lines on the dip stick Set scooter on level ground, remove dipstick and clean. Re-insert dipstick, pull back out to check level. -
Page 29: Changing Engine Oil, Cleaning Oil Screen
Maintenance (continued) CHANGING ENGINE OIL, CLEANING OIL FILTER SCREEN Remove Oil drain plug (1) located at the bottom left side of the engine and let oil drain into an approved collection container. DO NOT PERFORM THIS PROCEDURE WHILE THE ENGINE IS HOT. SERIOUS BURNS COULD RESULT FROM CONTACT WITH HOT OIL. -
Page 30: Brakes
Maintenance (continued) BRAKES FRONT HYDRAULIC DISK BRAKE INSPECTION 1. Inspect front disk brake caliper (1) for leakage. If brake fluid leaks, the safety of riding could be affected. 2. Inspect the brake hose (2) for cracks, and the joint for leakage. 3. -
Page 31: Air Filter
Maintenance (continued) AIR FILTER Air filter (2) is located under seat of scooter. 1. The air filter cover will need to be removed (1). 2. Take air filter (2) out and check to see if it is dirty or torn, if damaged, replace. -
Page 32: Idle Speed Adjustment/Fuel Hose Insp
Maintenance (continued) IDLE SPEED ADJUSTMENT To adjust the idle speed properly, you need a tachometer. If you do not have one, ask your authorized service center to perform this adjustment. Engine Idle adjustment Screw To adjust the idle speed: Start the engine and warm it up. Turn the engine idle screw in or out so that the engine idle speed is at 1700+100 RPM. -
Page 33: Tires
Maintenance (continued) Tires 1.5 mm (0.05 in) Front Rear Size 130/60-13 130/60-13 Tire Tread Condition WARNING Operating this scooter with improper tires, or even improper tire air pressure could be hazardous. If you use improper tires or improper tire air pressure, you may loose control of the scooter. -
Page 34: Transporting
Transporting It is best to transport the scooter in the normal upright position. Before transporting the scooter drain the fuel from the carburetor as follows: Drain fuel from carburetor into an empty container by loosening the carburetor drain screw. The carburetor drain screw is located on the bottom of the carburetor. -
Page 35: Storage Procedure
Storage Procedure If you do not use your scooter for a long period of time, it will need special service requiring appropriate materials, equipment and skill. For this reason, we recommend that you trust this maintenance work to your authorized service center. -
Page 36: Maintenance Chart
Maintenance Chart It is very important to inspect and maintain your SC150 scooter regularly. Follow the guidelines in the chart. The intervals between periodic ser- vices in miles are shown. At the end of each interval be sure to perform the maintenance listed. -
Page 37: Troubleshooting
Troubleshooting This troubleshooting guide is provided to help you to find the cause of some common complaints. COMPLAINT: Engine is hard to start or does not start at all. Something is probably wrong with the fuel system or ignition system. CAUTION Failing to troubleshoot a problem correctly can damage your scooter. -
Page 38: Ignition System Check
Trouble shooting (Continued) Ignition System Check Remove the spark plug and reattach it to the spark plug lead. Turn ignition key to the “RUN” position. Slide the engine stop switch to the “Run” position. Push the electric button “START “(grey button). If the ignition system is operating properly, a blue spark should jump across the spark plug gap. -
Page 39: Specifications
Specifications DESCRIPTION DATA Engine type 4- Stroke / Air cooled Overall length 1942mm (76.46 inches) Overall width 702mm (27.64 inches) Overall height 1125mm (44.29 inches) Dead weight 118kg (260lbs.) Payload 150kg (330lbs.) Suspension Telescopic fork-Front Dual shock-Rear Transmission Clutch Auto, Centrifugal Lubrication method Pressure, splash Displacement... -
Page 40: Electric Diagram
Coil Ignition... -
Page 41: Serial Number Location
SERIAL NUMBER LOCATION You need to know the frame and engine serial numbers to get warranty work, theft recovery and consumer safety information. You also need these numbers to help your authorized service center or BAJA INC. order parts. The Frame number is stamped on front of scooter just above the front floor base. -
Page 42: Emission Control System Warranty
BAJA INC. – EMISSION CONTROL SYSTEM WARRANTY YOUR WARRANTY RIGHTS AND OBLIGATIONS The emission control system warranty period for this vehicle begins on the date the vehicle is delivered to the first purchaser other than an authorized dealer, or the date it is first used as a demonstrator, lease, or company vehicle, whichever comes first and continues for 60 months after that date, or 12,000km, whichever comes first, provided there has been no abuse, neglect or improper maintenance of your vehicle. - Page 43 If an emergency situation exists when a warranted part or a dealer is not reasonably available to the owner, repairs may be performed at any available service establishment, or by the owner, us- ing any replacement part. The Distributor shall reimburse the owner for the expenses, including diagnostic charges, not to exceed the Distributor’s suggested retail price for all warranted parts replaced and labor charges based on the Distributor’s recommend time allowance for the war- ranty repair and the geographically appropriate hourly labor rate.
- Page 44 BAJA INC. P.O. Box 61150 Phoenix, AZ 85082 Tel: 602-443-9180 Toll Free: 888-863-2252...
Need help?
Do you have a question about the SC150 and is the answer not in the manual?
Questions and answers
my baja 150cc is hard to start