Advertisement
Advertisement
Table of Contents

Related Manuals for Lava Heat Ember


Summary of Contents for Lava Heat Ember
- Page 2 Model Outdoor Flame Heater Owner’s Manual Read these instructions before lighting this appliance. DANGER If you smell gas: 1. Shut off gas to the appliance. 2. Extinguish any open flame. 3. If odor continues, keep away from the appliance and immediately call your gas supplier or fire department.
-
Page 3: Warnings And Cautions
WARNINGS AND CAUTIONS DANGER CARBON MONOXIDE HAZARD This appliance can produce carbon monoxide which has no odor. Using it in an enclosed space can kill you. Never use this appliance in an enclosed space such as a camper, tent or home. WARNING: Improper installation, adjustment, alteration, service or maintenance can cause injury, death or property damage. - Page 4 WARNINGS AND CAUTIONS NOTE:PLEASE READ THE FOLLOWING SAFETY RULES WARNING: The installation must conform with local codes Any guard or other protective device or, in the absence of local codes, with the removed for servicing the heater must be National Fuel Gas Code, ANSI Z223.1/NFPA 54, replaced prior to operating the heater.
- Page 5 WARNINGS AND CAUTIONS NOTE:PLEASE READ THE FOLLOWING SAFETY RULES WARNING: Within a partial enclosure which includes an The pressure regulator and hose assembly sup- overhead cover and three side walls, as long as plied with the appliance must be used, replace- 30 percent or more of the horizontal periphery of ment pressure regulators and hose assemblies the enclosure is permanently open.
- Page 6 WARNINGS AND CAUTIONS NOTE: PLEASE READ THE FOLLOWING SAFETY RULES: Perform a leak test with a soapy solution: 1. To check gas connections. 2. After connecting a new cylinder. 3. Upon re-assembly after disassembly. This heater is designed to operate with a standard 20 Ib propane cylinder with Approved Cylinder Connection.
-
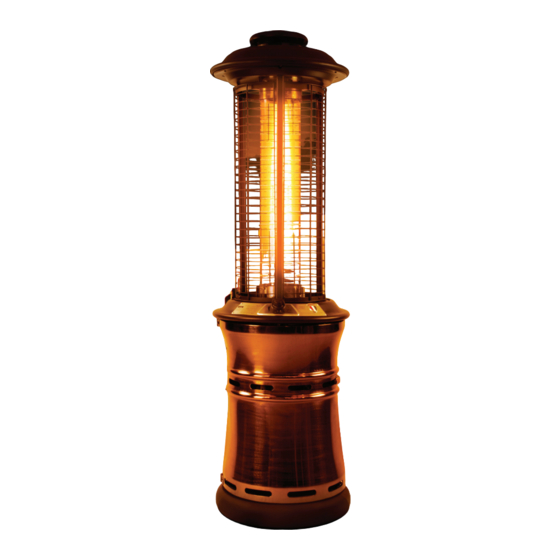
Page 7: Parts Contents
PARTS CONTENTS Please check the contents of the packaging as to whether anything is missing! Chimney cover Weather resistant dome prevents water from entering the combustion zone and reflects heat down. Safety guard protects the full height of the heat exchanger tube. Heat exchange tube has a large heat-radiating surface. - Page 8 ASSEMBLY INSTRUCTIONS Warning:This appliance requires installation Step 1 by a competent person. Proper assembly is the responsibility of the installer. Step1: To assemble unit-partially open gas chamber door.Carefully lift dome until entire heat exchange tube is exposed. Step 2: After heat exchange tube is fully extended, rotate Step 2 counter-clockwise until stopped.
- Page 9 ASSEMBLY INSTRUCTIONS Warning:This appliance requires installation by a competentperson. Proper assembly is the responsibility of theinstaller. Step 3 Step3: Insert M6x35 thumb screw into hole A, and M6x12 thumb screw into hole B. Lock the screws. Step4: Fully open gas chamber door. Remove knob Step 4 from door and place on control stem.
- Page 10 ASSEMBLY INSTRUCTIONS Warning:This appliance requires installation Step 5 by a competent person. Proper assembly is the responsibility of the installer. Step5: Place battery incompartment below control panel. Battery(1.5V) (not included) Step6: Place the gas cylinder (not included) into the base Step 6 assembly , and fix it with fixing chain.
-
Page 11: Safety Check
SAFETY CHECK WARNING : ONLY AN AUTHORIZED GAS TECHNICIAN SHOULD INSTALL THIS PRODUCT. Check for leaks All connection on the patio heater have been checked for leakage at the factory. Follow these steps to check the gas hose/regulator/cylinder connections: 1) Make leakage solution by mixing 1 part liquid brush dish soap and 3 parts water. -
Page 12: Operation
OPERATION 1. Ensure control knob is in OFF position. 2. Depress control knob and turn counter clockwise to IGNITE. 3. Continue to depress knob for 30 seconds, listen to ignition pulse. 4. Then, release knob and turn to adjust heat intensit 5. - Page 13 OPERATION Note: The burner may be noisy when initially turned on. To eliminate excessive noise from the burner, turn the control knob to the Minimum position. Then, turn the knob to the level of heat desired. If you experience any ignition problem consult the following “Troubleshooting”.
- Page 14 OPERATION...
-
Page 15: Locating Header For Use
LOCATING HEADER FOR USE CAUTION: WHEN CERTAIN MATERIALS OR ITEMS ARE LEFT, ABOVE, BESIDE OR UNDER THIS HEATER WHILE IN USE, THEY WILL BE SUBJECT TO RADIANT HEAT AND COULD BE SERIOUSLY DAMAGED. This heater is primarily used for the heating of outdoor patios, decks, spas, pools and open working areas. -
Page 16: Maintenance & Storage
MAINTENANCE/STORAGE CLEANING AND MAINTENANCE : To enjoy years of outstanding performance from your WARNING: heater make sure you perform the following maintenance FOR YOUR SAFETY ; activities on a regular basis: DO NOT touch or move heater for at least 45 minutes after use. Allow Keep exterior surfaces clean. - Page 17 MAINTENANCE/STORAGE Spiders and insects can nest in burner or orifices. This dangerous condition can damage heater and render it NOTE: unsafe for use. Clean burner holes by using a heavy-duty wait until heater is cool before pipe cleaner. Compressed air may help clear away covering.
-
Page 18: Troubleshooting
TROUBLESHOOTING... -
Page 19: Five-Year Limited Warranty
• Requires Technical Support • Requires Parts • Or If You Have A Sales Question Or You Would Like To Offer Product Feedback Please contact the manufacturer: LAVA HEAT ITALIA 888.779.5282 or CS@LAVAHEAT.COM DO NOT RETURN PRODUCT TO RETAILER! LAVA HEAT ITALIA Toll free No.: 1.888.779.LAVA 1.888.779.5282...
Need help?
Do you have a question about the Ember and is the answer not in the manual?
Questions and answers