Lenovo ThinkStation P900 Hardware Maintenance Manual
Lenovo thinkstation p900 hardware maintenance manual
Hide thumbs
Also See for ThinkStation P900:
- User manual (180 pages) ,
- Configuration manual (49 pages) ,
- Hardware configuration (35 pages)
Table of Contents
Advertisement
Quick Links
Advertisement
Table of Contents
Troubleshooting

Subscribe to Our Youtube Channel
Related Manuals for Lenovo ThinkStation P900


Summary of Contents for Lenovo ThinkStation P900
- Page 1 ThinkStation P900 Hardware Maintenance Manual Machine Types: 30A4 and 30A5...
- Page 2 1 “Read this first: Important safety information” on page 1 and Appendix E “Notices” on page 203. First Edition (October 2014) © Copyright Lenovo 2014. LIMITED AND RESTRICTED RIGHTS NOTICE: If data or software is delivered pursuant a General Services Administration...
-
Page 3: Table Of Contents
8.1 operating system ..Chapter 6. Advanced configuration . . 65 An introduction to Lenovo programs ..Using the Setup Utility program .. - Page 4 Diagnostics ....Replacing the battery ..Lenovo Solution Center ..Installing or replacing a flex adapter ..
- Page 5 Safety and Warranty... Recycling information for Brazil ..Lenovo Web site ... . Battery recycling information for Taiwan ..
- Page 6 ThinkStation P900 Hardware Maintenance Manual...
-
Page 7: About This Manual
Use this manual along with the advanced diagnostic tests to troubleshoot problems effectively. Before servicing a ThinkStation computer, be sure to read and understand Chapter 1 “Read this first: Important safety information” on page 1. © Copyright Lenovo 2014... - Page 8 ThinkStation P900 Hardware Maintenance Manual...
-
Page 9: Chapter 1. Read This First: Important Safety Information
• Do not perform any action that causes hazards to the customer, or that makes the equipment unsafe. • Before you start the machine, ensure that other service representatives and the customer's personnel are not in a hazardous position. © Copyright Lenovo 2014... -
Page 10: Electrical Safety
Many customers have, near their equipment, rubber floor mats that contain small conductive fibers to decrease electrostatic discharges. Do not use this type of mat to protect yourself from electrical shock. ThinkStation P900 Hardware Maintenance Manual... - Page 11 • Find the room emergency power-off (EPO) switch, disconnecting switch, or electrical outlet. If an electrical accident occurs, you can then operate the switch or unplug the power cord quickly. • Do not work alone under hazardous conditions or near equipment that has hazardous voltages. •...
-
Page 12: Safety Inspection Guide
2. Make sure that the ESD protective devices you use have been certified (ISO 9000) as fully effective. When handling ESD-sensitive parts: • Keep the parts in protective packages until they are inserted into the product. • Avoid contact with other people while handling the part. ThinkStation P900 Hardware Maintenance Manual... -
Page 13: Grounding Requirements
• Wear a grounded wrist strap against your skin to eliminate static on your body. • Prevent the part from touching your clothing. Most clothing is insulative and retains a charge even when you are wearing a wrist strap. • Use the black side of a grounded work mat to provide a static-free work surface. The mat is especially useful when handling ESD-sensitive devices. - Page 14 Some laser products contain an embedded Class 3A or Class 3B laser diode. Note the following: Laser radiation when open. Do not stare into the beam, do not view directly with optical instruments, and avoid direct exposure to the beam. ThinkStation P900 Hardware Maintenance Manual...
- Page 15 ≥18 kg (37 lb) ≥32 kg (70.5 lb) ≥55 kg (121.2 lb) CAUTION: Use safe practices when lifting. CAUTION: The power control button on the device and the power switch on the power supply do not turn off the electrical current supplied to the device. The device also might have more than one power cord.
- Page 16 ThinkStation P900 Hardware Maintenance Manual...
- Page 17 ≥18 kg (37 lb) ≥32 kg (70.5 lb) ≥55 kg (121.2 lb) PERIGO A corrente elétrica proveniente de cabos de alimentação, de telefone e de comunicações é perigosa. Chapter 1 Read this first: Important safety information...
- Page 18 • Não remova as tampas. A remoção das tampas de um produto a laser pode resultar em exposição prejudicial à radiação de laser. Não existem peças que podem ser consertadas no interior do dispositivo. ThinkStation P900 Hardware Maintenance Manual...
- Page 19 • A utilização de controles ou ajustes ou a execução de procedimentos diferentes dos especificados aqui pode resultar em exposição prejudicial à radiação. PERIGO Alguns produtos a laser contêm diodo de laser integrado da Classe 3A ou da Classe 3B. Observe o seguinte: Radiação a laser quando aberto.
- Page 20 ThinkStation P900 Hardware Maintenance Manual...
- Page 21 Chapter 1 Read this first: Important safety information...
- Page 22 ThinkStation P900 Hardware Maintenance Manual...
- Page 23 DANGER Le courant électrique provenant de l'alimentation, du téléphone et des câbles de transmission peut présenter un danger. Pour éviter tout risque de choc électrique : • Ne manipulez aucun câble et n'effectuez aucune opération d'installation, d'entretien ou de reconfiguration de ce produit au cours d'un orage.
- Page 24 L'interrupteur de contrôle d'alimentation de l'unité et l'interrupteur dubloc d'alimentation ne coupent pas le courant électrique alimentantl'unité. En outre, le système peut être équipé de plusieurs cordonsd'alimentation. Pour mettre l'unité hors tension, vous devez déconnectertous les cordons de la source d'alimentation. ThinkStation P900 Hardware Maintenance Manual...
- Page 25 VORSICHT An Netz-, Telefon- und Datenleitungen können gefährliche Spannungen anliegen. Aus Sicherheitsgründen: • Bei Gewitter an diesem Gerät keine Kabel anschließen oder lösen. Ferner keine Installations-, Wartungs- oder Rekonfigurationsarbeiten durchführen. • Gerät nur an eine Schutzkontaktsteckdose mit ordnungsgemäß geerdetem Schutzkontakt anschließen.
- Page 26 Mit dem Netzschalter an der Einheit und am Netzteil wird die Stromversorgung für die Einheit nicht unterbrochen. Die Einheit kann auch mit mehreren Netzkabeln ausgestattet sein. Um die Stromversorgung für die Einheit vollständig zu unterbrechen, müssen alle zum Gerät führenden Netzkabel vom Netz getrennt werden. ThinkStation P900 Hardware Maintenance Manual...
- Page 27 Chapter 1 Read this first: Important safety information...
- Page 28 ThinkStation P900 Hardware Maintenance Manual...
- Page 29 PERICOLO La corrente elettrica proveniente dai cavi di alimentazione, del telefono e di comunicazione può essere pericolosa. Per evitare il rischio di scosse elettriche: • Non collegare o scollegare qualsiasi cavo oppure effettuare l'installazione, la manutenzione o la riconfigurazione del prodotto durante un temporale. •...
- Page 30 Il pulsante di controllo dell'alimentazione presente sull'unità e l'interruttore dell'alimentatore non disattivano l'alimentazione corrente fornita all'unità. E' possibile che l'unità disponga di più cavi di alimentazione. Per disattivare l'alimentazione dall'unità, accertarsi che tutti i cavi di alimentazione siano scollegati dalla fonte di alimentazione. ThinkStation P900 Hardware Maintenance Manual...
- Page 31 Chapter 1 Read this first: Important safety information...
- Page 32 • Cualquier equipo que se conecte a este producto también debe conectarse a tomas de corriente debidamente cableadas. • Siempre que sea posible, utilice una sola mano para conectar o desconectar los cables de señal. ThinkStation P900 Hardware Maintenance Manual...
- Page 33 • No encienda nunca un equipo cuando hay señales de fuego, agua o daños estructurales. • Desconecte los cables de alimentación, los sistemas de telecomunicaciones, las redes y los módems conectados antes de abrir las cubiertas de los dispositivos, a menos que se indique lo contrario en los procedimientos de instalación y configuración.
- Page 34 Además, el dispositivo podría tener más de un cable de alimentación. Para suprimir toda la corriente eléctrica del dispositivo, asegúrese de que todos los cables de alimentación estén desconectados de la toma de corriente. ThinkStation P900 Hardware Maintenance Manual...
-
Page 35: Chapter 2. Product Overview
• Locations of parts on the system board • Locations of internal drives • Computer features • Software programs provided by Lenovo Locations This section provides the following topics: • “Locating connectors, controls, and indicators on the front of your computer” on page 28 •... -
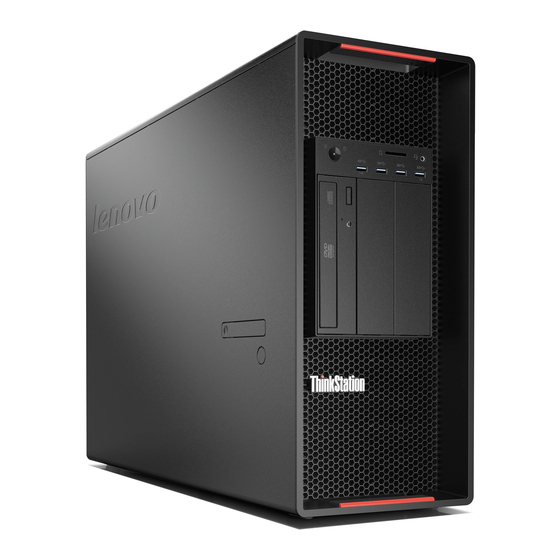
Page 36: Locating Connectors, Controls, And Indicators On The Front Of Your Computer
When you lay the computer on its side, you can slightly pull out the logo plate, turn it 90° counterclockwise, and then push it back in. ThinkStation P900 Hardware Maintenance Manual... -
Page 37: Locating Connectors On The Rear Of Your Computer
Locating connectors on the rear of your computer The following illustration shows the locations of the connectors on the rear of your computer. Some connectors on the rear of your computer are color-coded to help you determine where to connect the cables on your computer. -
Page 38: Locating Components
PDA. Locating components The following illustration shows the locations of the various components in your computer. To remove the computer cover, see “Removing the computer cover” on page 111. ThinkStation P900 Hardware Maintenance Manual... -
Page 39: Locating Major Frus And Crus
Figure 3. Component locations Power supply assembly Flex adapter (some models) M.2 solid-state drive (some models) Memory modules (amount varies by model) Multi-function bracket Front fan assembly Optical drive, flex module, or front-access storage Hard disk drive, hybrid drive, or solid-state drive (amount and combination vary by model) enclosure (amount and combination vary by model) Front fan assembly... - Page 40 ThinkStation P900 Hardware Maintenance Manual...
- Page 41 Figure 4. Locating major FRUs and CRUs The following table lists the major FRUs shown in Figure 4 “Locating major FRUs and CRUs” on page 32 and identifies which FRUs are also self-service CRUs or optional-service CRUs. Notes: • Self-service CRUs: These CRUs unplug or are secured by no more than two screws. Examples of these types of CRUs include the keyboard, the mouse, any USB device, and the power cord.
-
Page 42: Locating Parts On The System Board
4-pin power connector Optical-drive fan connector 4-pin power connector Front fan assembly connector Thermal sensor Battery Microprocessor 1 Microprocessor fan connector 1 Thermal sensor Memory slot Memory slot Memory slot Memory slot Flex adapter slot 1 ThinkStation P900 Hardware Maintenance Manual... -
Page 43: Locating Internal Drives
4-pin power connector eSATA connector Front-access storage enclosure control connector Front-access storage enclosure control connector Front fan assembly connector Thermal sensor SATA 3.0 connector SATA 3.0 connector 29-in-1 card reader connector Front USB 3.0 connector Cover presence switch connector (intrusion switch Thunderbolt™... - Page 44 Storage drive bays (with hard disk drives, solid-state drives or hybrid drives installed in some bays) PCI Express x16 graphics card slots and PCI Express x4 card slots (with PCI Express solid-state drives or other PCI cards installed in some models) ThinkStation P900 Hardware Maintenance Manual...
-
Page 45: Locating The Machine Type And Model Label
Locating the machine type and model label The machine type and model label identifies your computer. When you contact Lenovo for help, the machine type and model information helps support technicians to identify your computer and provide faster service. The machine type and model label is attached on the front of your computer as shown. - Page 46 For more information, see “Locating connectors, controls, and indicators on the front of your computer” on page 28 and “Locating connectors on the rear of your computer” on page 29. Expansion • Hard disk drive bays • Flex adapter slots ThinkStation P900 Hardware Maintenance Manual...
- Page 47 • Optical drive bays • PCI Express x1 card slots • PCI Express x4 card slots • PCI Express x16 graphics card slots • SD card reader slot For more information, see “Locating internal drives” on page 35 and “Locating parts on the system board” on page 34.
- Page 48 The operating system(s) listed here are being certified or tested for compatibility at the time this publication goes to press. Additional operating systems might be identified by Lenovo as compatible with your computer following the publication of this manual. This list is subject to change. To determine if an operating system has been certified or tested for compatibility, check the Web site of the operating system provider.
-
Page 49: Specifications
Control Panel. The icon name displayed in the search result or Control Panel might be different from the program name. You can find the program by its program name or icon name as shown in the Lenovo programs available on the Windows 7 operating system table. -
Page 50: Accessing Lenovo Programs On The Windows 8.1 Operating System
Press the Windows key to go to the Start screen. Click a Lenovo program to launch it. If you cannot find the program you need, click the arrow icon in the bottom-left corner of the screen to go to the Apps screen. - Page 51 As a result, you can access, edit, and share your files from anywhere. With Lenovo Reach, you also can add your favorite Web services to your cloud desktop and stay logged-in to Web sites with the cloud password manager.
- Page 52 • System Update (Windows 7 and Windows 8.1) The System Update program helps you keep the software on your computer up-to-date by downloading and installing software update packages. Examples of these software update packages include Lenovo programs, device drivers, UEFI BIOS updates, and other third-party programs.
-
Page 53: Chapter 3. Using Your Computer
When you register your computer, information is entered into a database, which enables Lenovo to contact you in case of a recall or other severe problem. After you register your computer with Lenovo, you will receive quicker service when you call Lenovo for help. In addition, some locations offer extended privileges and services to registered users. -
Page 54: Using The Fingerprint Reader
To open Fingerprint Manager Pro or ThinkVantage Fingerprint Software and use the fingerprint reader, do the following: • On the Windows 7 operating system, see “Accessing Lenovo programs on the Windows 7 operating system” on page 41. • On the Windows 8.1 operating system, see “Accessing Lenovo programs on the Windows 8.1 operating system”... -
Page 55: Advanced Configuration And Power Interface (Acpi) Bios
Advanced configuration and power interface (ACPI) BIOS Being an ACPI BIOS system, the operating system is allowed to control the power management features of the computer and the setting for Advanced Power Management (APM) BIOS mode is ignored. Not all operating systems support ACPI BIOS mode. Automatic Power-on features The Automatic Power-On features within the Power Management menu allow you to enable and disable features that turn on the computer automatically. -
Page 56: Setting The Volume From Control Panel
• Do not insert any object other than a disc into the drive. • Do not insert damaged discs into the drive. Warped, scratched, or dirty discs can damage the drive. • Before moving the computer, remove the disc from the drive. ThinkStation P900 Hardware Maintenance Manual... -
Page 57: Handling And Storing A Disc
If your computer is installed with a recordable optical drive, you can use the drive to record a disc. To record a disc, do the following: • On the Windows 7 operating system, use either the Corel DVD MovieFactory Lenovo Edition program or the Power2Go program installed on your computer. -
Page 58: Navigating Among Screens On The Windows 8.1 Operating System
Note: Only active workspaces that you have accessed during the current Windows session are displayed along the left edge. If you close an active workspace, its representation will not be displayed along the left edge of the screen. 2. Click the representation. – Using a touch screen: ThinkStation P900 Hardware Maintenance Manual... -
Page 59: Accessing Control Panel On The Windows 8.1 Operating System
Chapter 10 “Recovery information” on page 103. Additionally, in case of a hard-disk-drive failure, you can order a recovery disc set from the Lenovo Customer Support Center. For information about contacting the Customer Support Center, see Chapter 12 “Getting... - Page 60 • To set the Start screen as your default startup screen, clear the When I sign in or close all apps on a screen, go to the desktop instead of Start check box. 4. Click OK to save the new setting. ThinkStation P900 Hardware Maintenance Manual...
-
Page 61: Chapter 4. You And Your Computer
51–61 cm (20–24 inches). Then, position the monitor so that you can view it without twisting your body. Also, position other equipment you use regularly, such as the telephone or a mouse, within easy reach. © Copyright Lenovo 2014... -
Page 62: Glare And Lighting
For more information about power cords, see “Power cords and power adapters” on page 1. Accessibility information Lenovo is committed to providing people with disabilities greater access to information and technology. Some technologies are already provided in your operating system. Others can be purchased through vendors. - Page 63 On-screen notification On-screen notification helps hearing-impaired people be aware of the status of their computer. On-screen notification replaces sounds with visual cues or text captions to indicate that activity is happening on the computer. As a result, system alerts are noticeable even when they are not heard. For example, when you select one object with your keyboard, the object is highlighted.
- Page 64 Screen resolution, and then adjust the settings as you prefer. Note: Setting too low of a resolution might prevent some items from fitting on the screen. For alternatives on increasing the size of text and other objects, see the following: ThinkStation P900 Hardware Maintenance Manual...
- Page 65 • “Customizable text size” on page 56 • “Magnifier” on page 56 • “Zoom” on page 56 Ease of Access keyboard shortcuts The following table contains keyboard shortcuts that can help make your computer easier to use. Keyboard shortcut Function Windows logo key + U Open the Ease of Access Center Right Shift for eight seconds...
-
Page 66: Moving Your Computer To Another Country Or Region
Then, you can type a message on your computer and send it to the telephone. Documentation in accessible formats Lenovo provides electronic documentation in accessible formats, such as properly tagged PDF files or HyperText Markup Language (HTML) files. Lenovo electronic documentation is developed to ensure that visually impaired users can read the documentation through a screen reader. -
Page 67: Chapter 5. Security
For security, store the keys in a secure place when you are not using them. Note: The key lock and keys are available only in some models. © Copyright Lenovo 2014... - Page 68 Figure 8. Locking the computer cover ThinkStation P900 Hardware Maintenance Manual...
-
Page 69: Attaching A Kensington-Style Cable Lock
The cable lock also locks the buttons used to open the computer cover. This is the same type of lock used with many notebook computers. You can order such a cable lock directly from Lenovo by searching for Kensington at: http://www.lenovo.com/support Figure 9. -
Page 70: Windows Passwords
Your computer is preinstalled with an antivirus program to help you guard against, detect, and eliminate viruses. Lenovo provides a full version of antivirus software on your computer with a free 30-day subscription. After 30 days, you must renew the license to continue receiving the antivirus software updates. - Page 71 For more information about how to use your antivirus software, refer to the help system of your antivirus software. Chapter 5 Security...
- Page 72 ThinkStation P900 Hardware Maintenance Manual...
-
Page 73: Chapter 6. Advanced Configuration
Setup Utility program. See “Starting the Setup Utility program” on page 65. Then, follow the instructions on the screen. You can use either the keyboard or the mouse to navigate through menu choices. The keys used to perform various tasks are displayed at the bottom of each screen. © Copyright Lenovo 2014... -
Page 74: Using Bios Passwords
To set, change, or delete a password, do the following: 1. Start the Setup Utility program. See “Starting the Setup Utility program” on page 65. 2. From the Setup Utility program main menu, select Security. ThinkStation P900 Hardware Maintenance Manual... -
Page 75: Enabling Or Disabling A Device
3. Depending on the password type, select Set Power-On Password, Set Administrator Password, or Hard Disk Password. 4. Follow the instructions on the right side of the screen to set, change, or delete a password. Note: A password can be any combination of up to 64 alphabetic and numeric characters. For more information, see “Password considerations”... -
Page 76: Selecting A Startup Device
69. Enabling ErP LPS compliance mode Lenovo computers meet the eco-design requirements of the ErP Lot 3 regulation. For more information, go http://www.lenovo.com/ecodeclaration You can enable ErP LPS compliance mode in the Setup Utility program to reduce the consumption of electricity when your computer is off or in sleep mode. -
Page 77: Exiting The Setup Utility Program
Setup Utility program. Updating or recovering the BIOS Lenovo might make changes and enhancements to the BIOS. When updates are released, they are available as downloadable files on the Lenovo Web site at http://www.lenovo.com/drivers. Instructions for using the BIOS updates are available in a TXT file that is included with the update files. -
Page 78: Using System Programs
Lenovo might make changes and enhancements to the POST and BIOS. When updates are released, they are available as downloadable files on the Lenovo Web site at http://www.lenovo.com. Instructions for using the POST and BIOS updates are available in a TXT file that is included with the update files. -
Page 79: Updating The Bios From Your Operating System
Updating the BIOS from your operating system Lenovo makes constant improvements to its Web sites. The Web page contents are subject to change without notice, including the contents referenced in the following procedure. To update the BIOS from your operating system, do the following: 1. -
Page 80: Recovering From A Bios Update Failure
• “Configuring SATA or SAS RAID functionality with the Intel RSTe configuration utility” on page 73 Installing SATA or SAS hard disk drives Ensure that your computer has the minimum number of SATA or SAS hard disk drives installed for the following supported levels of RAID: ThinkStation P900 Hardware Maintenance Manual... - Page 81 • RAID Level 0 - Striped disk array – A RAID Level 0 hard disk drive group consisting of at least two hard disk drives – Supported strip size: 4 KB, 8 KB, 16 KB, 32 KB, 64 KB, or 128 KB –...
- Page 82 This section provides instructions on how to reset hard disk drives to non-RAID. To reset hard disk drives to non-RAID, do the following: 1. Enter the Intel RSTe configuration utility. See “Entering the Intel RSTe configuration utility” on page 73. ThinkStation P900 Hardware Maintenance Manual...
-
Page 83: Quick Raid Setup Using The Lsi Megaraid Bios Configuration Utility
• The following steps in this section are intended to guide you through a quick setup of basic RAID functions with the LSI MegaRAID SAS adapter. For advanced setup and configuration using this adapter, refer to the complete MegaRAID SAS Software User Guide that is available at http://support.lenovo.com/en_US/guides-and-manuals/detail.page?DocID=UM007543. This section provides information about the following topics: •... - Page 84 • Automatic Configuration: Automatically create an optimal RAID configuration. 4. Select Manual Configuration, and then click Next. The Drive Group Definition window is displayed. To create hard disk drive groups, do the following: ThinkStation P900 Hardware Maintenance Manual...
- Page 85 a. Select one or more hard disk drives for the group (keep pressing Ctrl while selecting more than one hard disk drive). b. Click Add To Array to move the selected hard disk drives to Drive Groups. c. Click Accept DG to create the hard disk drive group. d.
- Page 86 ThinkStation P900 Hardware Maintenance Manual...
-
Page 87: Chapter 7. Preventing Problems
This section explains how to get the latest updates for your computer. Getting the latest device drivers for your computer Note: Lenovo makes constant improvements to its Web sites. The contents on the Web page are subject to change without notice, including the contents referenced in the following procedure. -
Page 88: Using The System Update Program
To open System Update, see “Accessing Lenovo programs on the Windows 7 operating system” on page 41 or “Accessing Lenovo programs on the Windows 8.1 operating system” on page 42. If System Update is not currently installed on your computer, you can download it from the Lenovo Support Web site at: http://www.lenovo.com/support... -
Page 89: Optical Mouse
1. Apply some isopropyl rubbing alcohol to a soft, dust-free cloth. 2. Wipe each keytop surface with the cloth. Wipe the keys one by one; if you wipe several keys at a time, the cloth may hook onto an adjacent key and possibly damage it. Ensure that no liquid drips onto or between the keys. -
Page 90: Moving Your Computer
The cause of a problem might be change in hardware, change in software, or any other actions that might have taken place. A log book can help you or a Lenovo technician determines the cause of a problem. • Create Product Recovery discs. See “Creating and using recovery media” on page 103 for more information about using Product Recovery discs to restore the hard disk drive to the factory-default settings. -
Page 91: Chapter 8. Troubleshooting And Diagnostics
Note: If you cannot correct the problem, have the computer serviced. For a list of service and support telephone numbers, refer to the Safety, Warranty, and Setup Guide that comes with your computer or go to the Lenovo Support Web site at: http://www.lenovo.com/support/phone... -
Page 92: Troubleshooting Procedure
If this does not correct the problem, continue with the next step. 6. Run the diagnostic program. See “Lenovo Solution Center” on page 94 for more information. • If the diagnostic program detects a hardware failure or if you are unable to run the diagnostic program, contact the Lenovo Customer Support Center. -
Page 93: Audio Problems
1. Remove the new hardware option or software. If you must remove the computer cover to remove a hardware option, ensure that you review and follow the electrical safety information provided with your computer. For your safety, do not operate the computer with the cover removed. 2. -
Page 94: Dvd Problems
• Use the DVD menu for the video to select a different audio track. Playback is slow or choppy Solutions: • Disable any background programs, such as AntiVirus or Desktop Themes. • Ensure that video resolution is set to less than 1152 x 864 pixels. ThinkStation P900 Hardware Maintenance Manual... -
Page 95: Intermittent Problems
(one to five hard disk drives) or the LSI MegaRAID SAS adapter is installed. If these actions do not correct the problem, run the diagnostic program Lenovo Solution Center. See “Lenovo Solution Center” on page 94. If you need technical assistance, see Chapter 12 “Getting information, help, and service”... -
Page 96: Problems With The Keyboard Or Mouse
Refer to “Installing or replacing a 3.5-inch storage drive” on page 113. If these actions do not correct the problem, run the diagnostic program Lenovo Solution Center. See “Lenovo Solution Center” on page 94. -
Page 97: Monitor Problems
The fingerprint reader on the keyboard does not work Solutions: • Enroll your fingerprint correctly. • Never scratch the surface of the reader with a hard, pointed object. • Never scrap the surface of the reader with your nail or anything hard. •... -
Page 98: Networking Problems
The adapter stops working for no reason Solution: The network driver files might be corrupt or missing. Update the driver by referring to the “Solution” description for the previous problem to ensure that the latest device driver is installed. ThinkStation P900 Hardware Maintenance Manual... -
Page 99: I Have Connected An Option To My Computer, But It Does Not Work
The Wake On LAN feature is not working Solution: Enable the Wake On LAN (WOL) feature in the BIOS program. My computer is a Gigabit Ethernet model and I use a speed of 1000 Mbps, but the connection fails or errors occur Solution: Connect the network cable to the Ethernet connector using Category 5 wiring and a 100 BASE-T hub/switch (not 100 BASE-X). -
Page 100: The Printer Does Not Work
• Connect the serial cable to the serial connector on the computer and to the serial device. If the serial device has its own power cord, attach the power cord to a grounded electrical outlet. • Turn on the serial device and keep the device online. ThinkStation P900 Hardware Maintenance Manual... -
Page 101: Software Problems
• Install any application programs supplied with the serial device. Refer to the documentation that comes with the serial device for more information. • If you added one serial-connector adapter, install the adapter correctly. Software problems This section provides solutions to software-related problems. When using a sort feature, dates cannot be sorted in the correct order Solution: Some programs developed before the year 2000 used only the last two digits of a year to sort dates, assuming the first two digits were 19. -
Page 102: Lenovo Solution Center
Note: If you cannot isolate and repair the problem yourself after running the program, save and print the log files. You will need the log files when you speak to a Lenovo technical support representative. For additional information, refer to the Lenovo Solution Center help system. -
Page 103: Hardware Diagnostics
• If you are using a USB key, go to http://www.lenovo.com/support for information about how to read the error data on the USB key. • If you are using an Android device with the Lenovo Mobile Diagnostic application installed, open the application for details about the error. - Page 104 ThinkStation P900 Hardware Maintenance Manual...
-
Page 105: Chapter 9. Service Checkout And Symptom-To-Fru Index
If possible, have this information available when requesting assistance from Service Support and Engineering functions. • Machine type and model • Processor or hard disk drive upgrades • Failure symptom – Do diagnostics indicate a failure? © Copyright Lenovo 2014... -
Page 106: Symptom-To-Fru Index
• If you did not receive any error message, look for a description of your error symptoms in the first part of this index. Hard disk drive boot error A hard disk drive boot error can have the following causes. ThinkStation P900 Hardware Maintenance Manual... -
Page 107: Power Supply Problems
Error FRU/Action The start-up drive is not in the boot sequence in Check the configuration and ensure the start-up drive is configuration. in the boot sequence. No operating system installed on the boot drive. Install an operating system on the boot drive. The boot sector on the startup drive is corrupted. -
Page 108: Miscellaneous Error Conditions
1. Ensure that network is in startup sequence as first device or first device after diskette. 2. Ensure that network adapter is enabled for RPL. 3. Network adapter (Advise network administrator of new MAC address) ThinkStation P900 Hardware Maintenance Manual... - Page 109 Message/Symptom FRU/Action ® Computer will not perform a Wake On LAN (if applicable) 1. Check power supply and signal cable connections to network adapter. 2. Ensure that the operating system settings are set to enable Wake on LAN. 3. Ensure Wake On LAN feature is enabled in Setup/Configuration (see “Starting the Setup Utility program”...
-
Page 110: Undetermined Problems
4. Repeat steps 1 through 3 until you find the failing device or adapter. If all devices and adapters have been removed, and the problem continues, replace the system board. See “Replacing the system board” on page 177. ThinkStation P900 Hardware Maintenance Manual... -
Page 111: Chapter 10. Recovery Information
Product Recovery program installed. If the Enhanced Backup and Restore icon in the Lenovo ThinkVantage Tools program is dimmed, it indicates that you must install the Rescue and Recovery program manually before enabling its features. To install the Rescue and Recovery program, do the following: 1. -
Page 112: Creating Recovery Media
Note: On the Windows 7 operating system, you can create recovery media using discs or external USB storage drives. To create recovery media on the Windows 7 operating system, click Start ➙ All Programs ➙ Lenovo ThinkVantage Tools ➙ Factory Recovery Disks. Then, follow the instructions on the screen. - Page 113 To perform a recovery operation using the Rescue and Recovery program on the Windows 7 operating system, do the following: 1. From the Windows desktop, click Start ➙ All Programs ➙ Lenovo ThinkVantage Tools ➙ Enhanced Backup and Restore. The Rescue and Recovery program opens.
-
Page 114: Creating And Using A Rescue Medium
Creating a rescue medium To create a rescue medium on the Windows 7 operating system, do the following: 1. From the Windows desktop, click Start ➙ All Programs ➙ Lenovo ThinkVantage Tools ➙ Enhanced Backup and Restore. The Rescue and Recovery program opens. -
Page 115: Reinstalling Preinstalled Programs And Device Drivers
Reinstalling preinstalled programs and device drivers Your computer enables you to reinstall preinstalled programs and device drivers. Reinstalling preinstalled programs To reinstall programs preinstalled on your Lenovo computer, do the following: 1. Turn on the computer. 2. Go to C:\SWTOOLS. -
Page 116: Solving Recovery Problems
Attention: If you reset your computer, all your personal files and settings will be deleted. To avoid data loss, make a backup copy of all the data that you want to keep. To reset your computer, do the following: ThinkStation P900 Hardware Maintenance Manual... -
Page 117: Using The Advanced Startup Options
1. Move the pointer to the top-right or bottom-right corner of the screen to display the charms. Click Settings ➙ Change PC settings ➙ Update and recovery ➙ Recovery. 2. In the Remove everything and reinstall Windows section, click Get started. Using the advanced startup options Advanced startup options enable you to change the startup settings of your Windows operating system, start the computer from an external device, or restore the Windows operating system from a system image. - Page 118 ThinkStation P900 Hardware Maintenance Manual...
-
Page 119: Chapter 11. Installing Or Replacing Hardware
1 “Read this first: Important safety information” on page 1. Notes: • Use only computer parts provided by Lenovo. • When installing or replacing an option, use the appropriate instructions in this section along with the instructions that come with the option. -
Page 120: Installing Or Replacing An Internal Storage Drive
Depending on your computer model, your computer might come with one or more of the following internal storage drives: • 3.5-inch hard disk drive • 3.5-inch hybrid drive • 2.5-inch hard disk drive • 2.5-inch solid-state drive • M.2 solid-state drive ThinkStation P900 Hardware Maintenance Manual... - Page 121 • PCI Express solid-state drive To install or replace an internal storage drive, refer to one of the following topics: • “Installing or replacing a 3.5-inch storage drive” on page 113 • “Installing or replacing a 2.5-inch storage drive” on page 118 •...
- Page 122 • If you are replacing a storage drive, flex the sides of the bracket to release the four pins from the storage drive. Then, remove the storage drive from the bracket. Figure 12. Removing the storage drive from the bracket ThinkStation P900 Hardware Maintenance Manual...
- Page 123 6. Hold the storage drive so that the connectors face towards the rear of the bracket and the circuit board faces upward. Then, flex the sides of the bracket and align the four pins on the bracket with the corresponding holes in the storage drive. Note: Do not touch the circuit board of the storage drive.
- Page 124 • If you are installing a storage drive, do the following: a. Press the clip on the bottom of the optical drive bay so that the plastic cover is ejected out of the bay. Then, remove the metal static shield from the bay. ThinkStation P900 Hardware Maintenance Manual...
- Page 125 b. Press the tab as shown to open the cover of the front-access storage enclosure. Figure 15. Opening the cover of the front-access storage enclosure c. Open the handles on both sides of the hard disk drive bracket. Then, pull the bracket out of the front-access storage enclosure.
- Page 126 3. Locate the hard disk drive bay in which you want to install or replace a storage drive. See “Locating internal drives” on page 35. 4. Remove the storage drive bracket from the hard disk drive bay. See step 4 on page 113. ThinkStation P900 Hardware Maintenance Manual...
- Page 127 5. Depending on whether you are installing or replacing a storage drive, do one of the following: • If you are installing a storage drive, go to step 6. • If you are replacing a storage drive, flex the sides of the bracket to release the four pins from the storage drive.
- Page 128 4. Remove the storage drive bracket from the hard disk drive bay. See step 4 on page 113. 5. Depending on whether you are installing or replacing a storage drive, do one of the following: ThinkStation P900 Hardware Maintenance Manual...
- Page 129 • If you are installing a storage drive, pivot tab on the metal adapter upward. Then, push the adapter to the rear of the converter as shown until the four tabs on the adapter are slide into the four notches .
- Page 130 Note: Do not touch the circuit board (if accessible) of the 2.5-inch storage drive. Figure 23. Installing the storage drive into the adapter ThinkStation P900 Hardware Maintenance Manual...
- Page 131 7. Align the four tabs on the adapter with the corresponding notches in the converter. Then, slide the storage drive as shown until the tab snaps into position. The adapter with the storage drive is installed into the converter. Figure 24. Installing the adapter into the converter 8.
- Page 132 Locate the M.2 slot into which you want to install an M.2 solid-state drive on the flex adapter. Note: If the flex adapter is new, ensure that you install M.2 solid-state drives in the numerical order printed on the flex adapter (SLOT 1 and SLOT 2). ThinkStation P900 Hardware Maintenance Manual...
- Page 133 c. Remove the screw that is aligned with the M.2 slot. Figure 25. Removing the screw that is aligned with the M.2 slot • If you are replacing an M.2 solid-state drive, do the following: a. Remove the flex adapter. See “Installing or replacing a flex adapter” on page 146. b.
-
Page 134: Replacing The Cover Presence Switch (Intrusion Switch)
6. Pivot the tab on the cover presence switch bracket to the left as shown. Then, remove the bracket together with the cover presence switch from the chassis. Figure 28. Removing the cover presence switch bracket ThinkStation P900 Hardware Maintenance Manual... - Page 135 7. Pivot the clip on the bracket outward, and then disengage the failing cover presence switch from the circle clip to remove it from the bracket. Figure 29. Removing the cover presence switch from the bracket 8. Insert the end of the new cover presence switch with the post into the circle clip .
-
Page 136: Removing And Reinstalling The Direct Cooling Air Baffle
1. Remove all media from the drives and turn off all attached devices and the computer. Then, disconnect all power cords from electrical outlets and disconnect all cables that are connected to the computer. 2. Remove the computer cover. See “Removing the computer cover” on page 111. ThinkStation P900 Hardware Maintenance Manual... - Page 137 3. Pull the direct cooling air baffle outward by its handle to remove it from the chassis. Figure 32. Removing the direct cooling air baffle Chapter 11 Installing or replacing hardware...
-
Page 138: Removing And Installing A Device In An Optical Drive Bay
Attention: Do not open your computer or attempt any repair before reading and understanding the Chapter 1 “Read this first: Important safety information” on page 1. Depending on your computer model, the following devices might be installed in the optical drive bays: ThinkStation P900 Hardware Maintenance Manual... - Page 139 • Optical drive • Front-access storage enclosure • Flex module Note: The flex module might be installed with the following: – IEEE 1394 connector – eSATA connector – 29-in-1 card reader – Slim optical drive To remove and install a flex module and a front-access storage enclosure, follow the steps of removing and installing an optical drive.
- Page 140 To install or replace a slim optical drive in the flex module, do the following: 1. Remove the flex module out of the front of the computer. See “Removing and installing a device in an optical drive bay” on page 130. ThinkStation P900 Hardware Maintenance Manual...
- Page 141 2. Lift the clip on the rear of the flex module and slide the flex module cover to the rear of the flex module to remove the cover. Figure 36. Removing the flex module cover 3. If you are installing a new slim optical drive, go to step 4. If you are replacing an old slim optical drive, do the following: a.
- Page 142 Figure 39. Installing the plastic clip to the slim optical drive 5. Slide the new slim optical drive with the plastic clip into the flex module until the slim optical drive snaps into position. Figure 40. Installing the slim optical drive in the flex module ThinkStation P900 Hardware Maintenance Manual...
- Page 143 6. Position the flex module cover on the flex module so that the rail guides on the bottom of the flex module cover engage the rails on the flex module. Then, push the cover to the front of the flex module until it snaps into position.
- Page 144 4. To install the a new card reader into the card reader retaining bracket, align the four holes in the card reader with the corresponding studs on the bracket and then press the new card reader downward until it snaps into position. Figure 45. Installing the card reader into the card reader retaining bracket ThinkStation P900 Hardware Maintenance Manual...
- Page 145 5. Note the orientation of the new 29-in-1 card reader and route the card reader cable into the cable clip. Hold the clip on the card reader retaining bracket to insert the new card reader into the card reader slot in flex module until it snaps into position. Figure 46.
- Page 146 Press the two clips toward each other as shown to pull the eSATA connector or IEEE 1394 connector out of the flex module. Figure 49. Removing the eSATA connector or IEEE 1394 connector in the flex module ThinkStation P900 Hardware Maintenance Manual...
-
Page 147: Removing And Reinstalling The Multi-Function Brackets
4. Note the orientation of the eSATA connector or IEEE 1394 connector and route the eSATA connector or IEEE 1394 connector cable into the cable clip. 5. Place the eSATA connector or IEEE 1394 connector into the metal retainer. Then insert the eSATA connector or IEEE 1394 connector into the corresponding slot in the flex module as shown. - Page 148 7. Lay the computer on its side for easier access to the bracket. 8. Hold the handle and the foot at the same time and then pull the bracket to the rear of the chassis to remove the bracket. Figure 52. Removing the multi-function bracket ThinkStation P900 Hardware Maintenance Manual...
-
Page 149: Replacing The Front Fan Assemblies
9. Align the three tabs on the bracket with the corresponding holes in the chassis. Then, insert the three tabs into the corresponding holes until the bracket snaps into position. Figure 53. Reinstalling the multi-function bracket What to do next: •... - Page 150 Figure 55. Installing the front fan assembly What to do next: • To work with another piece of hardware, go to the appropriate section. • To complete the installation or replacement, go to “Completing the parts replacement” on page 183. ThinkStation P900 Hardware Maintenance Manual...
-
Page 151: Replacing The Power Supply Assembly
Replacing the power supply assembly Attention: Do not open your computer or attempt any repair before reading and understanding the Chapter 1 “Read this first: Important safety information” on page 1. Although there are no moving parts in your computer after the power cord has been disconnected, the following warnings are required for your safety and proper Underwriters Laboratories (UL) certification. - Page 152 Figure 57. Installing the power supply assembly What to do next: • To work with another piece of hardware, go to the appropriate section. • To complete the installation or replacement, go to “Completing the parts replacement” on page 183. ThinkStation P900 Hardware Maintenance Manual...
-
Page 153: Replacing The Battery
Replacing the battery Attention: Do not open your computer or attempt any repair before reading and understanding the Chapter 1 “Read this first: Important safety information” on page 1. Your computer has a special type of memory that maintains the date, time, and settings for built-in features, such as parallel-connector assignments (configuration). -
Page 154: Installing Or Replacing A Flex Adapter
1. If your computer is installed with two microprocessors, ensure you install flex adapters into the flex adapter slot 1 first, and then the flex adapter slot 2. 5. Depending on whether you are installing or replacing a flex adapter, do one of the following: ThinkStation P900 Hardware Maintenance Manual... - Page 155 • If you are installing a flex adapter, pivot the tab upward to open the latch inside the multi-function bracket. Figure 60. Opening the card latch • If your are replacing a failing flex adapter, pivot the tab upward to open the latch inside the multi-function bracket.
- Page 156 Ensure that the latch inside the multi-function bracket is closed. Figure 63. Closing the card latch 8. If a device only works with its cable connected to the flex adapter, connect the cable to the new flex adapter. ThinkStation P900 Hardware Maintenance Manual...
-
Page 157: Installing Or Replacing A Pci Card
What to do next: • To work with another piece of hardware, go to the appropriate section. • To complete the installation or replacement, go to “Completing the parts replacement” on page 183. Installing or replacing a PCI card Attention: Do not open your computer or attempt any repair before reading and understanding the Chapter 1 “Read this first: Important safety information”... - Page 158 The PCI card latch is opened. Figure 65. Opening the PCI card latch b. Remove the appropriate metal slot cover on the rear of the chassis. • If you are replacing a PCI card, do the following: ThinkStation P900 Hardware Maintenance Manual...
- Page 159 a. On the left of the PCI card slot, lift the handle until it stops, and then pivot it to the left until it stops. The PCI card latch is opened. Figure 66. Opening the PCI card latch Chapter 11 Installing or replacing hardware...
- Page 160 – The card fits tightly into the card slot. If necessary, alternate moving each side of the card a small amount until it is removed from the card slot. Figure 67. Removing the PCI card ThinkStation P900 Hardware Maintenance Manual...
- Page 161 7. To install a new PCI card, align the notch on the new PCI card with the slot key in the PCI card slot. Then, insert the new PCI card downward into the card slot until it is secured tightly. See “Locating parts on the system board”...
-
Page 162: Installing Or Replacing A Full-Length Pci Express Card
• PCI Express x16 graphics card slot Notes: • The full-length PCI Express card is available only in some models. • If you want to use an NVIDIA compute card, ensure that your computer also has an NVIDIA graphics card installed. ThinkStation P900 Hardware Maintenance Manual... - Page 163 To install or replace a full-length PCI Express card, do the following: 1. Remove all media from the drives and turn off all attached devices and the computer. Then, disconnect all power cords from electrical outlets and disconnect all cables that are connected to the computer. 2.
- Page 164 Figure 71. Opening PCI card latches b. Remove the metal slot cover of the PCI card slot on the rear of the chassis. • If you are replacing a full-length PCI Express card, do the following: ThinkStation P900 Hardware Maintenance Manual...
- Page 165 a. On the right of the PCI card slot, pivot the tab outward until it stops. The card latch opened. On the left of the PCI card slot, lift the handle until it stops, and then pivot it to the left until it stops.
- Page 166 Figure 73. Removing the full-length PCI Express card ThinkStation P900 Hardware Maintenance Manual...
- Page 167 7. To install a new full-length PCI Express card, align the notch on the new full-length PCI Express card with the slot key in the PCI card slot. Then, insert the new card downward into the card slot until it is secured tightly.
-
Page 168: Installing Or Replacing The Super Capacitor Module
2. Remove the computer cover. See “Removing the computer cover” on page 111. 3. Lay the computer on its side for easier access to the super capacitor module. ThinkStation P900 Hardware Maintenance Manual... - Page 169 4. Locate the PCI Express card slot in which you want to install or replace the super capacitor module. See “Locating parts on the system board” on page 34. 5. If necessary, remove the direct cooling air baffle for easier operation. See “Removing and reinstalling the direct cooling air baffle”...
- Page 170 Figure 78. Connecting the cable of the super capacitor module to the RAID card 11. Reinstall the direct cooling air baffle if you have removed it. See “Removing and reinstalling the direct cooling air baffle” on page 128. ThinkStation P900 Hardware Maintenance Manual...
-
Page 171: Installing Or Replacing A Memory Module
12. If you are instructed to return the failing super capacitor module, follow all packaging instructions and use any packaging materials that are supplied to you for shipping. What to do next: • To work with another piece of hardware, go to the appropriate section. •... - Page 172 Figure 80. Opening retaining clips • If you are replacing a memory module, open the retaining clips and gently pull the memory module out of the memory slot. Figure 81. Removing the memory module ThinkStation P900 Hardware Maintenance Manual...
-
Page 173: Replacing The Heat Sink And Fan Assemblies
7. To install a new memory module, position the new memory module over the memory slot. Ensure that the notch on the memory module aligns correctly with the slot key on the system board. Push the memory module straight down into the slot until the retaining clips close. Note: Do not touch the circuit board of the memory module. - Page 174 12. Reinstall the direct cooling air baffle. See “Removing and reinstalling the direct cooling air baffle” on page 128. What to do next: • To work with another piece of hardware, go to the appropriate section. ThinkStation P900 Hardware Maintenance Manual...
-
Page 175: Replacing The Rear Fan Assembly
• To complete the installation or replacement, go to “Completing the parts replacement” on page 183. Replacing the rear fan assembly Attention: Do not open your computer or attempt any repair before reading and understanding the Chapter 1 “Read this first: Important safety information” on page 1. CAUTION: Hazardous moving parts. -
Page 176: Installing Or Replacing The Microprocessor
2 is protected by a plastic socket cover. CAUTION: The heat sink and microprocessor might be very hot. Before you open the computer cover, turn off the computer and wait several minutes until the computer is cool. ThinkStation P900 Hardware Maintenance Manual... - Page 177 Notes: • Ensure that you install the correct type of microprocessor option your computer supports. When two microprocessors are installed, both must be identical. • For E5-1600 v3 series microprocessors, the computer can support only one installed. If you want to install two microprocessors into your computer, use the E5-2600 v3 series microprocessors.
- Page 178 9. Remove the new microprocessor from the protective cover that protects the gold contacts on the bottom of the new microprocessor. Do not touch the pins on the microprocessor socket or the gold contacts on the bottom of the new microprocessor. Figure 88. Do not touch the pins ThinkStation P900 Hardware Maintenance Manual...
- Page 179 10. Note the orientation of the new microprocessor. Hold the new microprocessor by its edges and align the notches on it with the tabs in the microprocessor socket. Then, carefully lower the new microprocessor straight down into the microprocessor socket. Note: The small triangle on one corner of the new microprocessor is the microprocessor orientation indicator.
-
Page 180: Replacing A Microprocessor
• To complete the installation or replacement, go to “Completing the parts replacement” on page 183. Replacing a microprocessor Attention: Do not open your computer or attempt any repair before reading and understanding the Chapter 1 “Read this first: Important safety information” on page 1. ThinkStation P900 Hardware Maintenance Manual... - Page 181 This section provides instructions on how to replace a microprocessor. Depending on the model, your computer might come with one or two microprocessors. For computer models with one microprocessor, the microprocessor is installed in the microprocessor socket 1 and the microprocessor socket 2 is protected by a plastic socket cover.
- Page 182 Figure 93. Opening the handles 8. Gently press down the small handle to open the microprocessor retainer. Pivot the retainer upward until it is in the fully open position. Figure 94. Opening the microprocessor retainer ThinkStation P900 Hardware Maintenance Manual...
- Page 183 9. Lift the microprocessor straight up and out of the microprocessor socket. Place the old microprocessor on a static-protective surface. Notes: • Your microprocessor and socket might look different from the one illustrated. • Touch only the edges of the microprocessor. Do not touch the gold contacts on the bottom. •...
- Page 184 The new microprocessor is in the correct orientation when this indicator faces the beveled corner of the microprocessor socket. Figure 97. Installing the microprocessor 13. Pivot the microprocessor retainer downward to close the retainer. Figure 98. Closing the microprocessor retainer ThinkStation P900 Hardware Maintenance Manual...
-
Page 185: Replacing The System Board
14. Gently press down the small handle and then push the handle inward to secure it. Then gently press down the small handle and push the handle inward to lock the microprocessor retainer into position. Ensure that the new microprocessor is secured in the socket. Note: There are two marks on the microprocessor retainer. - Page 186 Note: Carefully handle the system board by its edges. Figure 100. Removing the system board 16. Remove the microprocessor from the failing system board, and then install it onto the new system board. See “Installing or replacing the microprocessor” on page 168. ThinkStation P900 Hardware Maintenance Manual...
- Page 187 17. To install the new system board, position the new system board in the chassis so that the twelve mounting studs on the bottom of the system board align with the corresponding holes in the chassis. Then, push the new system board toward the rear of the computer until it snaps into position. Ensure that the system board is secured by the metal retainer.
- Page 188 , and then push the handle inward to secure it. Then gently press down the small handle and push the handle inward to lock the microprocessor retainer into position. Figure 103. Securing the microprocessor in the socket ThinkStation P900 Hardware Maintenance Manual...
-
Page 189: Replacing The Internal Speaker
3. Align the small triangle on one corner of the microprocessor socket cover with the alignment key on the microprocessor socket. Lower the socket cover straight down into the microprocessor socket on the system board. Figure 104. Installing the microprocessor socket cover What to do next: •... - Page 190 34. 9. Reinstall the system board. See “Replacing the system board” on page 177. 10. Reinstall the direct cooling air baffle. See “Removing and reinstalling the direct cooling air baffle” on page 128. ThinkStation P900 Hardware Maintenance Manual...
-
Page 191: Replacing The Keyboard Or Mouse
What to do next: • To work with another piece of hardware, go to the appropriate section. • To complete the installation or replacement, go to “Completing the parts replacement” on page 183. Replacing the keyboard or mouse Attention: Do not open your computer or attempt any repair before reading and understanding the Chapter 1 “Read this first: Important safety information”... -
Page 192: Obtaining Device Drivers
7. To update your configuration, refer to “Using the Setup Utility program” on page 65. Note: In most areas of the world, Lenovo requires the return of the defective Customer Replaceable Unit (CRU). Information about this will come with the CRU or will come a few days after the CRU arrives. -
Page 193: Chapter 12. Getting Information, Help, And Service
You can use the information in this section to access useful resources relating to your computing needs. Lenovo ThinkVantage Tools The Lenovo ThinkVantage Tools program provides easy access to various tools to help you work more easily and securely. To access the Lenovo ThinkVantage Tools program, click Start ➙ All Programs ➙ Lenovo ThinkVantage Tools. -
Page 194: Lenovo Support Web Site
Most computers come with a diagnostic program that help you identify hardware problems. You can also get the latest technical information and download device drivers and updates from Lenovo Support Web site at: http://www.lenovo.com/support... -
Page 195: Using Other Services
• Replacement or use of parts not manufactured for or by Lenovo or non-warranted Lenovo parts • Identification of software problem sources • Configuration of BIOS as part of an installation or upgrade • Changes, modifications, or upgrades to device drivers •... - Page 196 Service availability and service name might vary by country or region. For more information about these services, go to the Lenovo Web site at: http://www.lenovo.com ThinkStation P900 Hardware Maintenance Manual...
-
Page 197: Chapter 13. System Memory Speed
Intel Xeon E5-2699 v3, E5-2698 v3, E5-2697 v3, E5-2695 V3, E5-2690 v3, E5-2685 v3, E5-2683 v3, E5-2680 v3, 1.2 V 2133 MHz E5-2670 v3, E5-2667 v3, E5-2660 v3, E5-2650 v3, E5-2643 v3, E5-2637 v3, E5-2650L v3, E5-1680 v3, E5-1660 © Copyright Lenovo 2014... - Page 198 E5-1650 v3, E5-1630 v3, E5-1620 1.2 V Intel Xeon E5-2640 v3, E5-2630 v3, E5-2623 v3, E5-2620 v3, E5-2630L 1866 MHz v3, E5-1607 v3, E5-1603 v3 1.2 V Intel Xeon E5-2609 v3, E5-2603 v3 1600 MHz ThinkStation P900 Hardware Maintenance Manual...
-
Page 199: Appendix A. Regulatory Information
• Consult an authorized dealer or service representative for help. Lenovo is not responsible for any radio or television interference caused by using other than specified or recommended cables and connectors or by unauthorized changes or modifications to this equipment. - Page 200 Geräte der Klasse B. Dieses Gerät ist berechtigt, in Übereinstimmung mit dem Deutschen EMVG das EG-Konformitätszeichen - CE - zu führen. Verantwortlich für die Konformitätserklärung nach Paragraf 5 des EMVG ist die Lenovo (Deutschland) GmbH, Gropiusplatz 10, D-70563 Stuttgart. Informationen in Hinsicht EMVG Paragraf 4 Abs. (1) 4: Das Gerät erfüllt die Schutzanforderungen nach EN 55024 und EN 55022 Klasse B.
-
Page 201: Eurasian Compliance Mark
All regulatory notices are available on the Lenovo Support Web site in electronic format. To access electronic copies of the documentation, go to http://www.lenovo.com/UserManuals. - Page 202 ThinkStation P900 Hardware Maintenance Manual...
-
Page 203: Appendix B. Weee And Recycling Information
Collecting and recycling a disused Lenovo computer or monitor If you are a company employee and need to dispose of a Lenovo computer or monitor that is the property of the company, you must do so in accordance with the Law for Promotion of Effective Utilization of Resources. -
Page 204: Recycling Information For Brazil
If you need to replace it with a new one, contact your place of purchase or contact Lenovo for service. If you need to dispose of a disused lithium battery, insulate it with vinyl tape, contact your place of purchase or an industrial-waste-disposal operator, and follow their instructions. - Page 205 Customer participation is important to minimize any potential effects of batteries and accumulators on the environment and human health due to the potential presence of hazardous substances. For proper collection and treatment, go to: http://www.lenovo.com/recycling Appendix B. WEEE and recycling information...
- Page 206 ThinkStation P900 Hardware Maintenance Manual...
-
Page 207: Appendix C. Restriction Of Hazardous Substances Directive (Rohs)
(RoHS) European Union RoHS Lenovo products sold in the European Union, on or after 3 January 2013 meet the requirements of Directive 2011/65/EU on the restriction of the use of certain hazardous substances in electrical and electronic equipment (“RoHS recast” or “RoHS 2”). -
Page 208: Ukraine Rohs
Ukraine RoHS India RoHS RoHS compliant as per E-Waste (Management & Handling) Rules, 2011. ThinkStation P900 Hardware Maintenance Manual... -
Page 209: Appendix D. Energy Star Model Information
For more information about ENERGY STAR, go to: http://www.energystar.gov Lenovo encourages you to make efficient use of energy an integral part of your day-to-day operations. To help in this endeavor, set the following power-management features to take effect when your computer has been inactive for a specified duration: Table 6. - Page 210 ThinkStation P900 Hardware Maintenance Manual...
-
Page 211: Appendix E. Notices
Lenovo representative for information on the products and services currently available in your area. Any reference to a Lenovo product, program, or service is not intended to state or imply that only that Lenovo product, program, or service may be used. Any functionally equivalent product, program, or service that does not infringe any Lenovo intellectual property right may be used instead. -
Page 212: Trademarks
Trademarks The following terms are trademarks of Lenovo in the United States, other countries, or both: Lenovo Rescue and Recovery The Lenovo logo The ThinkStation logo ThinkStation ThinkVantage Microsoft, Windows, and Windows Media are trademarks of the Microsoft group of companies. -
Page 213: Index
30–31 replacing computer cover flex module removing installing computer cover, reinstalling removing connector front connectors connectors, controls, indicators rear front fan assembly connectors, controls, indicators replacing front front-access storage enclosure considerations, passwords installing © Copyright Lenovo 2014... - Page 214 PCI Express solid-state drive cleaning storage drive Optional-service CRUs super capacitor module installing options memory module internal drives internal speaker part numbers v, 31 replacing parts replacement, completing internal storage drive password installing Administrator ThinkStation P900 Hardware Maintenance Manual...
- Page 215 3.5-inch hard disk drive super capacitor module 3.5-inch hybrid drive installing 3.5-inch storage drive replacing battery system cover presence switch (intrusion switch) programs flex adapter system board front fan assembly connectors full-length PCI Express locating parts © Copyright Lenovo 2014...
- Page 216 BIOS USB 2.0 connector USB 3.0 connector using a rescue medium, creating and BIOS passwords diagnostic program documentation other services Setup Utility video features viewing and changing settings warranty information workspace, backup and recovery ThinkStation P900 Hardware Maintenance Manual...
Need help?
Do you have a question about the ThinkStation P900 and is the answer not in the manual?
Questions and answers