
Subscribe to Our Youtube Channel
Related Manuals for Dell Alienware Graphics Amplifier


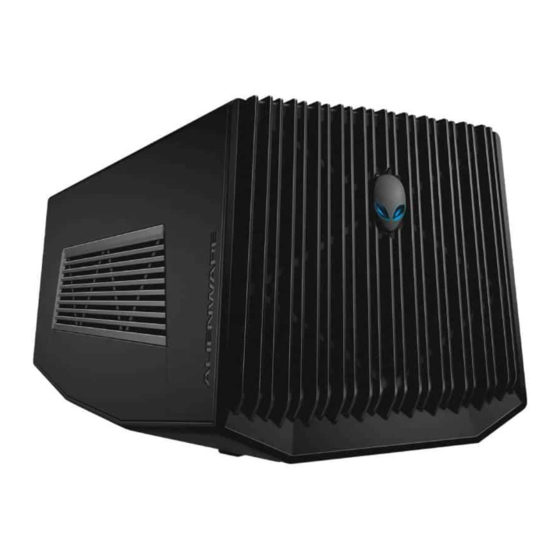
Summary of Contents for Dell Alienware Graphics Amplifier
- Page 1 Alienware Graphics Amplifier User’s Guide Regulatory Model: Z01G Regulatory Type: Z01G001...
- Page 2 WARNING: A WARNING indicates a potential for property damage, personal injury, or death. Copyright © 2014 Dell Inc. All rights reserved. This product is protected by U.S. and international copyright and intellectual property laws. Dell and the Dell logo are trademarks ™...
-
Page 3: Table Of Contents
Using the Alienware Graphics Amplifier........13 ................14 Installing the Graphics Card ................21 Removing the Graphics Card Setting Up Your Alienware Graphics Amplifier....27 .................. 29 Computer is Turned On Disconnecting Alienware Graphics Amplifier...... 31 ....32 Alternate Methods to Disconnect Alienware Graphics Amplifier ................32... - Page 4 Troubleshooting................ 35 Getting Help and Contacting Alienware.......36 ..................36 Self-Help Resources ..................36 Contacting Alienware...
-
Page 5: Before Working Inside Your Alienware Graphics Amplifier
WARNING: Before working inside your device, read the safety information that ships with your device. For more safety best practices, see the Regulatory Compliance home page at dell.com/ regulatory_compliance. WARNING: Disconnect all power sources before opening the device cover or panels. -
Page 6: Recommended Tools
CAUTION: Only a certified service technician is authorized to remove the device cover and access any of the components inside the device. See the safety instructions for complete information about safety precautions, working inside your device, and protecting against electrostatic discharge. CAUTION: Before touching anything inside your device, ground yourself by touching an unpainted metal surface, such as the metal at the back of the device. -
Page 7: After Working Inside Your Alienware Graphics Amplifier
After Working Inside Your Alienware Graphics Amplifier CAUTION: Leaving stray or loose screws inside your device may severely damage your device. Replace all screws and make sure that no stray screws remain inside your device. Connect any external devices, peripherals, and cables you removed before working on your device. -
Page 8: Views
Views This chapter lists out the features available on your Alienware Graphics Amplifier. Front View AlienHead/Docking status light Service Tag/Regulatory labels... -
Page 9: Back View
Back View Release latch Power port Power-supply diagnostic button 4 Power-supply status light USB 3.0 ports (4) External graphics port Graphics-card slot... -
Page 10: Graphics Cable
Graphics Cable Release clips (2) Undock button Docking status light Graphics cable... -
Page 11: Specifications
Specifications Dimensions and Weight Width 138 mm (5.43 in) Height 150 mm (5.90 in) Depth 375 mm (14.76 in) Ports and Connectors External: USB 3.0 ports (4) Video One external graphics port Internal: Graphics Card Graphics-card slot Device Environment Feature Specification Temperature range: Operating... - Page 12 Device Environment Feature Specification Altitude: Operating –15.20 m to 3048 m (–50 ft to 10,000 ft) Storage –15.20 m to 10,668 m (–50 ft to 35,000 ft) Airborne contaminant level G1 as defined by ISA-S71.04-1985...
-
Page 13: Using The Alienware Graphics Amplifier
Using the Alienware Graphics Amplifier This section will provide procedures on how to install and uninstall the Graphics card. WARNING: Disconnect all cables before working inside your device. CAUTION: Handle the components with care. Hold the graphics card at its edges. -
Page 14: Installing The Graphics Card
Installing the Graphics Card NOTE: The graphics card is sold separately. Slide the release latch to release the cover. release latch cover... - Page 15 Lift the cover and open it as far as possible. cover Remove the screws that secure the graphics card fillers to the chassis. NOTE: Remove only one filler if you are installing a single width graphics card.
- Page 16 Lift the graphics card fillers away from the chassis. screws (2) graphics card fillers (2)
- Page 17 Disconnect the power cables from the slots on the device. power cables (2) slots (2) Align the connector on the graphics card with the slot on the system board and press down the card until it locks into position.
- Page 18 Replace the screws that secure the graphics card to the chassis. screws (2) graphics card...
- Page 19 Connect the power cables to the power-cable connectors on the graphics card. NOTE: The location of the power-cable connectors may be different on your graphics card. power cables (2) power-cable connectors...
- Page 20 Close the cover and press down until it locks into position. cover...
-
Page 21: Removing The Graphics Card
Removing the Graphics Card Slide the release latch to release the cover. release latch cover... - Page 22 Lift the cover and open it as far as possible. cover...
- Page 23 Press the tabs and disconnect the power cables from the graphics card. power cables (2) tabs (2) Remove the screws that secure the graphics card to the chassis. Press the release latch to release the graphics card from the slot on the system board.
- Page 24 Lift the graphics card away from the chassis. release latch screws (2) graphics card Slide the graphics card fillers into the slots on the graphics card. Replace the screws that secure the graphics card fillers to the chassis.
- Page 25 Connect the power cables to the slots on the device. screws (2) graphics card fillers...
- Page 26 10 Close the cover and press down until it locks into position. cover...
-
Page 27: Setting Up Your Alienware Graphics Amplifier
Setting Up Your Alienware Graphics Amplifier Install the graphics card. See “Installing the Graphics Card”. Connect the power cable to the power port on the Alienware graphics amplifier. power port power cable... - Page 28 NOTE: It is recommended to shut down the computer and connect the Graphics cable from the Alienware Graphics Amplifier to your computer and then powering on the computer to dock with the graphics amplifier. Press the release clips and connect one end of the graphics cable to the external graphics port on the Alienware graphics amplifier.
-
Page 29: Computer Is Turned On
NOTE: Shut down your computer before you connect the graphics cable. Press the release clips and connect the other end of the graphics cable to the external graphics port on your computer. The light on the graphics cable turns on indicating the Alienware Graphics Amplifier is connected and ready to use. - Page 30 NOTE: For the location of the external graphics port, see the documentation that shipped with your computer. The AlienHead logo on the Alienware Graphics Amplifier lights up and a dialog box appears on the computer asking you to restart the computer.
-
Page 31: Disconnecting Alienware Graphics Amplifier
Disconnecting Alienware Graphics Amplifier CAUTION: Do not disconnect the graphics cable until the computer has shut down and the light on the graphics cable has turned off. Save and close all open files and exit all open applications. Shut down your computer. CAUTION: Do not disconnect the graphics cable until the computer has shut down and the light on the graphics cable has turned off. -
Page 32: Alternate Methods To Disconnect Alienware Graphics Amplifier
Alternate Methods to Disconnect Alienware Graphics Amplifier CAUTION: Do not disconnect the graphics cable until the computer has shut down and the light on the graphics cable has turned off. Using Keyboard Shortcut Save and close all open files and exit all open applications. -
Page 33: Undock Button Settings
Undock Button Settings This section will provide procedure on how to set the computer’s behavior when the undock button on the graphics cable is pressed. Launch AlienAdrenaline. Windows 8.1: a) On the Start screen, browse to Apps and click the Alienware Command Center tile. -
Page 34: Installing The Alienware Graphics Amplifier Software
NOTE: If the Alienware Graphics Amplifier software or Alienware Command Center is not available on your computer, you can download and install it from the support website. To download and install the Alienware Graphics Amplifier software, follow the instructions below: Turn on the computer. -
Page 35: Troubleshooting
Solution Graphics card is not detected Download and install the latest driver for the video card installed in the Alienware Graphics Amplifier. For more information, see the document that came with the video card you purchased. NOTE: The graphics card is sold separately. -
Page 36: Self-Help Resources
NOTE: If you do not have an active internet connection, you can find contact information on your purchase invoice, packing slip, bill, or Dell product catalog. NOTE: If you are in the United States, call 1-800-ALIENWARE for help...
Need help?
Do you have a question about the Alienware Graphics Amplifier and is the answer not in the manual?
Questions and answers