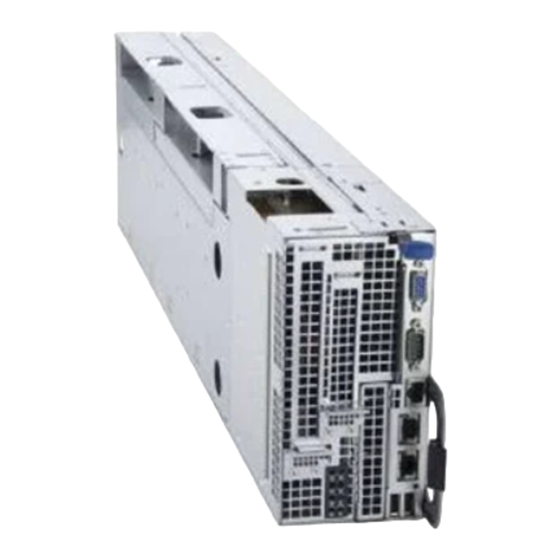
Dell PowerEdge C8220X Installation Manual
Xeon phi 5110p/7120p mic card
Hide thumbs
Also See for PowerEdge C8220X:
- Hardware owner's manual (378 pages) ,
- Installation manual (16 pages) ,
- Getting started (430 pages)

Related Manuals for Dell PowerEdge C8220X


Summary of Contents for Dell PowerEdge C8220X
- Page 1 C8220X_MIC5110P7120P_IG.book Page 1 Monday, August 12, 2013 5:42 PM Dell PowerEdge C8220X Xeon Phi 5110P/7120P MIC Card Installation Guide Regulatory Model: B06B Regulatory Type: B06B001...
- Page 2 Reproduction of these materials in any manner whatsoever without the written permission of Dell Inc. is strictly forbidden. Trademarks used in this text: Dell™, the DELL logo, and PowerEdge™ are trademarks of Dell Inc. Intel®, Xeon®, and Intel® Xeon Phi™ are trademarks of Intel Corporation in the U.S. and/or other countries.
-
Page 3: Table Of Contents
C8220X_MIC5110P7120P_IG.book Page 3 Monday, August 12, 2013 5:42 PM Contents Important Safety Information ..... Recommended Tools ......Information You May Need . - Page 4 C8220X_MIC5110P7120P_IG.book Page 4 Monday, August 12, 2013 5:42 PM Contents...
-
Page 5: Important Safety Information
C8220X_MIC5110P7120P_IG.book Page 5 Monday, August 12, 2013 5:42 PM Important Safety Information Observe the following safety precautions when installing Intel Xeon Phi 5110P/7120P Many Integrated Core (MIC) cards in the PowerEdge C8220X sled. WARNING: Working on systems that are still connected to a power supply can be extremely dangerous. -
Page 6: Information You May Need
PowerEdge C8220X Hardware Owner’s Manual. Place the sled on a flat, stable surface. Open the sled. For detailed information on opening the sled, see the PowerEdge C8220X Hardware Owner’s Manual. Remove the five M3 screws securing the top cover. -
Page 7: Installing The Front Xeon Phi 5110P/7120P Mic Card
C8220X_MIC5110P7120P_IG.book Page 7 Monday, August 12, 2013 5:42 PM Installing the Front Xeon Phi 5110P/7120P MIC card Remove the four M3 screws securing the air baffles. Lift the air baffles out of the sled cover. Figure 1-2. Removing the Air Baffles M3 screws (4) right air baffle left air baffle... - Page 8 C8220X_MIC5110P7120P_IG.book Page 8 Monday, August 12, 2013 5:42 PM Align the right air baffle with the screw holes on the front of the sled cover. Secure the right air baffle to the sled cover using the two M3 screws. Tighten the screws to 5.21 in-lbs.
- Page 9 C8220X_MIC5110P7120P_IG.book Page 9 Monday, August 12, 2013 5:42 PM Align the front mounting bracket with the screw holes on the left of the MIC card and secure with four M3 screws. Tighten the screws to 5.21 in-lbs. Align the back mounting bracket with the screw holes on the right of the MIC card and secure with four M3 screws.
- Page 10 C8220X_MIC5110P7120P_IG.book Page 10 Monday, August 12, 2013 5:42 PM Align and insert the MIC card assembly into the front GPGPU card riser connector until the card is fully seated. Secure the MIC card to the front of the sled cover using the four M3 screws, working in a clockwise sequence.
-
Page 11: Installing The Back Xeon Phi 5110P/7120P Mic Card
C8220X_MIC5110P7120P_IG.book Page 11 Monday, August 12, 2013 5:42 PM Installing the Back Xeon Phi 5110P/7120P MIC card Release the cables from the retaining clips and slightly lift the cables to access the screws on the sled cover. Figure 1-10. Releasing the Power Cables power cables Remove the four M3 screws securing the air baffles. - Page 12 C8220X_MIC5110P7120P_IG.book Page 12 Monday, August 12, 2013 5:42 PM Remove the four M3 screws securing the mounting brackets. Lift the mounting brackets away from the GPGPU blank. Save the mounting brackets. Lift the GPGPU blank out of the sled cover. Save the GPGPU blank for future use. NOTE: Be careful not to damage the twin axial cable on the back GPGPU card riser when removing the top cover.
- Page 13 C8220X_MIC5110P7120P_IG.book Page 13 Monday, August 12, 2013 5:42 PM Remove the four screws securing the MIC card bracket. Lift the bracket from the MIC card. Save the bracket for future use. Figure 1-14. Removing the MIC Card Bracket screws (4) MIC card bracket MIC card Align the front mounting bracket with the screw holes on the left of the MIC card and secure...
- Page 14 C8220X_MIC5110P7120P_IG.book Page 14 Monday, August 12, 2013 5:42 PM Connect the power cables to the MIC card. Ensure the cables are properly attached. See Figure 1-19 for the cable routing diagram. Figure 1-16. Connecting the Power Cables 1, 2 power cables Align and insert the MIC card assembly into the back GPGPU card riser connector until the card is fully seated.
- Page 15 C8220X_MIC5110P7120P_IG.book Page 15 Monday, August 12, 2013 5:42 PM Align the left air baffle with the screw holes on the back of the sled cover. Secure the left air baffle to the sled cover using the two M3 screws. Tighten the screws to 5.21 in-lb.
-
Page 16: Cable Routing Diagram
C8220X_MIC5110P7120P_IG.book Page 16 Monday, August 12, 2013 5:42 PM Cable Routing Diagram NOTE: Route the cables properly inside the sled to prevent the cables from being pinched or crimped. Figure 1-19. Cable Routing for Front and Back Xeon Phi 5110P/7120P MIC Card Assembly Installation Guide... - Page 17 C8220X_MIC5110P7120P_IG.book Page 17 Monday, August 12, 2013 5:42 PM power/emergency throttling connector on power connector on front GPGPU card front GPGPU card riser riser power/emergency throttling connector on power connector on back GPGPU card back GPGPU card riser riser twin axial cable on back GPGPU twin axial cable connector on system card riser board...
- Page 18 C8220X_MIC5110P7120P_IG.book Page 18 Monday, August 12, 2013 5:42 PM Installation Guide...
- Page 19 C8220X_MIC5110P7120P_IG.book Page 19 Monday, August 12, 2013 5:42 PM...
- Page 20 C8220X_MIC5110P7120P_IG.book Page 20 Monday, August 12, 2013 5:42 PM Printed in the U.S.A. ww w.d el l .c o m | s up p or t . de l l. c o m...