
Related Manuals for BOXLIGHT CD-454m


Summary of Contents for BOXLIGHT CD-454m
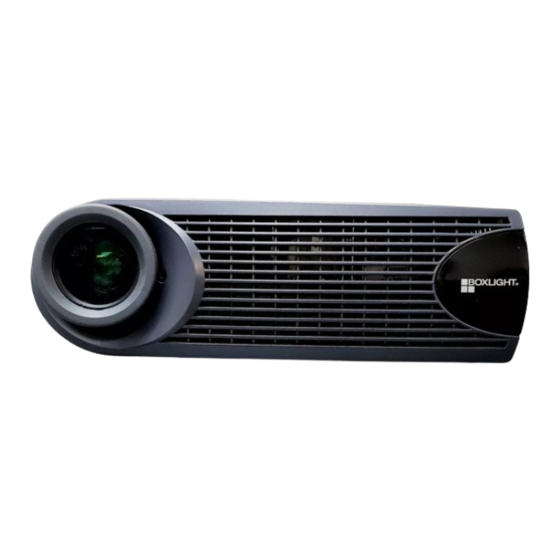
- Page 1 Copyright © 2001 by B OXLIGHT Poulsbo, Washington. All rights reserved. Downloaded From projector-manual.com Boxlight Manuals...
- Page 2 This is a Class A product. In a domestic environment it may cause radio interfer- ence, in which case the user may be required to take adequate measures. The typ- ical use is in a conference room, meeting room or auditorium. Downloaded From projector-manual.com Boxlight Manuals...
- Page 3 Declaration of Conformity Manufacturer: B OXLIGHT 19332 Powder Hill Place, Poulsbo, Washington, USA We declare under our sole responsibility that the CD-454m/455m/555m projec- tors conform to the following directives and norms: Directive 89/336/EEC, Amended by 93/68/EEC EMC: EN 55022 EN 55024...
- Page 4 Downloaded From projector-manual.com Boxlight Manuals...
-
Page 5: Table Of Contents
Using the On-Screen Menus Display Menu Audio Menu Image Menu Controls Menu Language Menu Status Menu Maintenance & Troubleshooting Cleaning the Lens Replacing the Projection Lamp Replacing the Batteries in the Remote Control Using the Security Lock Troubleshooting Downloaded From projector-manual.com Boxlight Manuals... - Page 6 Appendix Specifications Accessories Portable and Laptop Activation Chart Using Video Mirroring with a PowerBook Computer Projected Image Size Index Downloaded From projector-manual.com Boxlight Manuals...
-
Page 7: Safety Instructions
Warning: Refer all service to qualified service personnel. Ser- • vicing your own projector will void the warranty. See the fol- lowing page for the customer service contact information. Caution: Don’t block ventilation openings. • Downloaded From projector-manual.com Boxlight Manuals... - Page 8 Do not place objects in this area behind the projector Customer Service If you need assistance, call B 1-800-762-5757 OXLIGHT 360-779-7901 Downloaded From projector-manual.com Boxlight Manuals...
-
Page 9: Introduction
They generate crisp, clear images using Digital Light Process- ing™ (DLP) technology. They are easy to connect, easy to use, easy to transport, and easy to maintain. The CD-454m and CD-455m have native SVGA 800x600 resolution, the CD-555m has XGA 1024x768 resolution. The user interfaces of the products are identical except where noted;... -
Page 10: Compatibility
If you are experienced in setting up presentation systems, use the Quick Start card that was included in the shipping box. For com- plete details on connecting and operating the projector, refer to this User’s Guide. Downloaded From projector-manual.com Boxlight Manuals... - Page 11 IGURE Shipping box contents Projector + lens cap Computer cable Soft carry case Audio cable adapter User’s Guide and quick start Audio cable card Power cord Composite video cable Remote control Downloaded From projector-manual.com Boxlight Manuals...
-
Page 12: Usage Guidelines
If this happens, allow it to reach room temperature before use. Transport the projector in a vendor-approved hard or soft case. • Part numbers for these cases are listed on page 43. Downloaded From projector-manual.com Boxlight Manuals... -
Page 13: If You Need Assistance
If this manual doesn’t answer your question, call B OXLIGHT 1-800-762-5757 360-779-7901 Warranty This product is backed by a limited two-year warranty. The details of the warranty are printed at the back of this manual. Downloaded From projector-manual.com Boxlight Manuals... - Page 14 Downloaded From projector-manual.com Boxlight Manuals...
-
Page 15: Setting Up The Projector
“Projected Image Size” on jection screen. page 50. 20 ft. 12 ft. 5 ft. 6,1 m 3,66 m 1,5 m IGURE Projected image size at minimum zoom 3 Make sure the projector and the computer are turned off. Downloaded From projector-manual.com Boxlight Manuals... - Page 16 USB mouse connection hub containing mouse, audio, monitor and computer connectors. It is optimized for to projector to computer ceiling -mounted installations. See “Optional Accessories” on IGURE Computer cable page 43. Downloaded From projector-manual.com Boxlight Manuals...
-
Page 17: Connecting A Computer
NOTE: If you are connecting an older Macintosh computer that does not have a 15-pin connector, you must use a Mac adaptor between the computer and the projector. See “Optional Accesso- ries” on page 43. Downloaded From projector-manual.com Boxlight Manuals... - Page 18 Now you’re ready to power up the projector and your laptop. your computer after connecting a Skip to “Powering up the Projector and Adjusting the Image” on USB mouse to use it (it is hot- page 13. pluggable). Downloaded From projector-manual.com Boxlight Manuals...
-
Page 19: Connecting A Video Player
(Figure 8). audio adapter composite video cable audio cable IGURE Connecting the projector to a video player using the standard video cable (with com- posite video connector) and the audio cable and adapter Downloaded From projector-manual.com Boxlight Manuals... - Page 20 CAUTION: Your video player SECAM. It automatically adjusts to optimize its performance for may also have a “Video Out” the incoming video. connector for a coaxial cable connection. DO NOT use this to connect to the projector. Downloaded From projector-manual.com Boxlight Manuals...
-
Page 21: Powering Up The Projector And Adjusting The Image
Refer to your button on the keypad or remote, then select the Dis- menu computer’s documentation to play or Image menu. For more information about the determine the correct order. menus, see page 20. Downloaded From projector-manual.com Boxlight Manuals... -
Page 22: Turning Off The Projector
NOTE: To maximize lamp life, about a minute for the lamp to cool. The lamp won’t light if it’s allow the projector to run for at too hot. least five minutes before turning it off. Downloaded From projector-manual.com Boxlight Manuals... -
Page 23: Using The Projector
25 feet. If you point the remote at the projection screen, the distance to the screen and back to the projector must be less than or equal to 25 feet. For best results, point the remote directly at the projector. Downloaded From projector-manual.com Boxlight Manuals... - Page 24 Slide Show section, then click OK. Then, when you’re in Power- Point’s Slide Show mode, a left click advances to the next slide and a right click returns to the previous slide (other PowerPoint modes are not affected). Downloaded From projector-manual.com Boxlight Manuals...
-
Page 25: Adjusting The Projector
If necessary, turn the leveling knob at the rear of the projector to adjust the angle of the projected image. leveling elevator foot knob elevator button (under finger) IGURE Adjusting the height of the projector Downloaded From projector-manual.com Boxlight Manuals... -
Page 26: Using The Keypad And Remote Buttons
Computer and Video (remote only) When you have more than one source (computer and video) con- nected to the projector, select between them by pressing the button on the keypad or the button on source computer video the remote. Downloaded From projector-manual.com Boxlight Manuals... - Page 27 The LED lights orange while the projector is in standby. Volume (keypad only) To increase the volume, press To decrease the vol- volume + ume, press volume - Volume adjustments are saved for each source you have con- nected. Downloaded From projector-manual.com Boxlight Manuals...
-
Page 28: Using The On-Screen Menus
Standby Time, consist of options you scroll through to select the desired one. All changes are saved when you close the menus. To access another menu, use the left and right navigation buttons to move to the desired menu. Downloaded From projector-manual.com Boxlight Manuals... -
Page 29: Display Menu
The tint adjusts the red-green color balance in the projected image. Press the left mouse button to increase the amount of green in • the image. Press the right mouse button to increase the amount of red in • the image. Downloaded From projector-manual.com Boxlight Manuals... - Page 30 Reset All Click the left or right mouse button to reset all the options (except Language, Video Standard, Rear and Ceiling Projection, Plug and Play, and Standby Time) in all the menus to their original settings. Downloaded From projector-manual.com Boxlight Manuals...
-
Page 31: Audio Menu
The bass setting controls the low frequencies of your audio source. Press the left mouse button to decrease the bass. • Press the right mouse button to increase the bass. • Bass adjustments you make are saved for each source. Downloaded From projector-manual.com Boxlight Manuals... -
Page 32: Image Menu
To adjust the keystone, highlight Keystone, then click the left or right mouse button. This option is available for computer sources displaying their native resolutions only, SVGA 800x600 for the CD-454m/455m and XGA 1024x768 for the CD-555m. Overscan... - Page 33 Manual Tracking, Horiz. Posi- tion and Vert. Position options are available only for analog com- puter sources. The projector sets these options automatically for dig- ital computer and video sources. Downloaded From projector-manual.com Boxlight Manuals...
- Page 34 2 Highlight Vertical position, then press the left mouse button to move the image down or press the right mouse button to move the image up. Positioning adjustments are saved when you power off the pro- jector. Downloaded From projector-manual.com Boxlight Manuals...
-
Page 35: Controls Menu
Ceiling Projection When you turn on, the projector turns the Ceiling Projection image upside down for ceiling-mounted projection. Highlight Ceiling Projection, then click the left or right mouse button to turn this feature on and off. Downloaded From projector-manual.com Boxlight Manuals... - Page 36 “No signal detected” or “Standby Active” appear in the lower-right corner of the screen. Click the left or right mouse button to turn this feature off and not see sta- tus messages. Downloaded From projector-manual.com Boxlight Manuals...
-
Page 37: Language Menu
You can display the on-screen menus in English, French, German, Spanish, Chinese or Japanese. Move the cursor to the language you want, then click the left or • right mouse button. The menus redraw immediately. Downloaded From projector-manual.com Boxlight Manuals... -
Page 38: Status Menu
Shows your computer’s resolution setting. To change this, go to your computer’s Control Panel and adjust the resolution in the Display tab. See your computer’s user’s guide for details. Horizontal refresh rate The time period that one horizontal line is displayed. Downloaded From projector-manual.com Boxlight Manuals... - Page 39 Technical Support. Boot version Indicates the projector’s boot software version. This information is useful when contacting Technical Support. CablePro version Indicates the CablePro’s software version. This information is useful when contacting Technical Support. Downloaded From projector-manual.com Boxlight Manuals...
- Page 40 Downloaded From projector-manual.com Boxlight Manuals...
-
Page 41: Maintenance & Troubleshooting
Follow these steps to replace the projection lamp: projector is operating. 1 Turn off the projector and unplug the power cord. 2 Wait 30 minutes to allow the projector to cool thoroughly. Downloaded From projector-manual.com Boxlight Manuals... - Page 42 5 Loosen the two non-removable screws on the outside of the module (Figure 21). projector with the lamp door open or removed. This disrupts the air flow and causes the projector to overheat. IGURE Loosening the screws on the lamp module Downloaded From projector-manual.com Boxlight Manuals...
- Page 43 - menu (while still holding down the button) for 5 seconds. volume - Verify that the counter was reset by pressing the button menu and viewing the counter in the Status window. Downloaded From projector-manual.com Boxlight Manuals...
-
Page 44: Replacing The Batteries In The Remote Control
Cable Lock System (Figure 23). See “Optional Accessories” on page 43 for ordering information. Refer to the information that came with the lock for instructions on how to use it to secure the projector. IGURE Installing the security lock Downloaded From projector-manual.com Boxlight Manuals... -
Page 45: Troubleshooting
Refer to your com- puter’s documentation to determine the correct order. Make sure your laptop’s external video port is turned on. See • the “Portable and Laptop Activation Chart” on page 44 or your computer’s manual for details. Downloaded From projector-manual.com Boxlight Manuals... - Page 46 Turn the projection lens to focus the image. • Make sure the projection screen is at least 5 feet (1.5 m) from • the projector. Check the projection lens to see if it needs cleaning. • Downloaded From projector-manual.com Boxlight Manuals...
- Page 47 Problem: Lamp seems to be getting dimmer The lamp begins to lose brightness when it has been in use for • a long time. Replace the lamp as described in “Replacing the Projection Lamp” on page 33. Downloaded From projector-manual.com Boxlight Manuals...
- Page 48 Projection Lamp” on page 33. Before calling B for assistance, please have the following OXLIGHT information available: the projector’s serial number (located on the bottom label) • the resolution of your computer. • Call B OXLIGHT 1-800-762-5757 360-779-7901 Downloaded From projector-manual.com Boxlight Manuals...
-
Page 49: Appendix
Maximum Input Voltage PEAK < 2.0 Vrms for THD ≤ 0.3% or R Sensitivity 100 mV at 1 KHz for 88 dB SPL at 1 meter Connector Type 3.5 mm (1/8 inch) stereo phone mini Downloaded From projector-manual.com Boxlight Manuals... -
Page 50: Accessories
NOTE: Use only B OXLIGHT approved accessories. Other North American Power Cord products have not been tested with Australian Power Cord UK Power Cord the projector. European Power Cord Danish Power Cord Swiss Power Cord Downloaded From projector-manual.com Boxlight Manuals... - Page 51 Two-button Executive Remote Control Executive Remote IR Receiver Remote Point RF Remote with LaserPointer (US, Mexico, Canada only) PC Guardian Projector Cable Lock S-Video Cable 40” Portable Projection Screen 50” Portable Projection Screen 60” Deluxe Insta-Theatre Screen Downloaded From projector-manual.com Boxlight Manuals...
-
Page 52: Portable And Laptop Activation Chart
Conf.Simulscan Ambra** FN-F12 FN-F12 FN-F5 FN-F5 F2/Choose Option/F5 F2/Choose Option/F5 Amrel* ** setup menu setup menu Shift-Ctrl-D Shift-Ctrl-D Apple see Mac Portable and Mac PowerBook Aspen automatic automatic Award FN-F6 FN-F6 BCC* automatic reboot computer Downloaded From projector-manual.com Boxlight Manuals... - Page 53 CRT dip switch to LCD Epson dip switch to CRT dip switch to LCD Everex* setup screen option setup screen option For-A Ctrl-Alt-Shift-C Ctrl-Shift-Alt-L Fujitsu FN-F10 Gateway FN-F3 FN-F3 FN-F1/FN-F1 again simul- FN-F1 taneous Downloaded From projector-manual.com Boxlight Manuals...
- Page 54 Display folder; Activate Video Mirroring 210, 230, 250, requires Apple Docking Station or Mini Dock 270, 280, 2300 Magitronic FN-F4 FN-F4 Mastersport FN-F2 FN-F1 Micro Express* automatic warm reboot Micron FN-F2 FN-F2 Microslate* automatic warm reboot Downloaded From projector-manual.com Boxlight Manuals...
- Page 55 FN-F6 Toshiba* ** Ctrl-Alt-End Ctrl-Alt-Home FN-End FN-Home FN-F5 FN-F5 setup screen option setup screen option Twinhead* FN-F7 FN-F7 FN-F5 FN-F5 Automatic Automatic WinBook Ctrl-Alt-F10 Ctrl-Alt-F10 Wyse software driven software driven Zenith** FN-F10 FN-F10 FN-F2 FN-F2 Downloaded From projector-manual.com Boxlight Manuals...
- Page 56 * These manufacturers have models that automatically send video to the external CRT port when some type of display device is attached. ** These manufacturers offer more than one key command depend- ing on the computer model. Downloaded From projector-manual.com Boxlight Manuals...
-
Page 57: Using Video Mirroring With A Powerbook Computer
1 Open the Control Panel, then double-click Monitors and Sound. 2 In the Resolution list, choose the SimulScan mode, then click 3 If this changes your display settings, a dialog box appears. Click OK to confirm the change. Downloaded From projector-manual.com Boxlight Manuals... -
Page 58: Projected Image Size
Image Size, Width and Height-minimum image size Distance to Diagonal Width Height Screen (ft/m) (ft/m) (ft/m) (ft/m) 4.9/1.5 2.5/0.8 2.0/0.6 1.5/0.5 8.0/2.4 4.0/1.2 3.2/1.0 2.4/0.7 12.0/3.7 6.0/1.8 4.8/1.5 3.6/1.1 16.0/4.9 8.0/2.4 6.4/2.0 4.8/1.5 20.0/6.1 10.0/3.0 8.0/2.4 6.0/1.8 30/9.1 15.0/4.6 12.0/3.7 9.0/2.7 Downloaded From projector-manual.com Boxlight Manuals... -
Page 59: Index
Rear Projection 28 Standby Time 27 Video Standard 27 cables audio 10 audio adapter 12 CablePro extension 43 composite video 11 extension 43 M1-DA analog computer cable 3, 8, 9 ordering 42 power 42 Downloaded From projector-manual.com Boxlight Manuals S-video 11, 43... - Page 60 17 Horiz. Position 26 fuzzy lines 25 Keystone 24 Manual Sync 25 Manual Tracking 25 HDTV 2, 11, 24 Overscan 24 height adjustment 17 Resize 24 Vert. Position 26 keypad 18 keystone correction 24 Downloaded From projector-manual.com Boxlight Manuals...
- Page 61 27, 28 setting up 7 mouse specifications 41 buttons on keypad 18, 20 turning off 14 buttons on remote 15, 20 turning on 13 connecting USB 10 NTSC video 27 Downloaded From projector-manual.com Boxlight Manuals...
- Page 62 SimulScan, using with PowerBooks 49 Source button 18 widescreen video 25 specifications 41 Standby button 19 Standby Time 27 zooming the image 17 startup screen 29 Status menu 30 S-video connecting 11 ordering cable 43 Downloaded From projector-manual.com Boxlight Manuals...
- Page 63 THAT EXTEND BEYOND THE FACE HEREOF AND THE FOREGOING WARRANTY SHALL NOT BE EXTENDED, ALTERED OR VARIED EXCEPT BY WRITTEN INSTRUMENT SIGNED BY BOXLIGHT. SOME STATES DO NOT ALLOW LIMITATIONS ON HOW LONG AN IMPLIED WARRANTY MAY LAST, SO SUCH LIMITATIONS MAY NOT APPLY TO YOU.
- Page 64 FOR SPECIAL, INDIRECT, INCIDENTAL OR CONSEQUENTIAL DAMAGES OR LOST PROFITS, LOST REVENUES OR LOST SAVINGS. THE PRICE STATED FOR THE PRODUCT IS A CONSIDERATION IN LIMITING BOXLIGHT’S LIABIL- ITY. NO ACTION, REGARDLESS OF FORM, ARISING OUT OF THE AGREEMENT TO PURCHASE THE PRODUCT MAY BE BROUGHT BY PURCHASER MORE THAN ONE YEAR AFTER THE CAUSE OF ACTION HAS ACCRUED.
Need help?
Do you have a question about the CD-454m and is the answer not in the manual?
Questions and answers