Table of Contents
Advertisement
Quick Links
Advertisement
Table of Contents

Related Manuals for Baumatic BCG625-SS


Summary of Contents for Baumatic BCG625-SS
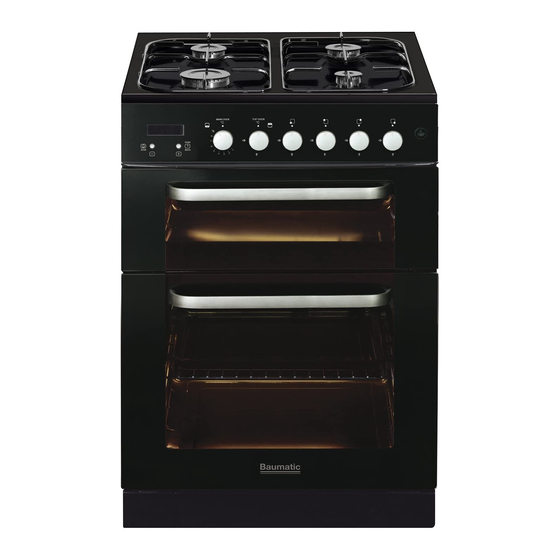
- Page 1 BCG625-SS/W/BL/R/IV 60 cm Twin cavity gas cooker...
- Page 2 User Manual for your Baumatic BCG625-SS/W/BL/R/IV 60 cm Twin cavity gas cooker NOTE : This User Instruction Manual contains important information, including safety & installation points, which will enable you to get the most out of your appliance. Please keep it in a safe place so that it is easily available for future reference;...
-
Page 3: Table Of Contents
Minimum flow adjustment for hob gas taps Gas adjustment (conversion to LPG for the oven and grill) 34 - 35 Minimum flow adjustment for the oven and grill burners 35 - 37 My appliance isn’t working correctly 37 - 39 Baumatic consumables Contact details... -
Page 4: Environmental Note
Environmental note o The packaging materials that Baumatic uses are environmentally friendly and can be recycled. o Please discard all packaging material with due regard for the environment. -
Page 5: Important Safety Information
Baumatic’s Conditions Of Guarantee. The foregoing does not affect your statutory rights. o Repairs may only be carried out by Baumatic service engineers or their authorised service agents. Warning and safety instructions o This appliance complies with all current European safety legislation. - Page 6 Child Safety o Baumatic strongly recommend that babies and young children are prevented from being near to the appliance and not allowed to touch the appliance at any time. During and after use, all surfaces will become hot.
- Page 7 o Do not place heavy objects on the oven door or lean on the oven door when it is open, as this can cause damage to the oven door hinges. Nobody should be allowed to sit or stand on any part of the cooker.
- Page 8 Please specific section of this booklet that refers to installation. o Baumatic Ltd. declines any responsibility for injury or damage, to person or property, as a result of improper use or installation of this appliance. o Heat, steam and moisture will be created during use of the appliance, take care to avoid injury and ensure that the room is adequately ventilated.
-
Page 9: Specifications
Specifications Product dimensions: Height: 900 - 920 mm Width: 600 mm Depth: 600 mm Product specifications: o 4 zone gas hob: o 1 x 3.00 kW rapid burner o 2 x 1.75 kW semi-rapid burner o 1 x 1.00 kW auxiliary burner o Enamelled pan stands o Push button ignition o Flame failure safety device on all burners... -
Page 10: Standard Accessories
Standard accessories o 2 x Enamelled baking tray with handle o 2 x Wire shelves o 1 x Trivet o LPG conversion jets Electrical details Rated Voltage: 220 - 240 Vac 50 Hz Supply Connection: 3A (double pole switched fused outlet with 3mm contact gap) Max Rated Inputs: 0.030 kW... -
Page 11: Control Panel
For future reference please record the following information which can be found on the rating plate and the date of purchase which can be found on your sales invoice. The rating plate for your oven can be located on the front frame of the oven cavity. Model Number ………………………………. -
Page 12: Oven Timer
Thermostat control knob (hob) o Use the control knob of the relevant cooking zone to set the temperature intensity. Oven light / gas ignition o Use this switch to turn the oven light on and off, and to ignite the gas hobs or the gas ovens. Oven timer 1) Alarm stop icon (press minus button to stop alarm). -
Page 13: Setting And Using The Oven Programmer/Timer
Setting and using the oven programmer/timer Setting the time of day Before using the oven for the first time you should set the time of day. o Press the plus (3) and minus (2) buttons simultaneously to enter the time-setting mode. The display will automatically show “12.00”. -
Page 14: Using The Oven
Using the oven Before first use o To remove any residue from the oven that may have been left from the manufacturing process, you should select the main oven, and the grill, and turn the thermostat dial to its maximum temperature setting. -
Page 15: Using The Main Oven
Using the main oven o To turn the main oven on, press and turn the control dial to the large flame position. o While still holding the dial inwards, press and hold the bottom half of the ignition button until the oven burner ignites. -
Page 16: Base Burner Appliances
Base burner appliances IMPORTANT: Your appliance is a Continental style/base burner gas oven, please follow the guidance below, to achieve the best cooking results. o There are two different types of heating methods for gas ovens, traditional U.K. style and Continental style. o In U.K. -
Page 17: Using The Grill
Using the grill IMPORTANT: You should always grill with the oven door open. NEVER attempt the grill with the door closed. o To turn the grill on press and turn the control dial to the large flame position. o While still holding in the control knob, press and hold the bottom half of the ignition button until the grill burner ignites. -
Page 18: Cooking Guidelines
Cooking guidelines o Please refer to the information given on food packaging for guidance on cooking temperatures and times. Once familiar with the performance of your appliance, temperatures and times can be varied to suit personal preference. o Make sure that frozen foods are thoroughly thawed before cooking, unless the instructions on the food packaging advise that you can “cook from frozen”. -
Page 19: Using The Hob Top
Using the hob top Before first use IMPORTANT: You should clean the hob surface. (Please see “Cleaning and maintenance” section). o You should switch on one cooking zone at a time, for 5 minutes at the maximum setting. This will help to eliminate any new smell that exists and evaporate any humidity that has formed on the heating elements during transit. -
Page 20: Hob Guidelines
Hob guidelines o The diameter of the bottom of the pan should correspond to that of the burner. o The burner flame must never extend beyond the diameter of the pan. o Use flat bottomed pans only o When possible, keep a lid on the pan whilst cooking. o Cook vegetables with as little water as possible, to reduce cooking times. -
Page 21: Cleaning The Gas Hob Top
Any damage that is caused to the appliance by a cleaning product will not be fixed by Baumatic free of charge, even if the appliance is within the guarantee period. Cleaning the gas hob top o Remove the dirty pan supports from the hob and place in warm soapy water for some time. -
Page 22: Cleaning The Burners
Cleaning the burners o Gas burners should be cleaned regularly and after each spillage to remove cooking residues and dirt. o To clean the burners, remove the caps and rings and place them separately in warm soapy water. After cleaning them, check that the burner ports are clear. -
Page 23: Replacing The Oven Bulb
Replacing the oven bulb IMPORTANT: The oven must be disconnected from your mains supply before you attempt to either remove or replace the oven bulb. o Remove all oven shelves and the drip tray. o Unscrew the lamp cover. o Unscrew bulb remove it from its holder. -
Page 24: Installation
o The oven door and door glass should only be cleaned using a damp cloth and a small amount of detergent. The cloth MUST NOT have come into contact with any form of cleaning product or chemical previously. o To refit the door you should slide the hinges back into their slots and open the door fully. - Page 25 (including the burners). o Baumatic do not recommend that the cooker is positioned below wall cupboards, as the heat and steam from the appliance and what is being cooked, may damage the cupboard and its...
-
Page 26: Ventilation Requirements
o The cooker may be located in a kitchen, or a bedroom, but not in a room containing a bath or shower. The cooker must not be installed in a bedroom of less than 20m³ in size. o The cooker is fitted with four feet that can be adjusted to match height your... -
Page 27: Securing The Safety Chains
o Decide on a suitable wall location for fitting the anchor brackets directly behind each cooker safety chain. o Hold the chain anchor up to the wall where it will be required and mark the fixing holes. o Drill the fixing holes and fix the chain anchors to the wall using the screws provided and suitable wall plugs for the type of wall being fixed to. -
Page 28: Electrical Connection
Electrical connection YOUR COOKER INTENDED FITTED PERMANENT INSTALLATION. o Before connecting the appliance, make sure that the supply voltage marked on the rating plate corresponds with your mains supply voltage. o We recommend that the appliance is connected by a qualified electrician, who is a member of the N.I.C.E.I.C. -
Page 29: Gas Connection
Conversion for use on LPG and other gases must only be undertaken by a qualified person. For information on the use of other gases, please contact the Baumatic Technical Department. o The cooker must be installed by a qualified person, in... -
Page 30: Gas Safety
Gas Safety (Installation and Use) Regulations o It is the law that all gas appliances are installed by competent persons in accordance with the current edition of the Gas Safety Installation and Use Regulations. o It is in your interest and that of safety to ensure compliance with the law. - Page 31 o This cooker can be connected to the supply both on the right and left hand side at the rear of the cooker. To reverse the position, remove the blanking plug and refit it to the opposite side to where the hose is being connected. o If the cooker has been converted for use with LPG, then it should be connected to the gas supply using an appropriate bayonet type hose.
-
Page 32: Gas Adjustment (Conversion To Lpg For The Hob Top)
Gas adjustment (Conversion to LPG for the hob top) All work must be carried out by a GASSAFE registered engineer. IMPORTANT: Always isolate the cooker from the electricity supply before changing the injectors and/or adjusting the minimum flow of the burners. o Remove the pan supports, burner cap and burner rings. -
Page 33: Minimum Flow Adjustment For Hob Gas Taps
Minimum flow adjustment for hob gas taps. All work must be carried out by a GASSAFE registered engineer. o Ignite the large (rapid) burner and set the control knob to the minimum position. o Remove the control knob to access a small adjusting screw. o Using a suitable screwdriver, turn the screw clockwise to decrease the flow of gas and make the flame smaller. -
Page 34: Gas Adjustment (Conversion To Lpg For The Oven And Grill)
Gas adjustment (Conversion to LPG for the oven and grill) work must carried GASSAFE registered engineer. IMPORTANT: Always isolate the cooker from the electricity supply before changing the injectors and/or adjusting the minimum flow of the burners. o Before you can change the injectors on the grill and oven burners, you must unscrew the burners from their fixing brackets. -
Page 35: Minimum Flow Adjustment For The Oven And Grill Burners
screw the injector and replace it with the required injector for the new gas supply according to the table below. Burner Type Gas Type Pressure Injector Power Mbar Marking (Kw) (1/100mm) Max Min Oven Burner Natural 1.05 Liquid Gas 28..30/37 0.72 Grill Burner Natural... - Page 36 o To take off the control panel, remove the screws fixing the control panel. o When the screws have been removed, you can take off the control knobs and remove the control panel by pulling it to the front. o Locate the adjusting screws for the grill and oven burners. These will be positioned to the left hand side of the grill and oven thermostat taps.
- Page 37 o To establish the correct adjustment, the flame should be approximately 3 - 4 mm in length. For Butane / Propane gas, the adjusting screw must be tightly screwed in. o Turn the control knob to maximum and then back to minimum two or three times to make sure that the flame does not go out when the control knob is set to minimum.
-
Page 38: My Appliance Isn't Working Correctly
My appliance isn’t working correctly The gas oven burner or grill burner do not light. * Check that the oven is switched on at your mains supply. * Check that the fuse in the spur outlet doesn’t need replacing. * Check that there is not a problem with your gas supply Food is cooking too quickly or too slowly. - Page 39 Or any installation other than the one specified by Baumatic Ltd. has been completed. Please refer to the conditions of guarantee that appear on the...
-
Page 40: Baumatic Consumables
BC005 Stainless Steel Cleaner and Protector (250 ml) o BC007 E-Cloth – General Purpose Cloth o BC008 – Microwave Cover To order a Baumatic consumables product please call 0123 5437 244 and quote the product code. You can also order online from eshop.baumatic.co.uk... -
Page 43: Contact Details
(0118) 933 6933 E-mail: Deutschland 0049(0)180-5888975 sales@baumatic.co.uk Oesterreich +43 (0) 820 / 420423 customercare@baumatic.co.uk spares@baumatic.co.uk www.baumatic.de technical@baumatic.co.uk Italy Website: Baumatic Italia S.R.L. www.baumatic.co.uk Via Galvani N.3 35011 Campodarsego (PD) Facebook: www.facebook.com/baumatic.uk +3904 9920 2297 www.baumatic.it Republic of Ireland Holland Service Telephone Baumatic Benelux B.V.
Need help?
Do you have a question about the BCG625-SS and is the answer not in the manual?
Questions and answers