Table of Contents
Advertisement
Quick Links
Advertisement
Table of Contents

Related Manuals for Ness IQ-MDVR-8


Summary of Contents for Ness IQ-MDVR-8
- Page 1 User Manual Ness IQ-MDVR-8 Mobile Digital Video Recorder...
- Page 2 Ness IQ-MDVR-8 NOTICE The information in this manual was current when published. The manufacturer reserves the right to revise and improve its products. All specifications are therefore subject to change without any notice. The purpose of this manual is to kindly aid the user for the operation for our MDVR (especially for GUI setting).
-
Page 3: Table Of Contents
Ness IQ-MDVR-8 CONTENT 1 Product Characteristics and Overview ........4 2 Remote Control ................5 3 GUI Tree..................8 4 System Start Up ................. 9 5 GUI Configuration ..............11 5.1 SEARCH ..........................11 5.1.1 REC. SEARCH ........................ 11 5.1.2 EVENT SEARCH ......................14 5.2 SETUP .......................... -
Page 4: Product Characteristics And Overview
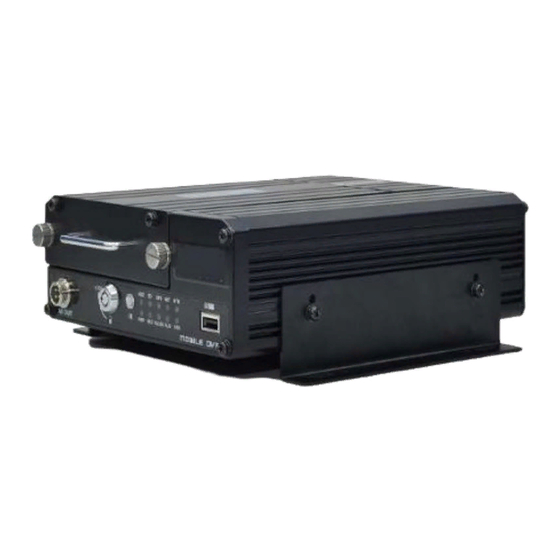
Ness IQ-MDVR-8 1 Product Characteristics and Overview The Ness IQ-MDVR-8 is superior MDVR model specially designed for vehicle surveillance and remote monitoring, combined with high-speed processor and embedded operating system. The advanced H.264 video compression and decompression, wireless transmission, GPS location makes the Ness IQ-MDVR-8 a very powerful and perfect solution for vehicles. -
Page 5: Remote Control
Ness IQ-MDVR-8 2 Remote Control Numeric Input Keys Use the numbers to input Values in the system setup Screen or switch through the channels in QUAD view Navigation Arrows Use the ARROW keys to move between selections, input fields and icons. -
Page 6: Numeric Keypad
Ness IQ-MDVR-8 Remote Control Key Functions: 1. Numeric Keypad [0-9] keys: During setup, number keys are used to input number values. In QUAD view, you can press 1, 2, 3 and 4 to switch the full screen for each channel, and press 0 to switch to quad view. - Page 7 Ness IQ-MDVR-8 the specific time you want to playback. Increase volume while playback (if audio is recorded). NEXT Decrease volume while playback (if audio is recorded). PREV Rewinds the video while playback. X2 and X 4 modes available. Fast forward the video while playback. X2 and X4 modes available.
-
Page 8: Gui Tree
Ness IQ-MDVR-8 3 GUI Tree Graphic User Interface over view... -
Page 9: System Start Up
Ness IQ-MDVR-8 System Start Up After connecting the MDVR to a vehicle power supply, turn on the vehicle ignition and the unit will automatically start Power is normally supplied to the MDVR as long as the vehicle ignition is ON. - Page 10 Ness IQ-MDVR-8 DEVICE NO.: The unit ID of MDVR. You can setup the ID for the MDVR in the menu yourself. After setting, the ID number will appear automatically on the login screen. It’s the number in the bracket PASSWORD: Enter the admin password or user password.
-
Page 11: Gui Configuration
Ness IQ-MDVR-8 5 GUI Configuration This part will show all the main functions for MDVR including SEARCH, SETUP, and INFORMATION. Search is for searching all the video files and alarm files. Setup for all the configurations for MDVR and information display the MDVR and accessory working status. - Page 12 Ness IQ-MDVR-8 SOURCE: : : : As the IQ-MDVR support mirror recording, so you need to chose the video storage first, HDD or SD card TYPE: Choose the file type please, ALL means normal and alarm video file; ALARM means alarm file .
- Page 13 Ness IQ-MDVR-8 You can export the MDVR video files to external storage device for playback easily. Just please setup the start time and end time for the video from certain channel for local playback. Or you can export the file during certain period to thumb driver or any external storage device and backup to computer for playback (but the file is H.264...
-
Page 14: Event Search
Ness IQ-MDVR-8 If you do not connect external storage device or the storage device is defective, then the system will display NO EXTERNAL STORAGE. If the MDVR current video type is different with the setting that the MDVR record last time, then the video file can not playback, for example, the video type of record files is NSTC, now the video type is PAL, you can’t playback... -
Page 15: Setup
Ness IQ-MDVR-8 EVENT TYPE: The type of the alarm file including I/O ALARM/ACCELERATION/SPPED/TEMP ALARM/VIDEO L OSS/EMERGENCY BUTTON/MOTION DETECTION/ BLIND DETECTION and so on. DATE: MDVR system will display the current date automatically. The date with alarm record files will be indicated by red. -
Page 16: System
Ness IQ-MDVR-8 5.2.1 SYSTEM A) DATE/TIME DATE FORMAT: Press 【ENTER】to select different format MM/DD/YYYY, DD/MM/YYYY, YYYY-MM-DD TIME FORMAT: 12H or 24H, Press【ENTER】to select different format. TIME SYNC SOURCE: The system can adjust the time in different zone via either “GPS” or “NTP”. - Page 17 Ness IQ-MDVR-8 setting on the TIME SYNC SOURCE option: NTP SERVER IP: Input the IP server does support NTP protocol, in order to allow the system can have time synchronization through the network. [Example: "192.43.244.18", "129.6.15.28", "211.22.55.116", "194.88.2.60"] DST: Daylight Time. Only when it set on, the following option will available.
- Page 18 Ness IQ-MDVR-8 IDLE TIME (SEC): The time for the operation interface switching to the QUAD view. If the user does not make some operation for some time, the system will switch to the QUAD view automatically. EVENT FILES AUTO-EXPORT (USB): When is switch is ON, you can back up all the alarm record files on that day by press F1 on remote control.
- Page 19 STORAGE, SD and USB. Then press 【FORMAT】to format the device. Video Storage means the main recording storage. For example the Ness IQ-MDVRs we have hard disk for main recording and SD card for mirror recording. If you want to format hard disk please select video storage and if you want to format SD card (for mirror) please select SD.
- Page 20 Ness IQ-MDVR-8 FIRMWARE: Upgrade the firmware. MCU: Upgrade the MCU. How to upgrade the firmware? 1. Please create one folder named dvrupgrade in root directory in thumb drive and then copy the firmware upgrade file into this folder. 2. Insert the thumb drive into the USB port on the front panel of MDVR.
- Page 21 Ness IQ-MDVR-8 Please check the firmware version after the MDVR reboot up and make sure that the firmware upgrade is completely successful. MCU UPGRADE: The step is the same as upgrade firmware. F) USER SECURITY Setup the password for user and admin.
- Page 22 Ness IQ-MDVR-8 Restore the default setting and export and import the MDVR configuration. EXPORT: Export the all configuration for the MDVR to another MDVR to make sure that two MDVR have the same setting. Please insert the external storage device to the USB port and then press 【EXPORT】, Then the configuration file will backup to external device.
-
Page 23: Record
Ness IQ-MDVR-8 GEO-FENCING SWITCH: this is the enable switch for GEO-Fencing function. This switch is only for MDVR terminal. EXPORT and IMPORT: these two options is for Geo-fencing config file, you can setup and copy a Go-fence (like area) config file from PC software CMS, for the create details, please check the manual from CMS instruction. - Page 24 Ness IQ-MDVR-8 VIDEO TYPE: PAL and NTSC optional. The default setting is NTSC RECORD MODE: Record mode, three modes as following: When MDVR is power supplied and start up, the MDVR will start to record automatically. GENERAL: MDVR will start to record at defined time setting in the TIMER RECORD menu based on the TIMER: schedule.
- Page 25 Ness IQ-MDVR-8 METADATA CAPTURE: metadata information, it will create a black box file in HDD when you setup this switch as ON. The metadata mainly include GPS info, event info, temperature, inertia sensor info and so on, and you can analysis the metadata file in Ceiba software, you will get the value chat with the corresponding video files.
- Page 26 Ness IQ-MDVR-8 DATE/TIME: Display date and time on OSD. POSITION: Setup the display position for DATE/TIME ALARM: Display Alarm information on OSD including the I/O sensor, speed, temperature, motion detection etc… ACCELERATION: Display the information for inertial sensor TEMPERATURE: Display the temperature on OSD FIRMWARE VERSION: Display the current firmware version GPS: Display the GPS information, fixed means it will display the information always, just like date/time.
- Page 27 Ness IQ-MDVR-8 C) CAMERA SETTINGS Setup enables record function and video for each channel. ENABLE: Enable the record function. NAME: The name of the channel. For example, if you setup the name of CH1 is ABC, and you can see ABC...
- Page 28 Ness IQ-MDVR-8 RES: Resolution, D1, HD1, CIF optional. For our system, D1 resolution is 704×576 for NTSC and 704×480 for PAL, HD1 resolution is 704×288 for NTSC and 704×240 for PAL. CIF resolution is 354×288 for NTSC and 354×240 for PAL.
- Page 29 Ness IQ-MDVR-8 Date: To select the exact date for MDVR recording. Single Day: Choose the day to create a recording schedule Every Day: Choose “Every” to apply a schedule to every day of the week Weekday: Schedule will only apply Weekdays (weekday is from Monday to...
-
Page 30: Network
Ness IQ-MDVR-8 interface you want it to stay, CP3 menu interface or quad live view interface. WATERMARK: Water mark is a technical to protect original data from illegal modification, as long as you setup water mark, we will find the difference when we analysis the record files. - Page 31 Ness IQ-MDVR-8 CLIENT PORT: no use at present WEB PORT: this port is for IE access, you have to add this port when you want to access to MDVR through IE browser, of example, you have to access MDVR like that: http://192.168.3.155:10090...
- Page 32 Ness IQ-MDVR-8 ACTIVE MODE: There are three options. means when MDVR started up, the wireless module will always dial up and connect to message ALWAYS: server. : means only you call the phone number of the SIM card or send the message to the SIM, it will CALL/SMS active the wireless module and start to dial up.
- Page 33 Ness IQ-MDVR-8 INTERCOM SETTINGS: if you want to make a call, please enable this function here. Remark: if you want to make a call, you need to use our CP3 and speaker. D) FTP SETTINGS Setup the FTP security for MDVR.
-
Page 34: Event
Ness IQ-MDVR-8 5.2.4 EVENT A) SENSOR IQ-MDVR support 8 sensors inputs. EN: Enable, to active this function NAME: Press ENTER on the Name field to display the soft keyboard. Enter the text name to identify the source of each Sensor connected to the unit. - Page 35 Ness IQ-MDVR-8 LOG: Press ENTER to select YES/NO to enable or disable the input sensor to put as event log file, the EVENT LOG is recorded in EVENT search file e.g.: If set as ON, using EVENT SEARCH option even sensor triggered, there is event file on this menu.
- Page 36 Ness IQ-MDVR-8 ON means this input can trigger this output, OFF means can’t. C) SPEED Setup the alarm for over speed and some other parameters. SOURCE: MDVR is capable of capturing vehicle speed via GPS antenna or Vehicle--speedometer. Browse between the settings of GPS or speedometer from the list.
- Page 37 Ness IQ-MDVR-8 Please note that the GPS antenna should be connected to MDVR to receive satellite signals for speed. For more information on capturing speed from speedometer please contact local distributor for more technical support; SPD CHECK: Speed check is used to calibrate the offset speed when connected to the speedometer.
- Page 38 Ness IQ-MDVR-8 If the MDVR working temperature is higher than the setting for HIGH TEMP, MDVR will trigger alarm. If the MDVR working temperature is lower than the setting for LOW TEMP, MDVR trigger will alarm F) CAMERA Display the alarm information from camera.
- Page 39 Ness IQ-MDVR-8 VOLTAGE PROTECTION: means when MDVR system detect that the voltage input always in a low status, MDVR will disconnect to CMS and shutdown automatically. ENABLE: setup the voltage protection switch, ON means enable, OFF means disable. VOLTAGE: setup the low Voltage limited value for shutdown automatically.
-
Page 40: Peripheral
Ness IQ-MDVR-8 Trigger alarm when driving/resting for a long time 5.2.5 PERIPHERAL A) ) ) ) PTZ... -
Page 41: Information
Ness IQ-MDVR-8 CHANNEL: The channel of PTZ connected. PROTOCOL: select the protocol of different PTZ, there are two protocols to switch, and the default is Pelco-D BAUD RATE: select the different baud rate for your PTZ, there are 1200, 2400, 4800, and 9600 DATA BIT: there are 5,6,7,8 options to select, default setting is 8. -
Page 42: System
Ness IQ-MDVR-8 5.3.1 SYSTEM Display the MCU version, firmware version, HDD status and SD card information. 1, NO HDD means No HDD installed or the HDD is defective and can not work. 2, NO FORMAT means HDD installed but not formatted. -
Page 43: Modules
Ness IQ-MDVR-8 Press 【CLEAR】to delete all the current data. 5.3.3 MODULES Display the GPS/WIFI module information。...
Need help?
Do you have a question about the IQ-MDVR-8 and is the answer not in the manual?
Questions and answers