Viking Built-in French Door Bottom-Freezer Refrigerator Use & Care Manual
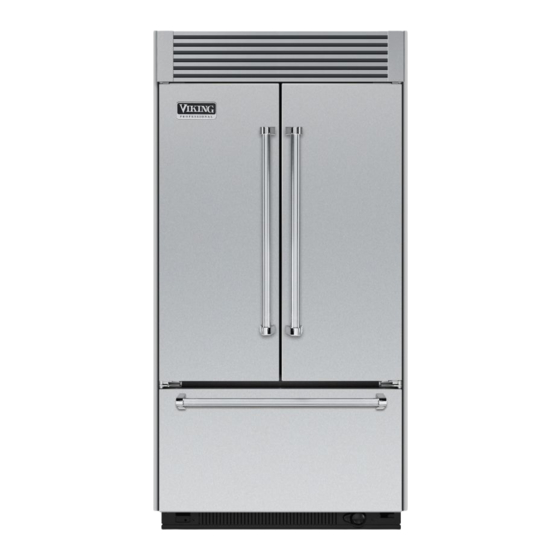
Built-in french door bottom-freezer refrigerator
Hide thumbs
Also See for Built-in French Door Bottom-Freezer Refrigerator:
- Installation manual (12 pages)
Table of Contents
Advertisement
Advertisement
Table of Contents

Related Manuals for Viking Built-in French Door Bottom-Freezer Refrigerator


Summary of Contents for Viking Built-in French Door Bottom-Freezer Refrigerator
- Page 1 Use & Care Manual Built-in French Door Bottom-Freezer Refrigerator...
- Page 2 Congratulations We hope you will enjoy and appreciate the care and attention we have put into every detail of your new, state-of-the-art refrigerator. Your appliance is designed to offer years of reliable service. This Use and Care Guide will provide you with the information you need to become familiar with your refrigerator’s care and operation.
-
Page 3: Table Of Contents
Table of Contents Getting Started Refrigerator Safety ____________________________________________4 Important Safety Instructions ___________________________________5 Proper Disposal (of old refrigerator) _____________________________6 Water Supply Requirements____________________________________8 Water System Preparation _____________________________________9 Product Controls Using the Controls___________________________________________10 Temperature Controls ________________________________________12 Water Filter Indicator ________________________________________13 Rest Mode__________________________________________________14 Alarm Functions _____________________________________________15 Operation Ice Maker___________________________________________________17 Water Filtration System_______________________________________18... -
Page 4: Refrigerator Safety
Refrigerator Safety Recognize Safety Symbols, Words, Labels Warning and Important Safety Instructions appearing in this manual are not meant to cover all possible conditions and situations that may occur. Common sense, caution, and care must be exercised when installing, maintaining, or operating the appliance. ALWAYS contact the manufacturer about problems or conditions you do not understand. -
Page 5: Important Safety Instructions
Important Safety Instructions WA R N I N G WA R N I N G To reduce the risk of fire, electric shock, or injury when using your refrigerator, follow these basic precautions: • Plug into a grounded 3-prong outlet. •... -
Page 6: Proper Disposal (Of Old Refrigerator)
Proper Disposal (of old refrigerator) WA R N I N G WA R N I N G Suffocation Hazard Remove doors from your old refrigerator. Failure to do so can result in death or brain damage. IMPORTANT: Child entrapment and suffocation are not problems of the past. Junked or abandoned refrigerators are still dangerous—even if they will sit for “just a few days”. -
Page 7: Before Using Your Refrigerator
Before Using your Refrigerator Remove the Packaging ■ Remove tape and glue residue from surfaces before turning on the refrigerator. Rub a small amount of liquid dish soap over the adhesive with your fingers. Wipe with warm water and dry. ■... -
Page 8: Water Supply Requirements
Water Supply Requirements Read all directions before you begin. IMPORTANT: ■ When your refrigerator was installed, the water connection from the water source should have been connected to your refrigerator. If your refrigerator is not connected to a water source, see “Connect to Water Line” in the Installation Instructions. -
Page 9: Water System Preparation
Water System Preparation Please read before using the water system. IMPORTANT After connecting the refrigerator to a water source or replacing the water filter, fill and discard two full containers of ice to prepare the water filter for use, before using the ice. CA UT ION Do not use with water that is microbiologically unsafe or of unknown quality without adequate disinfection before or... -
Page 10: Using The Controls
Using the Controls Power ON/Off Switch Before installing the top grille, turn the power Power switch to ON. Switch To install the Top Grille: 1. Remove the grille from the packaging. 2. Locate pins above refrigerator.. BACK 3. Place grille on top pins. BACK 4. - Page 11 Using the Controls If you need to turn the power to your refrigerator Off after installation, you must remove the top grille assembly to access the power switch. Turn the power to the refrigerator Off when cleaning your refrigerator or changing light bulbs. To Remove Top Grille, reverse steps listed for installing the grille.
-
Page 12: Adjusting Controls
Using the Controls Turning Refrigerator On and Viewing Set Points ■ Press the ON/OFF touch pad. NOTE: ■ After the refrigerator is turned on, the Over Temperature audio alarm and indicator light may activate every 1¹⁄₂ hours until the refrigerator and freezer temperatures are below 48°F (9°C) and 15°F (-9°C), respectively, or until the alarm is turned off. -
Page 13: Water Filter Indicator
Using the Controls TEMPERATURE CONDITION/REASON ADJUSTMENT: REFRIGERATOR too cold REFRIGERATOR Not set correctly for conditions Control 1° higher REFRIGERATOR too warm REFRIGERATOR High use or room very warm Control 1° lower FREEZER too cold FREEZER Not set correctly for conditions Control 1°... -
Page 14: Rest Mode
Using the Controls Rest Mode The Rest Mode feature is designed for the traveler or for those whose religious observances require turning off the lights and ice maker. By selecting this feature, the temperature set points and Deli Pan settings remain unchanged, the ice maker will be disabled and the interior lights will turn off. -
Page 15: Alarm Functions
Using the Controls Alarm Functions Master Alarm Reset Pressing Alarm Reset once will turn off the audio alarm and indicator light. The audio alarm will not sound again for the current condition that caused the alarm until a new condition occurs or until a Master Alarm Reset is performed. - Page 16 Using the Controls Over Temperature IMPORTANT: If the Over Temperature Alarm activates, your food may spoil. See the “Power Interruptions.” Minimize door openings until temperatures return to normal. The Over Temperature feature is designed to let you know when either the refrigerator temperature rises above 48°F (9°C) or the freezer temperature rises above 15°F (-9°C) for longer than 1¹⁄₂...
-
Page 17: Ice Maker
Ice Maker IMPORTANT: After connecting the refrigerator to a water source or replacing the water filter, fill and discard two full containers of ice to prepare the water filter for use, before using the ice. Turn the Ice Maker On/Off The ice maker On/Off control is located on the left-hand side of the ice bin. -
Page 18: Water Filtration System
Water Filtration System CA UTI ON Do not use with water that is microbiologically unsafe or of unknown quality without adequate disinfection before or after the system. Water Filter Indicator The water filter indicator, located on the control panel, will help you know when to change the water filter. - Page 19 Water Filtration System Cover 3. Align the ridge on the cap O-Rings with the arrow on the new filter and turn the cap until it snaps into place. 4. Remove the covers from the O-rings. Be sure the O-rings are still in place after the covers are removed.
- Page 20 Water Filtration System...
- Page 21 Performance Data Sheet...
-
Page 22: Refrigerator Features
Refrigerator Features Shelves and Shelf Frames CA UT ION Glass Shelves and Covers Do not clean glass shelves or covers with warm water when they are cold. Shelves and covers may break if nicked, scratched, or exposed to sudden temperature changes or impact, such as bumping. - Page 23 Refrigerator Features Deli / Crisper Pans and Deli Control Panel The control panel located Crisper Pans above each deli pan has the following three temperture settings: Deli, Produce, Meats (Cold to Coldest) and the Quick Chill setting. Select the Deli appropriate setting for the Pans Deli...
- Page 24 Refrigerator Features Crisper Pan Above each deli pan is a crisper pan (the larger of the pans) which is for your larger produce items. Remove and Replace the Deli/Crisper Pans 1. Slide the deli/crisper pan straight out to the stop. Lift the front of the pan with one hand while supporting the bottom with the other hand.
-
Page 25: Utility Compartment
Refrigerator Features Utility Compartment The utility compartment can be placed in any position on the refrigerator door. To Remove and Replace the Utility Bin: 1. Remove utility compartment by grasping both ends and lifting compartment up and out. 2. Replace the bin by sliding it in above the desired support and pushing it down until it stops. -
Page 26: Freezer Features
Freezer Features Freezer Pan and Pull-out Ice Bin The freezer pan can be used to store smaller items. The freezer pan is not removable. Remove and Replace the Ice Bin: 1. Slide the ice bin out of the freezer and lift up and out. 2. -
Page 27: Cleaning And Maintenance
Cleaning and Maintenance CA UT ION Explosion Hazard Use non-flammable cleaners. Failure to do so can result in death, explosion, or fire. Both the refrigerator and freezer sections defrost automatically. However, clean both sections about once a month to avoid buildup of odors. -
Page 28: Changing The Light Bulb
Cleaning and Maintenance Changing the Light Bulbs NOTE: Not all appliance bulbs will fit your refrigerator. Be sure to replace the bulb with one of the same size and shape. The lights require a 40-watt maximum appliance bulb. Replacement bulbs are available from your dealer. -
Page 29: Power Interruptions
Cleaning and Maintenance Power Interruptions If the power will be out for 24 hours or less, keep the door or doors closed (depending on your model) to help food stay cold and frozen. If the power will be out for more than 24 hours, do one of the following: ■... -
Page 30: Troubleshooting
Troubleshooting WA R N I N G WA R N I N G Electrical Shock Hazard Plug into a grounded 3 prong outlet. Do not remove ground prong. Do not use an adapter. Do not use an extension cord. Failure to follow these instructions can result in death, fire, or electrical shock. - Page 31 Troubleshooting (cont.) Refrigerator Operation Problem Cause Solution The refrigerator Refrigerator noise has been Buzzing—heard when the seems noisy reduced over the years. water valve opens to fill the Due to this reduction, you ice maker may hear intermittent Pulsating—fans/compressor noises from your new adjusting to optimize refrigerator that you did performance...
-
Page 32: Temperature And Moisture
Troubleshooting (cont.) Lights Problem Cause Solution Lights do not Is a light bulb loose in the See “Changing the Light work. socket or burned out? Bulbs” Is the refrigerator in Rest See ‘Using the Controls” Mode? Has the door been open See ‘Using the Controls”... -
Page 33: Ice And Water
Troubleshooting (cont.) Ice and Water Problem Cause Solution The ice maker is Refrigerator connected to a Connect refrigerator to not producing water supply and the supply water supply and turn water ice or not shutoff valve turned on? shutoff valve fully open. enough ice Kink in the water source A kink in the line can reduce... - Page 34 Troubleshooting (cont.) Ice and Water Problem Cause Solution Off-taste, odor or New plumbing connections? New plumbing connections gray color in the can cause discolored or off- flavored ice. Ice stored too long? Discard ice. Wash ice bin. Allow 24 hours for ice maker to make new ice.
-
Page 35: Service Information
Be ready to clearly describe the problem that you are having with your refrigerator. If you are unable to obtain the name of an authorized service agency, or if you continue to have service problems, contact Viking Range, LLC at (888) 845-4641 or write to: VIKING RANGE, LLC... -
Page 36: Warranty
(3) years from the date of original retail purchase or closing date for new construction, whichever period is longer. Viking Range, LLC, warrantor, agrees to repair or replace, at its option, any part which fails or is found to be defective during the warranty period. - Page 37 Viking Range, LLC service agency or representative. This warranty does not apply to commercial usage.
- Page 40 Viking Range, LLC 111 Front Street Greenwood, Mississippi 38930 USA (662) 455-1200 For product information, call 1-888-(845-4641) or visit our web site at vikingrange.com in the US or brigade.ca in Canada F21309A EN 103114...