Advertisement
1 4
Contents
Dear customer,
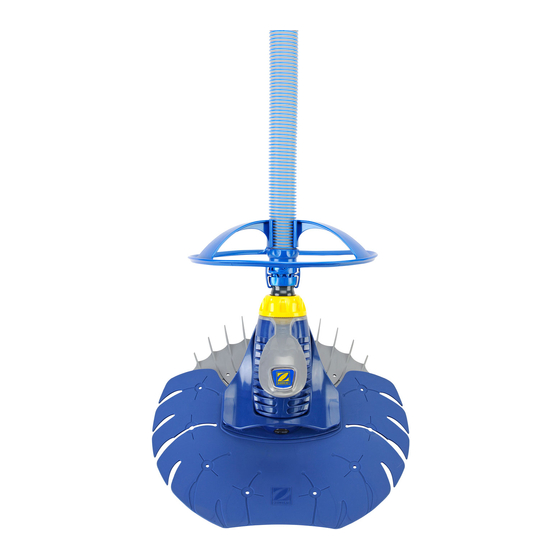
Congratulations on your purchase of the ZODIAC T5 Duo
Suction cleaner. We would like to thank you for your custom.
Your appliance has been designed, manufactured and
checked with the greatest care to ensure you are completely
satisfied with the product.
Before using the appliance read this manual carefully.
It contains all the information needed in order to get
the most from your pool cleaner in complete safety.
For any further information your retailer, a pool professional,
will be able to advise you on how to use and maintain
your pool cleaner.
They will be able to supply spare parts and will provide
qualified After Sales service.
15
15
16
17
19
20
21
22
24
Advertisement
Table of Contents

Related Manuals for Zodiac T5 Duo Suction


Summary of Contents for Zodiac T5 Duo Suction
-
Page 1: Table Of Contents
7 / CLEANING, REPLACING THE DIAPHRAGM 8 / WARRANTY Dear customer, Congratulations on your purchase of the ZODIAC T5 Duo Suction cleaner. We would like to thank you for your custom. Your appliance has been designed, manufactured and checked with the greatest care to ensure you are completely satisfied with the product. -
Page 2: List Of Parts
1 / List of parts Below is the list of parts shipped in the box needed to install your T5 Duo: Complete head Complete disk Quick connector Deflector wheel (used if the cleaner jams on obstacles, ladders, steps, ...) Set of 12 Twist Lock 1 metre hose sections 1 hose counter-weight 1 automatic flow regulation valve 1 flow tester... -
Page 3: Fitting The Hose
2 / Fitting the hose The hose for your T5 Duo is composed of 12 x 1 m sections. • The ideal hose length for your pool corresponds to one 1 m hose section plus the greatest distance between the Connection point (suction point or skimmer) and the furthest point in your pool (Figure Ex: if the greatest distance between the suction point or skimmer... -
Page 4: Connecting
3 / Connecting Figure 3 • Orient your pool inlet jets downward. • Close the main drain of your pool. • Activate the pool pump. • Fill the T5 Duo hose with water using the flow generated by the return fitting and maintain the hose underwater for the remained of the operations (Figure 3). - Page 5 Connect the male part of the hose adaptor to the leaf trap*. * optional, not sold with this product. Check that there is no air in the hose assembly, then connect it to the vacuum point by joining the last hose section to the female part of the hose adaptor (Figure Connection to the vacuum point with leaf trap*...
-
Page 6: Flow Test
4 / Flow test You can always check the flow rate, particularly if you have doubts Figure 8 about the suction power of your pump. NB: all these operations must be carried out under water so that the pump does not take in air. •... -
Page 7: Hose And Cleaner Assembly
5 / Hose and cleaner assembly • Immerse the hose and the cleaner and assemble the elements underwater. • Fit the assembled hose (see paragraph 2 page 16 : fitting the hose) with the quick connection fitting (Figure 12). To assemble them correctly make a quarter turn and position the tabs in one of the slots. -
Page 8: Troubleshooting
6 / Troubleshooting The T5 Duo is not operating • Control the flow using the flow tester. correctly If the flow is insufficient: • Check that the valve of the main drain is closed. • Check that the pump pre filter and basket are clean. •... -
Page 9: Cleaning, Replacing The Diaphragm
7 / Cleaning, replacing the Diaphragm Cleaning the Diaphragm Figure 16 If the cleaner stops, check the diaphragm for blockage. • Turn cleaner over (Figure 16). • Inspect diaphragm and push through debris or obstacles to clear. If not blocked, check the diaphragm for wear or damage. Removing the Diaphragm •... - Page 10 Reassembling the Diaphragm • Insert the diaphragm back on the inner tube. • Insert the diaphragm/inner tube assembly into the upper part of the cassette. Align the stop markers on the diaphragm with the notches and pull gently on the inner tube (without twisting) until the edge of the diaphragm becomes visible (Figures 21 and 22).
-
Page 11: Warranty
Conditions: All our technical experience and concern for quality have been used in the manufacture of ZODIAC automatic pool cleaners. All our cleaners are subject to quality control tests and are guaranteed against manufacturing defects. If, in spite of all the care... - Page 12 For further information please contact your retailer. Register your product on our website: • You will be the first to be informed of new Zodiac products and special offers. • You can help us to constantly improve our product quality.
Need help?
Do you have a question about the T5 Duo Suction and is the answer not in the manual?
Questions and answers