Table of Contents
Advertisement
Advertisement
Table of Contents

Subscribe to Our Youtube Channel
Related Manuals for Martin Mania SCX600


Summary of Contents for Martin Mania SCX600
- Page 1 Mania SCX600/700 user manual...
- Page 2 ©2005 Martin Professional A/S, Denmark. All rights reserved. No part of this manual may be reproduced, in any form or by any means, without permission in writing from Martin Professional A/S, Denmark. P/N 35000169, Rev. C...
-
Page 3: Table Of Contents
Unpacking ..........5 Mania SCX600/700 overview ....... . . 6 Safety information . - Page 4 This page left intentionally blank...
-
Page 5: Introduction
1. I NTRODUCTION Thank you for selecting a fixture from the Martin Mania SCX600/700 series. This series of automated moving-mirror projectors has the following features: • 9 full colors plus white • 7 interchangeable rotating gobos including 2 glass gobos (SCX600) or 3 glass gobos (SCX700) •... -
Page 6: Mania Scx600/700 Overview
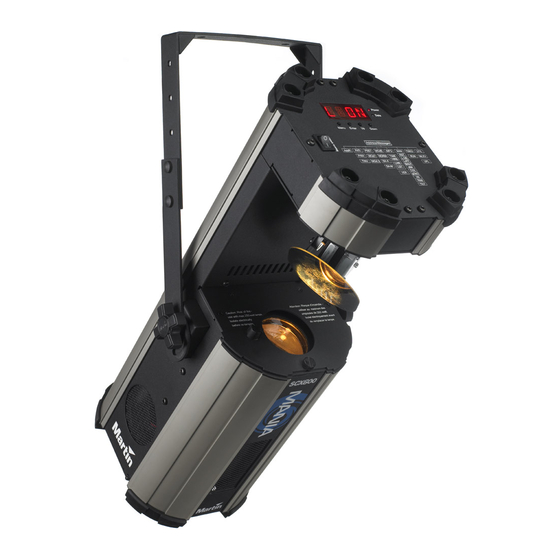
M a n i a S C X 6 0 0 / 7 0 0 o v e r v i e w Control panel and display Swivel lock Power on/off switch DMX in DMX out Power cable connector and fuseholder AC voltage selector switch (SCX700 EU and SCX600 only) Connections panel Mania SCX600/700 user manual... -
Page 7: Safety Information
• Do not expose the fixture to rain or moisture. • Refer all service not described in this manual to a Martin service technician. • Never operate the fixture with missing or damaged lenses. - Page 8 • Allow the fixture to cool before handling. Allow the fixture to cool for at least 20 minutes before opening the fixture or removing the lamp. • Do not modify the fixture or install other than genuine Martin parts. • Do not operate the fixture if the ambient temperature (Ta) exceeds 40° C (104°...
-
Page 9: Installation
Mania SCX600 po wer setting s All Mania SCX600 models can be set to 115 V, 60 Hz or 230 V, 50 Hz AC power using the switch on the connections panel. -
Page 10: Rigging The Fixture
R i g g i n g t h e f i x t u r e The Mania SCX600/700 must be mounted by means of its adjustable U- bracket. Do not install the fixture by any other means, as this can cause the fixture to overheat. -
Page 11: Creating A Data Link For Dmx Or Synchronized Operation
2. If using a rigging clamp, ensure that the clamp is undamaged and can bear at least 10 times the fixture’s weight. Bolt the clamp securely to the fixture’s mounting bracket with a grade 8.8 (minimum) M12 bolt and lock nut through the 13 mm hole in the center of the mounting bracket, or as recommended by the clamp manufacturer. - Page 12 DMX data reliably over long runs. For best results, use cable with at least one twisted pair specifically designed for RS-485 applications. Your Martin dealer can supply suitable high quality cable in various lengths. Connecting the serial data link The fixture’s data connections are XLR type, wired with pin 1 to ground,...
- Page 13 4. Plug a data cable into the OUT socket of the first fixture and the IN socket of the next one. Continue connecting up to 32 fixtures output-to- input. 5. Terminate the link by inserting a male termination plug (P/N 91613017) into the data output of the last fixture.
-
Page 14: Operation
G e t t i n g s t a r t e d Powering on Once the Mania SCX600/700 is correctly and safely installed, power on at the fixture’s power on/off switch. The fixture will start up and reset. The display will show the following messages: 1. -
Page 15: Music Trig, Auto Trig And Dmx Modes
The Mania SCX600/700 is supplied set to DMX mode with its DMX address set to 1. If you intend to operate the fixture without a DMX controller, you need to set it to stand-alone music trig or auto trig mode. -
Page 16: Synchronized Music Trig And Auto Trig Operation
DMX controller, are linked. Setting up synch roni zed operation To set up Mania SCX600/700s for synchronized operation: 1. Ensure that all slave fixtures are in DMX mode. 2. Select one fixture to be the master and set it to stand-alone auto trig or music trig mode (see “Selecting DMX, music trig or auto trig operating... -
Page 17: Dmx Controller Operation
DMX controller. The Mania SCX600/700 is supplied in DMX mode 2. • The Mania SCX600 uses 7 channels in DMX mode 1, and 11 channels in DMX mode 2. • The Mania SCX700 uses 6 channels in DMX mode 1, and 10 channels in DMX mode 2. - Page 18 1. The shutter can also be set to music triggered operation. The Mania SCX600 can be dimmed from 0% (blackout) up to 100% intensity using channel 2. Note that to douse the Mania SCX700’s lamp, a DMX value from 240 to 247 must be sent on channel 1 for at least five seconds.
- Page 19 Effects movement is set to ‘tracking’ if the fixture is in DMX mode 1 and by default. D MX si gn al in di cato r When the Mania SCX600/700 receives a valid DMX signal, the Data LED will light to show that the fixture is receiving control data. Operation...
-
Page 20: Focus Adjustment
4. Repeat step 3 until you find a level that gives the best response to the music beat. 5. Press [Menu] to save your setting and exit the music level menu. The fixture will return to this setting when you power it off and on. Mania SCX600/700 user manual... -
Page 21: Control Panel
4. C ONTROL PANEL The following functions of the control panel are described earlier in this manual: • selecting stand-alone music trig or auto trig operation (see page 15) • switching between DMX modes 1 and 2 (see page 17) •... -
Page 22: Manual Control
). It also permits you to position and move individual effects. E f f e c t s t e s t → The test sequence ( ) runs through all effects to provide a quick check of fixture performance. Mania SCX600/700 user manual... -
Page 23: Upload Mode
U p l o a d m o d e → The upload mode command ( ) prepares the fixture for a software upload (see “Software uploads” on page 33). Control panel... -
Page 24: Service And Maintenance
S C X 6 0 0 l a m p The Mania SCX600 uses a 24 V, 250 W halogen lamp with integral reflector. Important! Use only this type of lamp. See “Accessories” on page 47 for details of replacement lamps. - Page 25 2. Remove the lamp cover release thumbscrew and open the lamp cover on its hinge. Lamp cover release thumbscrew Focus knob 3. Remove the old lamp and socket from the lampholder and, being careful not to strain any wires, gently pull the lamp off its ceramic socket.
-
Page 26: Scx700 Lamp
7. Reapply power and reset the lamp hours counter (see “Information readouts” on page 21). Beam adjustment 1. If the brightest part of the beam is off-center: Mania SCX600/700 user manual... -
Page 27: Cleaning
• use screw B1 to adjust horizontal lamp alignment • use screw B2 and/or B3 to adjust vertical lamp alignment 2. If there is an excessive hot-spot or dark area in the center of the beam, or if light output is low, turn all three screws B1, B2 and B3 by an equal amount in the direction that gives an improvement, until a satisfactory beam is obtained. -
Page 28: Replacing The Main Fuse
R e p l a c i n g t h e m a i n f u s e The Mania SCX600/700 uses a time-delay fuse for protection against current overload. An indication that the fuse may have blown is that when power is applied and the lamp is switched on, no light is produced. -
Page 29: Replacing A Color Filter
R e p l a c i n g a c o l o r f i l t e r The color filters fitted to the Mania SCX600/700 are standard interchangeable items. Wear cotton gloves when changing filters to avoid contaminating components with grease from your fingers. -
Page 30: Rotating Gobos
R o t a t i n g g o b o s The rotating gobos fitted to the Mania SCX600/700 are standard interchangeable items. A range of replacement gobos is available from your Martin dealer. SCX600 gobos (viewed from lens side) SCX700 gobos (viewed from lens side) Mania SCX600/700 user manual... - Page 31 Focus is easiest to maintain if all coated gobos in a fixture are installed with their coatings as close as possible to the same plane of focus. The coated gobos in the Mania SCX600/700 are factory-installed with their coated side facing away from the lamp. If there is a risk of heat damage on a custom coated gobo, the first priority is normally to ensure that more reflective sides face towards the lamp.
-
Page 32: Mirror Removal
• – Gobo wheel timeout. On the Mania SCX700, an additional message will be displayed in the event of an error: • – Rotating gobo timeout. Mania SCX600/700 user manual... -
Page 33: Software Uploads
To do this, hold both the [Menu] and the [Enter] button pressed in while powering on the fixture. The data LED will blink when the Mania SCX600/700 is in hard boot mode. -
Page 34: Troubleshooting
SCX700: Impossible to 8-minute restrike protection Wait 8 minutes before restrike lamp after dousing delay activated. restriking a hot discharge via DMX. lamp. Mania SCX600/700 user manual... -
Page 35: Scx600 Dmx Protocol
7. SCX600 DMX PROTOCOL Channel Value Percent Function Shutter, strobe effect, music triggered shutter, reset Shutter closed 8-15 Shutter open → 16-95 4-37 Strobe slow fast 96-103 38-40 Shutter open → 104-151 41-59 Random strobe slow fast 152-159 60-62 Shutter open 160-199 63-78 Music triggered shutter... - Page 36 56 - 62 Macro 9 160 - 175 63 - 68 Macro 10 176 - 191 69 - 74 Macro 11 192 - 207 75 - 81 Macro 12 208 - 255 82 - 100 Reserved. No function Mania SCX600/700 user manual...
- Page 37 Channel Value Percent Function Effects macros (DMX mode 2 only) 0 - 15 0 - 5 No Macro 16 - 31 6 - 11 Macro 1 32 - 47 12 - 18 Macro 2 48 - 63 19 - 24 Macro 3 64 - 79 25 - 30...
-
Page 38: Scx700 Dmx Protocol
Color 8 Congo B13 185-191 73-74 Color 9 Pink B16 Continuous color wheel rotation → 192-215 75-84 CW fast slow → 216-239 85-93 CCW slow fast Music triggered color chase 240-245 94-96 Fast 246-250 97-98 Medium 251-255 99-100 Slow Mania SCX600/700 user manual... - Page 39 Channel Value Percent Function Gobo selection, gobo shake, music trig gobo chase Gobo indexing: select gobo (set indexing angle on channel 4) 0 - 2 Open 8-15 Gobo 1: Parasol twist 16-23 Gobo 2: Plaid dream, cyan B20, 24-31 9-11 Gobo 3: Cartwheel 32-39 12-14...
- Page 40 Effect speed (Mode 2 only) Tracking (default) → 8-255 3-100 Fast slow Channels 7- 10 are available in DMX mode 2 only. In DMX mode 1, pan & tilt speed and effects speed are set to ‘tracking’. Mania SCX600/700 user manual...
-
Page 41: Control Menus
9. C ONTROL MENUS Factory default settings are shown in bold type. Menu Item Options Notes (default settings in bold print) DMX address (default address = – Pan invert ... - Page 42 Manually set fixture to software update (Press mode [Enter] for 3 → Music sensitivity level (1 = most sensitive, secs. to 7 = default) access) Table 2: Control menu Mania SCX600/700 user manual...
-
Page 43: Circuit Board Layouts
Mania SCX 600 / 700 (SCX700 only) (SCX700 only) Main PCB Main PCB Power Power Tilt Color Shutter Gobo Rot. Gobo Lamp Lamp Mania SCX600 Mania SCX600 Signal Transformer Power PCB Power PCB Main Main Power Power Power Power Input... - Page 44 Transformer Fuse Mania SCX700 Mania SCX700 EU Power PCB EU Power PCB Main Main Power Power Lamp Signal Lamp Main Main Mania SCX700 Mania SCX700 US Power PCB US Power PCB Lamp Lamp...
-
Page 45: Mania Scx600/700 Specifications
Mania SCX600 lamp socket ........ - Page 46 E l e c t r i c a l M a n i a S C X 6 0 0 a l l m o d e l s Input ......... . 3-prong IEC male socket AC power .
- Page 47 O r d e r i n g i n f o r m a t i o n Mania SCX600 EU model, 220-240 V, 50 Hz ....P/N 90430082 Mania SCX600 US model, 110-120 V, 60 Hz .
- Page 52 • Olof Palmes Allé 18 • 8200 Aarhus N • Denmark Tel: +45 8740 0000 • Fax +45 8740 0010...
Need help?
Do you have a question about the Mania SCX600 and is the answer not in the manual?
Questions and answers