Table of Contents
Advertisement
Quick Links
Advertisement
Table of Contents

Subscribe to Our Youtube Channel
Related Manuals for iCentral System One M200


Summary of Contents for iCentral System One M200
- Page 1 System One Music/Video/Intercom system. M200 Installation Manual Products covered System One System One System One System One System One M200 Compact Master D200 Door Stations Alloy Video Door R200 Room Stations K200 Desktop Stations Video & Non-Video Station M200 Manual Rev4...
- Page 2 1300 050 333 Sales, Service, Spares consumer enquiries M200 Installation Manual Document Part No. 890-435 iCeNtRAl tRADe & DeAleR eNquIRIeS Head OffIce Ness Corporation Pty ltd ABN 28 069 984 372 Ph +61 2 8825 9222 Fax +61 2 9674 2520 ness@ness.com.au...
-
Page 3: Table Of Contents
SYSTEM ONE INSTALLATION MANUAL REV 4.0 M200/M250 MASTERS, R200 (S1R) ROOM STATIONS, K200 (S1DT) DESKTOP STATIONS, D200 (S1FD) & ALLOY DOOR STATIONS MASTER STATION ......................2 ROOM STATIONS ......................2 DOOR/GATE STATION(S) ....................3 POWER SUPPLY ........................ - Page 4 INITIAL POWERUP ....................... 28 ENTERING PROGRAM MODE..................28 NAVIGATING IN PROGRAM MODE ................28 GENERAL OPTIONS MENU..................28 STATION OPTIONS MENU.................... 28 AUDIO OPTIONS MENU ....................29 VIDEO OPTIONS MENU ....................29 AUX1 OPTIONS MENU....................30 AUX2 OPTIONS MENU....................30 OTHER OPTIONS MENU ....................
- Page 5 The System One Home Communication System can be installed using up to 20 stations offering great flexibility. System One provides a choice of two Master station sizes – the traditional standard size or the new compact size. Where a Master station is not required, System One can be installed without a master using only Room and Door stations.
-
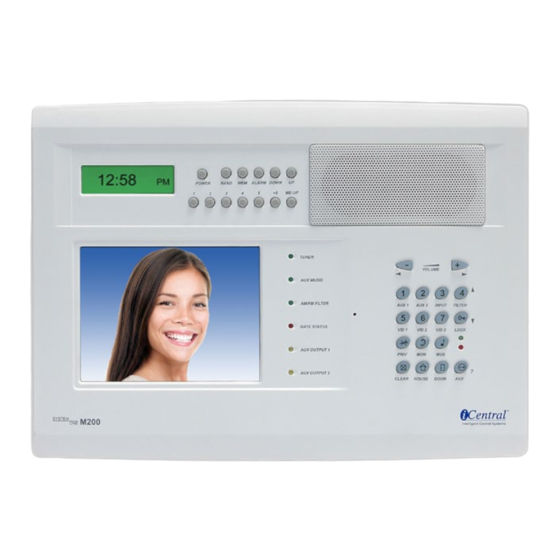
Page 6: Master Station
MASTER STATION Where a Master has been purchased as part of the system, it is generally located above the breakfast bar in the kitchen/family room at a suggested height of 1400 millimetres from the floor to the centre of the unit. -
Page 7: Door/Gate Station(S)
DOOR/GATE STATION(S) Door stations are best located adjacent to the front door or at the front gate at a suggested height of 1400 to 1500 millimetres and may require a wall box depending upon the surface to which they are to be affixed. -
Page 8: Auxiliary Input Jacks
AUXILIARY INPUT JACKS The Auxiliary Input Jack is an optional accessory allowing music from an external source, such as an iPod, MP3 player, CD player, tape deck, or computer, to be played throughout the intercom system. Three different types of Input Jack are used: 1)... -
Page 9: Where To Run Cables
WHERE TO RUN CABLES Cables can be run: In the roof space In false ceilings/bulkhead area Through and/or around external walls Under floors (subject to access being available) Underground in conduit Intercom cables should be kept as far away from AC wiring as practicality permits. Avoid running intercom cable in parallel to AC or any other type of wiring. -
Page 10: Maximum Length For Cable Runs
MAXIMUM LENGTH FOR CABLE RUNS The system may be "starwired" from a central point or "loopwired" however the number of stations on a loopwired run governs the overall length of the run. The table below shows the relationship between the length on a cable run and the number of stations permitted on the run. -
Page 11: Master To Rooms
MASTER TO ROOMS Depending on the type of cable being used, rooms stations are wired as per the table above. Where the Auxiliary function is required, this can be achieved in two ways: 1) By wiring the AUX terminal from each room to the AUX terminal at the master ... -
Page 12: Am Aerial
AM AERIAL The coaxial cable supplied with the Master is fitted with a plug at one end and a socket at the other end, which allows for plugging together multiple lengths of coaxial cable for extended runs. The plug and socket is to be cut off at both ends of the coaxial cable run for connection to the Master and the AM loop antenna. -
Page 13: Auxiliary Input Jacks (Optional)
AUXILIARY INPUT JACKS (OPTIONAL) Three different Input Jacks are available: Wireless Audio Transmitter Can only be used on systems incorporating a master station No cabling required between the master and the input jack Input Jack ‘Type A’ For use with systems using the M200 or M250 master station ... -
Page 14: Block Diagrams
BLOCK DIAGRAMS ... - Page 15 IMPORTANT: On Room Station Only systems, a 22K load resistor is required and should be fitted across the VLC and NEG terminals of the Room Station to which the power supply is connected.
-
Page 16: Installation Of M200 & M250 Master Stations
INSTALLATION OF M200 & M250 MASTER STATIONS Install the Master wall box flush with the front of the stud and brace it so as to limit any movement of the box when fitting the Master Station. After the wall has been lined, cut out an opening to the inside dimensions of the wall box. Note: For M200 model, use Metal Wall Bracket Part Number: 100975 Wall Box for Master Station –... - Page 17 Remove bricks and install wall box. For homes under construction, install wall box as brickwork is going up. Note: For M200 model, use Metal Wall Bracket Part Number: 100975 or construct a suitable timber frame. Wall Box for Master Station – Cavity Brick Wall ...
- Page 18 VDC IN 13.8V & 0V Input from regulated linear 13.8V supply (3A min for master and up to 10 room door stations) INTERCOM Connects to Corresponding terminal at Room and Door stations Connects to Corresponding terminal at Room and Door stations ...
- Page 19 VIDEO OUT Video signal for external PAL video displays Video GND for external PAL video displays This output can be used to activate a 12V relay(s) which switches 12V DC to external PAL video display(s) Provides 0V for the external video display control relay FM 300...
-
Page 20: Installation Of R200 (S1R) Room Station
INSTALLATION OF R200 (S1R) ROOM STATION The room station is normally mounted at a height from the floor of approximately 1400mm If a surface mount back box is being used, feed the cable through the back box and secure the back box to the wall using screws and appropriate wall plugs. -
Page 21: Installation Of K200 (S1Dt) Desktop Station
INSTALLATION OF K200 (S1DT) DESKTOP STATION The desktop station connects to a wall plate by means of a CAT5 Patch Lead (RJ45 to RJ45) The patch lead should be “straight through” and not “crossover” in that the wire colour coding should be the same at both ends of the lead. -
Page 22: Installation Of D200 (S1Fd) Door Station
INSTALLATION OF D200 (S1FD) DOOR STATION The door station is normally mounted at a height from the floor of approximately 1400 to 1500mm. If a surface mount back box is being used, feed the cable through the back box and secure the back box to the wall using screws and appropriate wall plugs. -
Page 23: Installation Of Alloy Door Station
INSTALLATION OF ALLOY DOOR STATION This station is designed to be surface mounted. On brick, stone or cement walls, ensure that there is a small recessed section, where the cabling protrudes through the wall, to facilitate the video connector, balun or any other connections. Remove the hex head screw from the bottom of the door station to allow the metal front to be separated from the plastic body. - Page 24 6WAY BLOCK Connects to Corresponding terminal at Master Connects to Corresponding terminal at Master Connects to Corresponding terminal at Master See Note 1 Connects to corresponding VLC terminal at the Master depending on Door Station number * COM1 ...
- Page 25 Wiring the Lock and Chime Outputs The Lock output (LK) and Chime (voltage) output (CH) will provide 12 Volt DC @ 50mA which can be used to power up relays which in turn will switch voltage to the device being used. Note: Both these outputs are designed to drive a load, with a resistance of not less than 240 ohm.
- Page 26 Powering Electric Lock from Door Station Powering Electric Lock from Separate Supply...
-
Page 27: Installation Of Auxiliary Input Jacks
INSTALLATION OF AUXILIARY INPUT JACKS Installation in Timber Frame Walls Cut out the wall lining so as to allow fitting of the mounting bracket. Pull the cable through the opening, strip the required wires, and screw into the terminals of the Input Jack as indicated. - Page 28 Connection Diagram for Input Jack Type B – 8 Wire Room Station Only Systems Connection Diagram for Input Jack Type B – 6 Wire Room Station Only Systems ...
-
Page 29: Installation Of Auxiliary Output Board
Connect the plug pack to the Wireless Audio Transmitter. Connect the audio output of a PC, CD player, TV, or any other device with an audio output, to the 3.5mm stereo input jack on the Wireless Audio Transmitter. Connect the plug pack to the power point and switch the power point on. -
Page 30: Installation Of Power Supply
AM radio reception. Note: Since some linear supplies also generate interference, it is suggested that only power supplies recommended by iCentral be used. See sections "LOCATION OF EQUIPMENT" and "CABLING" for important details on power supply location and cabling. - Page 31 In Figure A, there are effectively two cable runs of 50M each, with two stations on each run. This is acceptable because it is permissible to have two stations on a 50M run of cable. (see section "...
-
Page 32: Initial PowerUp
INITIAL POWERUP On powerup the master displays a blue welcome screen showing the applicable software version. Press CLEAR to clear screen ENTERING PROGRAM MODE Press PRIV and MON buttons simultaneously. The GENERAL OPTIONS menu is displayed. NAVIGATING IN PROGRAM MODE Press ... -
Page 33: Audio Options Menu
– Sets the number of door stations that do not have an inbuilt or associated external camera. Options are 1, 2 or 3. If “2 NONCAM DOOR STN” is selected, door stations 2 & 3 (wired to VLC2 and VLC3) will be the door station without cameras. If “2 NON CAM DOOR STN”... -
Page 34: Aux1 Options Menu
AUX1 OPTIONS MENU – programmable from 1 to 99 seconds or 1 to 99 minutes – output turns on when AUX button pressed followed by 1 – output turns off after programmed duration – Output turns on and off each time AUX followed by 1 is pressed ... -
Page 35: Radio/Clock Adjustmet (Am/Fm Model)
– This test will display the image from the camera or other video device connected to CAM 1 input. – This test will display the image from the camera or other video device connected to CAM 2 input. ... -
Page 36: Radio/Clock Adjustmet (Dab+/Fm Model)
RADIO/CLOCK ADJUSTMET (DAB+/FM MODEL) Setting the clock is not required as the time and date are automatically synchronized via DAB broadcasting. Press the “Mus” button at the Master, so the red LED illuminates. Turn the radio on, by pressing the “Power” button at Master. ... -
Page 37: Entering Program Mode
ENTERING PROGRAM MODE Press PRIV and MON buttons simultaneously. The red LED will flash the current station number. When all programming options have been entered, press CLEAR to exit PROGRAM mode. ROOM STATION CODING For the purpose of Select Calling (calling individual or grouped stations), each station must be allocated either a Single Digit or Double Digit number. -
Page 38: Keypad Backlighting
KEYPAD BACKLIGHTING Keypad backlighting, which can be toggled on and off by pressing the DOOR button while in PROGRAM mode. Note: Repeated pressing of the DOOR button, while in program mode, will toggle the backlighting On and Off. VOLUME FEEDBACK TONE When adjusting the volume level on the room stations, a feedback tone will be heard that varies in amplitude as the volume level is adjusted. -
Page 39: Door Station Volume Adjustments
DOOR STATION VOLUME ADJUSTMENTS There are 2 adjustments on the door station which may require fine tuning after installation. Note: A flat bladed screw driver with a blade width of 2 2.4mm is required to perform these adjustments. The use of an incorrect screw driver will result in the pot being damaged. -
Page 40: Chime (Voltage) Output Options
CHIME (VOLTAGE) OUTPUT OPTIONS The CH Terminal provides an output voltage whenever the chime button is pressed. The duration of this output voltage is set by 1of 4 programming options. Option #1 Single flash Voltage present for duration of Bell Press ... - Page 41 S Turn on the intercom radio and press the MUSIC button at the Master, to enable MUSIC mode. Tune the intercom radio to one of the FM frequencies listed in the table below that is not being used by a commercial FM radio station. If a clear frequency cannot be found, use one that is picking up only a weak radio signal.
- Page 42 The fitting of an Auxiliary Output Board to the System One intercom allows devices such as door strikes, automatic gates, courtesy lights etc. to be controlled from the Master or any Room Station. Each Output Board provides two sets of "normally open" and "normally closed" dry relay contacts (RELAY 1 and RELAY 2).
- Page 43 NOTES...
Need help?
Do you have a question about the System One M200 and is the answer not in the manual?
Questions and answers