OWC ThunderBay 4 Assembly Manual & User Manual
Hide thumbs
Also See for ThunderBay 4:
- Support manual (22 pages) ,
- Assembly manual & user manual (10 pages) ,
- Assembly manual & user manual (8 pages)
Table of Contents
Advertisement
Advertisement
Table of Contents

Subscribe to Our Youtube Channel
Related Manuals for OWC ThunderBay 4


Summary of Contents for OWC ThunderBay 4
- Page 1 OWC ThunderBay® 4 ASSEMBLY MANUAL & USER GUIDE...
-
Page 2: Table Of Contents
2.3 SOFTRAID 5 2.3.1 Configuring Email Notifications 2.3.2 Disk Failure, Replacement, and RAID Rebuild 2.4 CHANGING DRIVES 3. APPENDIX ......................9 3.1 TROUBLESHOOTING 3.2 ABOUT DATA BACKUP 3.3 ONLINE RESOURCES 3.4 TECHNICAL SUPPORT HOURS AND CONTACT INFORMATION OWC THUNDERBAY 4 TABLE OF CONTENTS... -
Page 3: Introduction
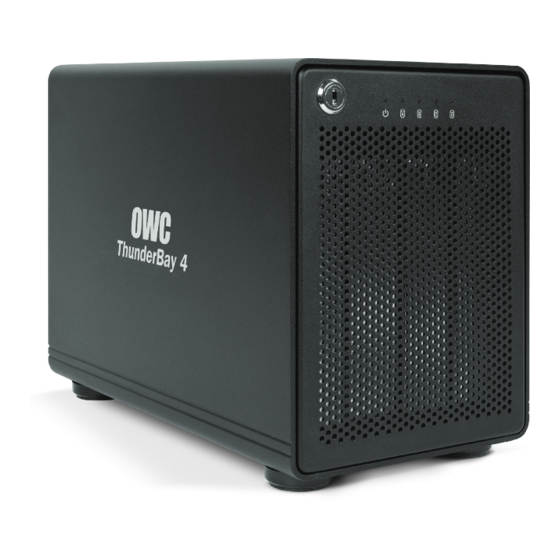
1. Locking faceplate — Use the included keys to lock the faceplate for security, or remove the faceplate to gain access to the drive bays. 2. LED indicators — See the following chart for details on the ThunderBay 4’s LEDs. THUNDERBAY... -
Page 4: Rear View
If there is no Thunderbolt cable connected, or if the computer is off or in a sleep or hibernation mode, the ThunderBay 4 will turn off and its power LED will turn orange to indicate that it is not receiving a data signal. -
Page 5: System Setup
6. Fasten the drive into the drive tray using six of the included screws. 7. Slide the drive tray back into the rails in the ThunderBay 4 and push until it is seated fully, then push in on the thumbscrew and turn it clockwise until it stops moving. If you encounter resistance, do not force the drive tray. -
Page 6: Quick Start
RAID volumes, predict drive failures, and send you an email when a problem occurs. This ThunderBay 4 has been set up as a RAID 5 volume in SoftRAID. Proceed to the next section for first-time setup instructions. -
Page 7: Disk Failure, Replacement, And Raid Rebuild
In the event of a disk failure or similar event, SoftRAID will indicate that the RAID volume of which the failed disk is a member is in a degraded state. If your ThunderBay 4 has a failed disk, it will look like this: To replace the failed disk and rebuild the RAID volume, follow these steps: 1. - Page 8 The new disk needs to be initialized in SoftRAID before it can be added to the RAID volume. To do this, right-click the disk and select ‘Initialize’. You will be warned that data on the disk will be destroyed. Select ‘Initialize’ again. OWC THUNDERBAY 4 SYSTEM SETUP...
- Page 9 In the window that pops up next, click on the new disk to select it, then click ‘Add’. You will be prompted to confirm your selection. Click ‘Add’ again to add the new disk to the RAID volume and begin the rebuild process. OWC THUNDERBAY 4 SYSTEM SETUP...
-
Page 10: Changing Drives
ThunderBay 4 or unmount any of the other drives. If two or more drives in the ThunderBay 4 are members of a Software RAID, make sure you understand the ramifications of removing a drive before doing so. -
Page 11: Appendix
Begin your troubleshooting by verifying that the power cable is connected to the ThunderBay 4 and to a power source. If the power cable is connected to a power strip, make sure that the power switch on the strip is turned on. - Page 12 Other World Computing. OWC is a trademark of New Concepts Development Corporation, registered in the U.S. Patent and Trademark Office and in Canada.
Need help?
Do you have a question about the ThunderBay 4 and is the answer not in the manual?
Questions and answers