Table of Contents
Advertisement
Quick Links
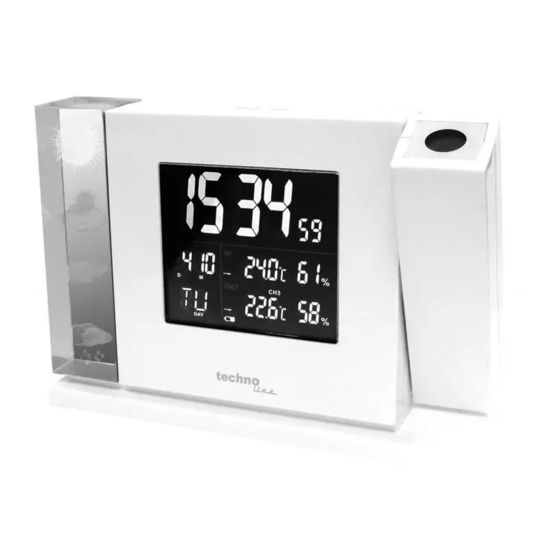
WT643 Weather Station
Instruction Manual
The weather station desk clock combines the following functions:
– Time with Projection – Alarm – Calendar – Indoor and Outdoor Temperature
– Indoor and Outdoor Humidity – Weather Forecast
1. "MODE" button
2. "MIN / MAX" button
3. "▲ °C & °F" button
4. "▼" button
5. "SET / ALARM" button
6. "CHANNEL" button
7. BATTERY COMPARTMENT
8. AC/DC ADAPTER JACK
9. TIME PROJECTION FOCUS
10. CRYSTAL WEATHER FORECASTER
11. "SNOOZE / LIGHT" buttonButtons :
Getting started
Due to the heavy power consumption of the unit it is strongly recommended to
use the A/C adapter at all times.
1. Install the A/C adapter into the AC/DC ADAPTER JACK (8) hole
2. Install 3 x 'AAA' size batteries by sliding open the BATTERY
COMPARTMENT (7). Replace battery compartment door when finished.
See battery warnings below
Advertisement
Table of Contents

Related Manuals for Technoline WT643


Summary of Contents for Technoline WT643
- Page 1 WT643 Weather Station Instruction Manual The weather station desk clock combines the following functions: – Time with Projection – Alarm – Calendar – Indoor and Outdoor Temperature – Indoor and Outdoor Humidity – Weather Forecast 1. “MODE” button 2. “MIN / MAX” button 3.
- Page 2 3. When batteries are in use, the symbol of the battery will be shown on the clock face when the batteries are low and need replacing. 4. The batteries in the unit will keep the time and other details working if and when the A/C adapter is removed.
- Page 3 9. Press “SET / ALARM” button (5) to confirm. *Language setting: -The unit is equipped with 7 languages for the screen display. Toggle between these languages: EN for English; –GE for German; IT for Italian; FR for French; NE for Dutch; ES for Spanish; and DA for Danish. NOTE: The preset language is English (EN) after reset or after installation of batteries and the date is Thursday (TH), 2009 January 1.
- Page 4 The weather station requires at least 24 hours on acclimatizing to local weather conditions. The weather station process and analyze the weather patterns for the past 24 hours in order to determine the future weather. Until that time has elapsed, the predicted weather forecast may not accurately reflect the actual weather for your immediate area.
- Page 5 Batteries installation 1. Open battery compartment on the back of the unit by removing the two small screws (RTS 2) with a Philips head screwdriver. (see figure 4) 2. Install / replace with 2x “AAA” size batteries in the compartment. It is recommended that only alkaline batteries are used.
- Page 6 each channel for approximately 3 seconds before skipping to the next channel. 4. Once all your channels are received press “CHANNEL” button (6) once to confirm the channel. 5. The weather station will receive a new signal automatically every 30 seconds to update the remote temperature.
- Page 7 Do not dispose this unit in a fire as it may explode. Dispose the unit legally and recycle if possible. Batteries safety warnings: 1. Please read all instructions carefully before use. 2. Install batteries correctly by matching the polarities (+/-). 3.
Need help?
Do you have a question about the WT643 and is the answer not in the manual?
Questions and answers