Table of Contents
Advertisement
Quick Links
Advertisement
Table of Contents

Related Manuals for Vibra CJ-E series


Summary of Contents for Vibra CJ-E series
- Page 1 230002M01 Precision Advanced Tuning Fork Electronic Balance CJ-E Series Operation Manual Instructions ● To ensure safe and proper use of the balance, please read this manual carefully. ● After reading this manual, store it in a safe place near the balance, so you can review it as needed.
-
Page 3: Safety Precautions
Safety Precautions Safety Precautions Before using the balance, please read this manual carefully. The nature of dangers and damages that may result in the event of improper operation are indicated under the following categories: DANGER This symbol indicates improper handling that may cause death or severe damage including serious injury. - Page 4 DANGER Do not disassemble Only use the or modify the unit. specified power Doing so could cause source. accidents such as Use of other types of injury, electrical power sources may shock, and fire, or result in heat malfunction. For generation, fire, or inspection and malfunction of the...
- Page 5 Safety Precautions CAUTION When the balance Do not lay the AC is not waterproof adapter cable on and dustproof, do the surface of a not expose the passage. balance to rain, Somebody may trip on the cable, causing water, dust, or such the balance to fall, other environment.
- Page 6 Avoid applying Do not use volatile excess force or solvents for impact to the cleaning. balance. The body may be distorted. To clean the To prevent breakage unit of stains, use a or malfunction, place piece of dry cloth or the sample to be cloth soaked in a measured on the...
- Page 7 Safety Precautions Do not use the balance in the following places: Location where it Location where it may be subject to may be subjected air from an to abrupt changes air-conditioning in ambient unit: temperature or humidity: Extreme changes in the ambient Accurate temperature may...
- Page 8 Respect the following: Be sure to calibrate Do not leave the the balance after balance installation or overloaded. (When relocation. it is overloaded, o-Err is displayed.) Measurement values may contain errors. To To prevent breakage maintain accurate or malfunction, measurement, be remove the sample sure to calibrate the placed on the balance...
- Page 9 Safety Precautions Dispose of batteries in accordance with local regulations. -vii-...
-
Page 10: How To Read This Manual
How to Read this Manual This manual comprises the following chapters: Chapter 1 How to Begin This chapter gives introductory information such as how to assemble and install the balance, and how to turn the power on and off. For your first use of the balance, be sure to read this chapter. -
Page 11: Table Of Contents
Contents Contents Safety Precautions ......................i How to Read this Manual ....................viii Notational conventions......................viii Contents .......................... ix Checking Supplied Items ..................2 Names and Functions of Component Parts ............3 Workings of Operation Keys .................5 How to See Displayed Signs.................6 Assembling and Installing the Balance ..............8 Assembling the balance ...................... - Page 12 Weighing with addition function....................37 Judging “Above” and “Below” (Limit Function)............38 How to judge ....................... 38 Judgment criteria and limit value setting..............38 Detailed function setting ....................39 Limit function setting ........................ 40 Judging by absolute values...................... 41 Judging by absolute values using the method of placing actual samples on the balance ............................
-
Page 13: Contents
Contents Data format........................68 Meanings of data ......................68 Input commands ........................71 Procedure for transmission..................71 Sample input commands ..................... 71 Command form......................71 Command format......................72 Response..........................75 Error Messages ....................78 Troubleshooting....................80 Initializing......................83 Maintenance......................84 For heavy dirt ........................... 84 How to take care of the balance.................... -
Page 15: How To Begin
Chapter 1 How to Begin This chapter describes the operations required before using the balance, starting from assembling the main unit to turning the power switch on and off. Before your first use of the balance, be sure to read this chapter. This chapter includes: Checking Supplied Items Names and Functions of Component Parts... -
Page 16: Checking Supplied Items
How to Begin 1-1 Checking Supplied Items The following items are contained in the box. In the unlikely event of problems such as missing or broken items, please contact the retailer from whom the balance was purchased or our Sales Office (See the Appendix at the end of this manual). -
Page 17: Names And Functions Of Component Parts
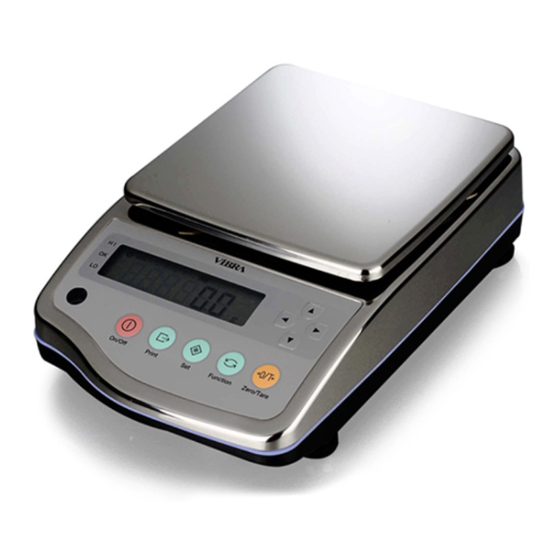
1-2 Names and Functions of Component Parts 1-2 Names and Functions of Component Parts Level Indicates the inclination of the balance. Adjuster Use to adjust the inclination of the Display Operation Keys unit by turning them right or left. Refer to “Workings of Operation Keys”... - Page 18 How to Begin When not using the balance, be sure to attach the AC adapter jack cap, connector cover, and the rubber cap and the cover on the bottom to prevent water and dust from entering the unit. Note that the waterproofing and dustproofing functions do not work in the following situations: Caution When the cable is connected to the D-SUB9P.
-
Page 19: Workings Of Operation Keys
1-3 Workings of Operation Keys 1-3 Workings of Operation Keys The operation keys are provided on the front of the main unit. Use these keys to operate and set the balance. Direction key: Use to set the function setting, etc. [Zero/Tare] key: Use to zero a [On/Off] key: Use to power on/off [Set] key: Use to... -
Page 20: How To See Displayed Signs
How to Begin 1-4 How to See Displayed Signs Each of the signs displayed on the front of the main unit has the following meanings: Displayed sign Description Stable state indicator (Indicates that readout is stable.) Lights up when the limit function is used. Indicates that the addition function is enabled when the balance is in addition mode. - Page 21 1-4 How to See Displayed Signs Lights up when sum totals are displayed (shared use together with other readout units) when the addition function is used. Indicates that the balance is in parts counting mode. Indicates that the balance is in unit covering mode. Indicates the unit momme.
-
Page 22: Assembling And Installing The Balance
How to Begin 1-5 Assembling and Installing the Balance Assembling the balance Assemble the main unit with the following steps: Attach the pan base. Place the pan base by aligning it to the projections Align the hole of the pan Fix the pan base by provided on the main unit and then fix it by turning base to the projection of... - Page 23 1-5 Assembling and Installing the Balance Use the balance in a horizontal position. By using the level provided on the front of the main unit and the adjuster provided on the bottom, the inclination of the main unit can be corrected and checked. Adjust the inclination of the unit so that the air bubble in the level fits within the circle.
-
Page 25: Basic Operation
Chapter 2 Basic Operation This chapter describes how to use basic measuring functions that are used daily. This chapter includes: Powering On/Off the Balance and Checking Operation Weighing by Placing a Sample in a Container (Tare) Weighing an Added Sample Displaying the Sum of the Container and the Sample Function Setting Basics... -
Page 26: Powering On/Off The Balance And Checking Operation
Basic Operation 2-1 Powering On/Off the Balance and Checking Operation Turning the power of the balance on and off Turn the power on. Press the [On/Off] key. Check that the AC adapter is connected. Zero is shown in the display after all indicators light up. ... -
Page 27: Weighing By Placing A Sample In A Container (Tare)
2-2 Weighing by Placing a Sample in a Container (Tare) 2-2 Weighing by Placing a Sample in a Container (Tare) When measuring weight with the sample in a container (tare), only the sample is weighed by subtracting the weight of the container. This is called “tare.” Place the container on the pan. -
Page 28: Weighing An Added Sample
Basic Operation 2-3 Weighing an Added Sample Place an additional sample. Only the added weight is measured. Place the sample. The weight of the placed sample is displayed. Set the tare. Press the [Zero/Tare] key. The readout becomes zero (tare range setting). ... -
Page 29: Displaying The Sum Of The Container And The Sample
2-4 Displaying the Sum of the Container and the Sample 2-4 Displaying the Sum of the Container and the Sample The sum weight of the sample and the container is displayed (gross weight readout). A gross weight can only be displayed when the balance functions as a weighing Caution machine. -
Page 30: Function Setting Basics
Basic Operation 2-5 Function Setting Basics To set the settings of the balance, use the function keys. This section describes the basic operations of function setting Pressing the [Print] key when a function is being set can cancel the setting and return to Reference measurement mode. - Page 31 2-5 Function Setting Basics For the items and settings settable by the function capability, refer to “Appendix 1: Function Reference Setting List” (P. 86). To initialize the function setting, refer to “Section 7-3: Initializing” (P. 83). Function setting is possible with the direction keys. After switching to the function setting mode with step 1, use the direction (arrow) keys to change setting items and settings.
- Page 33 Chapter 3 Various Measuring Methods In addition to weighing, the balance has the following measuring modes: parts counting, percentage weighing, unit converting, gravimeter, and animal weighing. This chapter includes: Weighing (Weighing Machine) Counting Parts Count Measuring Percentage Obtaining Weight Multiplied by Coefficient Measuring Specific Gravity Weighing an Animal Adding Multiple Measurements...
-
Page 34: Weighing (Weighing Machine)
Various Measuring Methods 3-1 Weighing (Weighing Machine) By default, the balance is set to “weighing machine” mode. To return to weighing machine mode from other weighing modes, use the following operation: Set to the function setting mode. Press and hold the [Function] key. After “” is displayed, release the finger. -
Page 35: Counting Parts Count
3-2 Counting Parts Count 3-2 Counting Parts Count The balance saves sample weight (unit weight) using the automatic memory update method (simplified SCS method) to count the number of samples. First, place a set number of samples. Next, place an appropriate number of additional samples, up to three times the set number. -
Page 36: Displaying Average Sample Weight
Various Measuring Methods Put additional samples. Put additional samples. The number of additional samples is up to three times the set number of samples. For example, if “10 Pcs” is set, add 30 or less samples. A blip sound reports you that added samples have been measured. -
Page 37: Measuring Percentage
3-3 Measuring Percentage 3-3 Measuring Percentage With respect to the reference sample weight, the weight of a sample is shown in percentage. A reference sample weight can be set by weighing an actual sample (setting a reference weight by weighing an actual sample) or entering a value ( setting a reference weight by entering a value ). -
Page 38: Setting A Reference Weight By Entering A Value
Various Measuring Methods Setting a reference weight by entering a value Set to the function setting mode. Press and hold the [Function] key. After “” is displayed, release the finger. (Refer to “Section 2-5: Function Setting Basics (P. 16).) Select “Percentage Weighing.” Press the [Zero/Tare] key several times to select “... - Page 39 3-3 Measuring Percentage Weigh. The display indicates the percentage of the sample with respect to the reference sample weight. Pressing the [Function] key toggles the display between percentage weight and total weight. The minimum unit is automatically set based on the saved reference weight. Min.
-
Page 40: Obtaining Weight Multiplied By Coefficient
Various Measuring Methods 3-4 Obtaining Weight Multiplied by Coefficient Measured weight is multiplied by a set coefficient, and the result can be displayed. For example, if “2.35” is set for the coefficient, and the weight of the sample is “2,000 g,” the given readout is “4,700.”... - Page 41 3-4 Obtaining Weight Multiplied by Coefficient Save the coefficient. Press the [Set] key. Weigh. The weight of the sample is multiplied by the coefficient, and the result is displayed. The increment of the minimum readability is automatically set to 1, 2, or 5 depending on the Reference entered coefficient.
-
Page 42: Measuring Specific Gravity
Various Measuring Methods 3-5 Measuring Specific Gravity The specific gravity of a sample is measured using the underfloor weigher function. The “CJ underfloor weigher fixture option” is required (Refer to “Appendix 4 Caution Specifications” (P. 93). Measurement procedures for specific gravity Measure specific gravity with the following steps: 1. -
Page 43: Measurement
3-5 Measuring Specific Gravity Measurement Set to the function setting mode. Press and hold the [Function] key. After “” is displayed, release the finger. (Refer to “Section 2-5: Function Setting Basics (P. 16).) Select “Gravimeter.” Press the [Zero/Tare] key several times to select “... - Page 44 Various Measuring Methods turned off. The acceptable range of water temperature is 0 to 99.9°C. Pressing the [Print] key can cancel the setting. Save the water temperature. Press the [Set] key. Hang only the cage to zero the weight Hang only the cage on the underfloor weigher readout.
-
Page 45: Using A Liquid Medium Other Than Water
3-5 Measuring Specific Gravity Using a liquid medium other than water Set to the function setting mode. Press and hold the [Function] key. After “” is displayed, release the finger. (Refer to “Section 2-5: Function Setting Basics (P. 16).) Select “Gravimeter.” Press the [Zero/Tare] key several times to select “... - Page 46 Various Measuring Methods Set language for printing by the function setting “” (language for printing) (1 = English/2 = Japanese). -32-...
- Page 47 3-5 Measuring Specific Gravity Gravimeter measurement data output samples When water is selected English Japanese (katakana) Specific gravity of solid Sample weight Actual water temperature When other than water is selected English Japanese (katakana) Specific gravity of solid Sample weight Specific gravity of medium -33-...
-
Page 48: Weighing An Animal
Various Measuring Methods 3-6 Weighing an Animal The balance can accurately weigh animals and other samples that move during measurement. Even if animals and other such moving samples move during measurement, if weight variations fit within a set value range, the measured value is held (fixed) and displayed. A weight variation range for value holding can be set with “.”... - Page 49 3-6 Weighing an Animal If the animal moves too much, the value may not be held. The measurement unit used in animal weighing is “g” only. Caution In animal weighing, because stability detection ranges are wide, errors may occur compared to actual weight. -35-...
-
Page 50: Adding Multiple Measurements
Various Measuring Methods 3-7 Adding Multiple Measurements Multiple samples are weighed consecutively and the sum is displayed. The weighing method can be selected from reloading samples (cumulate function) or without replacing samples (net addition function). The addition function can be used in the following weighing modes: weighing machine, parts Reference counting, percentage weighing, and unit converting. -
Page 51: Weighing With Addition Function
3-7 Adding Multiple Measurements Weighing with addition function Place the first sample. After an asterisk (*) is displayed, press the [Set] key. The measured value is saved and a sigma [Σ] sign is displayed for several seconds. Place another sample (cumulative). After an asterisk (*) is displayed, press the [Set] key. -
Page 52: Judging "Above" And "Below" (Limit Function)
Various Measuring Methods 3-8 Judging “Above” and “Below” (Limit Function) By setting values in the balance, you can judge whether measured values fit within set ranges. The limit function can be used in the following weighing modes: weighing machine, parts Reference counting, percentage weighing, and unit converting. -
Page 53: Detailed Function Setting
3-8 Judging “Above” and “Below” (Limit Function) A limit value can be entered in the following two ways: - Putting actual samples on the balance: By weighing a sample on the balance, save the weight. - Entering values: Set a value using the keys. Detailed function setting In the function setting function, the limit function can be set in detail. -
Page 54: Limit Function Setting
Various Measuring Methods Limit function setting First, set the limit function. Then, set limit values. Set to the function setting mode. Press and hold the [Function] key. After “” is displayed, release the finger. (Refer to “Section 2-5: Function Setting Basics (P. 16).) Select Limit Function. -
Page 55: Judging By Absolute Values
3-8 Judging “Above” and “Below” (Limit Function) Save the setting. Press the [Set] key. Then, set the values for judgment (limit values) to perform measurement. Judging by absolute values The function setting for absolute value judgment is “ .” Judging by absolute values using the method of placing actual samples on the balance Set upper and lower limits by weighing samples. -
Page 56: Judging By Absolute Values Using The Method Of Entering Values
Various Measuring Methods Judging by absolute values using the method of entering values Set upper and lower limits by entering values using the keys. Check that the limit function is set for judging by absolute values (Refer to the previous section “Limit function setting”). -
Page 57: Judging By Deviation Values
3-8 Judging “Above” and “Below” (Limit Function) Judging by deviation values The function setting for deviation value judgment is “ .” Judging by deviation values using the method of placing actual samples on the balance Set a reference, upper limit, and lower limit values by weighing samples. Check that the limit function is set for judging by deviation values (refer to the previous section “Limit function setting”). -
Page 58: Judging By Deviation Values Using The Method Of Entering Values
Various Measuring Methods Judging by deviation values using the method of entering values Set a reference, upper limit, and lower limit values by entering values using the keys. Check that the limit function is set for judging by deviation values (Refer to the previous section “Limit function setting”). - Page 59 3-8 Judging “Above” and “Below” (Limit Function) Weigh. Place a judgment target sample on the pan. The OK, LO, or HI result judged from the upper and lower limit values is displayed with the “” indication. -45-...
-
Page 61: Adjusting The Scale
Chapter 4 Adjusting the Scale Calibrate the balance using weights. This chapter includes: How to Calibrate Testing the Balance... -
Page 62: How To Calibrate
Adjusting the Scale 4-1 How to Calibrate To calibrate a balance is called span adjustment. Be sure to perform span adjustment for highly accurate measurements. An electronic balance is influenced by the acceleration of gravity. For this reason, you should calibrate your balance every time you relocate it. - Page 63 4-1 How to Calibrate Place the weight on the pan. After zero-point adjustment finishes and the display changes to “ ,” place the weight on the pan. Adjustment starts. Span adjustment starts. After display changes to the blinking of “ ,”...
-
Page 64: Testing The Balance
Adjusting the Scale 4-2 Testing the Balance The amount of offset with respect to the reference weight can be checked. This is called “span test.” Performing a span test will not calibrate the balance. Use a weight for calibration that weighs 50% of the weighing capacity or heavier. To calibrate Reference more accurately, use a weight that is equivalent to the weighing capacity. -
Page 65: Function Setting
Chapter 5 Function Setting Set the functions of the balance. This chapter includes: Using Two Expression Units by Switching Them Minimum Readability Setting Saving Container (Tare) Weight Power Setting ID No. Setting Improving the Stability of the Balance... -
Page 66: Using Two Expression Units By Switching Them
Function Setting 5-1 Using Two Expression Units by Switching Them You can set two units (unit A and unit B) and switch between the units. Unit B can be used only in weighing machine mode. Unit A can be used in all measurement Reference modes. -
Page 67: Minimum Readability Setting
5-2 Minimum Readability Setting 5-2 Minimum Readability Setting Use this function to set the minimum readability. The larger the minimum readability becomes, the less the balance is affected by external influences. In addition, it takes less time for the balance reading to become stable. -
Page 68: Saving Container (Tare) Weight
Function Setting 5-3 Saving Container (Tare) Weight Use this function to set a tare range when the balance is powered on using the latest saved tare weight. Use this function when you turn the balance on or off with a sample and tare put on the pan. -
Page 69: Power Setting
5-4 Power Setting 5-4 Power Setting Auto Power Off This function, which is only available when the balance is operated by batteries, turns off the balance automatically if left untouched for about five minutes. Set to the function setting mode. Press and hold the [Function] key. -
Page 70: Auto Backlight Off
Function Setting Auto Backlight Off This function automatically turns off the backlight if the balance is left untouched in measurement mode for about three minutes. Set to the function setting mode. Press and hold the [Function] key. After “” is displayed, release the finger. (Refer to “Section 2-5: Function Setting Basics (P. -
Page 71: Id No. Setting
5-5 ID No. Setting 5-5 ID No. Setting Results of successfully completed span adjustments and span tests can be printed by ISO/GLP/GMP compliant devices. Set the ID numbers printed together at this printing. In situations such as when the same model is used, you can assign numbers that allow you to control them easily. - Page 72 Function Setting Save the ID number. Press the [Set] key. Display changes to “ .” Pressing the [Set] key again returns the balance to normal display. -58-...
-
Page 73: Improving The Stability Of The Balance
5-6 Improving the Stability of the Balance 5-6 Improving the Stability of the Balance When the balance is stable, “ ” is lit in the upper left of the display. When displayed values flicker and stabilized display blinks, it indicates that the balance is influenced by wind or vibration. - Page 74 Function Setting Save the setting. Press the [Set] key. The balance goes back to normal display. -60-...
-
Page 75: External Devices
Chapter 6 Input/Output to/from External Devices Balance data can be output to a printer and be input and output to/from external devices via the RS-232C interface. This chapter includes: Outputting to a Printer Connecting to External Devices via RS-232C Interface Communication Data and Commands... -
Page 76: Outputting To A Printer
Input/Output to/from External Devices 6-1 Outputting to a Printer By connecting a printer to the balance, span adjustment and span test results and measurement results can be printed in ISO/GLP/GMP compliant form. For printing examples, refer to “Appendix 3: Printing in Compliance with ISO/GLP/GMP” Reference (P. -
Page 77: Printing Measurement Results
6-1 Outputting to a Printer Perform span adjustment or span test. After span adjustment or test is successfully completed, the printer executes printing. While the data is being printed, the balance may seem to not be moving, but wait until printing is completed. No printing is executed if span adjustment or test is not successfully completed. -
Page 78: Connecting To External Devices Via Rs-232C Interface
Input/Output to/from External Devices 6-2 Connecting to External Devices via RS-232C Interface The balance inputs and outputs from and to external devices such as a PC via the RS-232C interface. The RS-232C interface equipped on the balance is a D-SUB9P type. The connection with external devices is established with the following specifications: Disconnect the AC adapter of the balance before connecting external devices. -
Page 79: Sample Connection With A Pc
6-2 Connecting to External Devices via RS-232C Interface You can set a tare range or adjust the zero-point from an external device by connecting a contact or a transistor switch between the pin for externally setting a tare range (Pin 9) to Reference the pin for signal ground (Pin 5). -
Page 80: Interface Specifications
Input/Output to/from External Devices Interface specifications Transmission system Serial transmission, Start-stop synchronization Transmission rate 1200/2400/4800/9600/19200 bps Transmission codes ASCII codes (8/7 bits) Signal level Compliant with EIA RS-232C HIGH level (data logic 0): +5 to +15 V LOW level (data logic 1): -5 to -15 V Bit configuration Start bit: One bit Data bits: 8/7 bits... -
Page 81: Communication Data And Commands
6-3 Communication Data and Commands 6-3 Communication Data and Commands The RS-232C interface exchanges data with external devices as follows: Output data (Measurement data, etc.) Input command (Used to control the balance externally) Response data (Response to input commands) Output data The three formats of “6-digit numeric,”... -
Page 82: Data Format
Input/Output to/from External Devices Data format - 6-digit numeric format Consists of 14 characters including terminators (CR = 0DH/LF = 0AH). - 7-digit numeric format Consists of 15 characters including terminators (CR = 0DH/LF = 0AH). A parity bit can be appended. - Page 83 6-3 Communication Data and Commands When expression units are changed or switched to display of parts counting, percentage weighing, or unit converting, the decimal place is changed (Refer to “ Sample communication formats” (P. 70)). [U1, U2] (two characters) Indicates the unit used to show numeric data. Code Meaning Balance indicator...
- Page 84 Input/Output to/from External Devices [S2] (one character) Indicates the status. Code Description Data stable *1 Data unstable *1 Data error *2 (Indicates that data other than S2 is invalid.) (SP) No status specified *1: This value is independent of data if the data is independent of whether the weighing condition is stable or not, such as cumulative values and unit weights.
-
Page 85: Input Commands
6-3 Communication Data and Commands Input commands An input command is to control the balance from an external device. The following four input commands are supported: (1) Tare range command (2) Set output control command (3) Set measurement mode command (4) Span adjustment/test command Procedure for transmission (1) An input command is sent from an external device to the balance. -
Page 86: Command Format
Input/Output to/from External Devices Command format (1) Tare range (zero-point adjustment) command Code (C1) Code (C2) Description Value Response A00: Successful completion E01: Command error - Tare range setting E04: A tare range (SP) - Zero-point None (zero-point adjustment adjustment) cannot be set (Range violation, weight error, etc.). - Page 87 6-3 Communication Data and Commands (2) Set output control command Code (C1) Code (C2) Description Response -{}-30H Stop output. Output continuously at all times. Output continuously if stable (Stop output if unstable). Output once when the [Print] key is pressed (whether the balance is stable or unstable).
- Page 88 Input/Output to/from External Devices (3) Set measurement mode command Code (C1) Code (C2) Description Response Set to Mode 1 A00: Successful completion Set to Mode 2 E01: Command error Set to Mode 3 E02: Error Set to Mode 4 * The measurement mode to be activated by the above mode settings 1 to 4 depends on the weighing mode currently in use.
-
Page 89: Response
6-3 Communication Data and Commands Response Upon receiving an input command, the balance sends out a response. You can select the response format of either the [“A00”/“Exx”] format or the [ACK/NAK] format. In the explanation of “input commands” in the previous section, the [“A00”/“Exx”] format responses are described. - Page 91 Chapter 7 Troubleshooting This chapter describes troubleshooting including error messages and remedies. This chapter includes: Error Messages Troubleshooting Initializing Maintenance...
-
Page 92: Error Messages
Troubleshooting 7-1 Error Messages Message Cause Remedy - The weight of the sample is over the - Unload the sample to weigh it in weighing capacity some portioned-out measurements. - Replace the tare with a lighter one. - If the error message does not disappear even when nothing is placed on the pan, mechanical parts may have failed. - Page 93 7-1 Error Messages balance influenced static - Unplug the AC adapter from the electricity or noise. receptacle and then turn the power on again. - If this error occurs again, electric components may have failed. Contact our Sales Office or Technical Service Division.
-
Page 94: Troubleshooting
Troubleshooting 7-2 Troubleshooting Problem Cause Remedy Nothing is displayed even when The AC adapter is not connected. - Check that the AC adapter is the balance is powered on. connected. - If nothing is displayed even if the AC adapter is properly connected, electric components of the balance, or... - Page 95 7-2 Troubleshooting Problem Cause Remedy Weight indication contains an The balance may have been The balance may be affected by error even after calibrated. affected by an external influence an external influence such as such as wind and vibration wind vibration.
- Page 96 Troubleshooting Problem Cause Remedy No outputs Intended output function settings Make the balance compatible in are not established. communication conditions with the external device by referring Communication conditions to their operation manuals. disagree with the external device. Check outputs with the following methods: Initialize the function settings by referring...
-
Page 97: Initializing
7-3 Initializing 7-3 Initializing The settings of the balance can be initialized with the following steps: Set to the function 2 setting mode. Press the [Function] key while pressing the [Zero/Tare] key. Release the fingers when “ ” is displayed. ... -
Page 98: Maintenance
Troubleshooting 7-4 Maintenance When taking care of the balance, be careful of the following: For heavy dirt If the balance is very dirty, disassemble and clean it. The parts that you can remove are only the pan and the pan base. Pan base Removing parts other than the pan and the pan base damages the waterproof function Caution... - Page 99 Appendixes Appendixes The appendixes provide data including each type of data for the balance. This chapter includes: Function Setting List Measurement Mode List Printing in Compliance with ISO/GLP/GMP Specifications...
-
Page 100: Appendix 1 Function Setting List
Appendix 1 Function Setting List 1: Weighing machine Weighing mode A star ( ) denotes an initial value. 2: Parts counting 3: Percentage weighing 4: Unit converting 5: Gravimeter (Measuring specific gravity of a solid) 6: Animal weighing Gravimeter selected (Media) Water ... - Page 101 Appendix 1 Function Setting List A star ( ) denotes an initial value. Auto-zero Disabled Enabled Stability judgment Wide (Mild) Narrow (Strict) Response speed Measurement by consecutive weighings Fast Slow Interface Stop input/output Numeric 6-digit format * Select “1”...
- Page 102 A star ( ) denotes an initial value. CAL operation disabled Span Span adjustment with external weight adjustment/test Span test with external weight Bar graph Not displayed Displayed Auto power off Disable (for continuous use) Enable (The power is turned off five minutes later.) * Enabled only when the balance is powered by batteries Auto backlight off...
- Page 103 Appendix 1 Function Setting List A star ( ) denotes an initial value. Set tare range “0” is displayed immediately after the key is pressed. Reset the display to “0” when the balance is stabilized. Store tare Disabled Enabled Buzzer control ...
-
Page 104: Appendix 2 Measurement Mode List
Appendix 2 Measurement Mode List In each weighing mode, pressing the [Function] key can toggle the function displayed. Displayable functions differ between modes. The additional functions usable concurrently in each function also differ. Displayed functions switched at each [Function] key Additional function Remarks press... -
Page 105: Appendix 3 Printing In Compliance With Iso/Glp/Gmp
Appendix 3 Printing in Compliance with ISO/GLP/GMP Appendix 3 Printing in Compliance with ISO/GLP/GMP Span adjustment with external weight English Japanese (katakana) Span test with external weight Japanese (katakana) English -91-... - Page 106 Measurement data: Header English Japanese (katakana) Measurement data: Footer English Japanese (katakana) The date and time shown in printing examples are printed only when the dedicated Caution printer (CSP-160 or CSP-240) is used. -92-...
-
Page 107: Appendix 4 Specifications
Appendix 4 Specifications Appendix 4 Specifications Basic specifications Gram (g) Parts counting Percentage Model Dimension of pan Weighing Minimum Minimum unit Weight limit (g) capacity readability (d) weight (g) CJ-220E CJ-320E φ140 mm 0.01 0.01 CJ-620E CJ-820E CJ-2200E 2200 CJ-3200E 3200 190 ×... - Page 108 Output RS-232C compliant output is equipped as standard. SHINKO DENSHI standard format D-SUB9P male (RS-232C output, port for external tare range setting, bi-directional) Supported printer: CSP-160/CSP-240 (SHINKO DENSHI) Span adjustment Span adjustment/test with external weights (Weights used are at least 50% of the weighing capacity) * Only the unit g can be used for span adjustment.
-
Page 109: Minimum Display By Unit Of Measurement
Appendix 4 Specifications Minimum Display by Unit of Measurement Model 220E 320E 620E 820E 2200E 3200E 6200E 8200E Unit_of measuremant 2200 3200 6200 8200 0.01 0.01 0.01 0.01 0.22 0.32 0.62 0.82 0.00001 0.00001 0.00001 0.00001 0.0001 0.0001 0.0001 0.0001 1100 1600 3100... - Page 110 Model 15KE Unit_of measuremant 15000 0.001 75000 (ct) (oz) 0.05 (lb) 0.005 (ozt) 0.05 9600 (dwt) Bottom right grain (Hong Kong) 0.05 (Singapore, 0.05 Malaysia) (Taiwan) 0.05 4000 mom (momme) 1200 (to) * The view of the table Upper cell: Capacity Lower cell: Readability -96-...
-
Page 111: Appendix 5 Conversion Table Units
Appendix 5 Conversion Table Units Appendix 5 Conversion Table Units Penny Unit Gram carat Ounce Pound troy ounce Weight 0.03527 0.00220 0.03215 0.64301 1 ct 0.00705 0.00044 0.00643 0.12860 1 oz 28.34952 141.74762 0.06250 0.91146 18.22917 1 lb 453.59237 2267.96185 14.58333 291.66667 1 ozt... -
Page 112: Index For Terms
Index for Terms Absolute value ............38 Net................15 AC adapter..............2, 8 Net addition.............. 36 Adjuster ..............9 Number of samples........... 21 Animal ..............34 Auto backlight off.............56 Operation key ............. 5 Auto power off............55 Average sample weight..........22 Pan..............2, 8, 84 Pan base............2, 8, 84 Bar graph ............12, 38 Percentage ..............
Need help?
Do you have a question about the CJ-E series and is the answer not in the manual?
Questions and answers