Table of Contents
Advertisement
Advertisement
Table of Contents

Related Manuals for Bushnell Trailscout 119700


Summary of Contents for Bushnell Trailscout 119700
- Page 1 Models: 119700/119830 Models: 119930/119901 LIT. #: 98-0744/03-06...
- Page 4 Bushnell Digital Trail Scout Features (All Models) One of the most revolutionary advances in scouting technology to date, the Bushnell Digital Trail Scout delivers. Boasting one of the most user friendly interfaces in the industry, this trail camera has a positive toggle switch system that instantly tells you what your camera setting are—without fumbling with a confusing software interface! The...
- Page 5 DIGITAL TRAIL SCOUT MODELS 119700—Digital Trail Scout 2.1MP Great images and scouting technology at a great value. This camera will sense deer and other game as far out as 90 feet with its passive infrared sensor. Low-battery indicator lights when battery life drops below 25%. Motion LED lights when activity is detected by the sensor in regular imaging mode and during setup mode for aiming.
-
Page 6: Digital Trail Scout Specifications
DIGITAL TRAIL SCOUT SPECIFICATIONS Image Sensor 1/2” CMOS, 2.1 million pixels (119700) or 3.0 million pixels (119830/119930/119901) Lens F/3.5, effective focal length 42mm. Sight range: 45 degrees Flash High power electronic Incandescent Flash or Infrared LED array. Range: 30 ft. PIR Sensor Low noise, high sensitivity passive infrared sensor. -
Page 7: Parts Guide
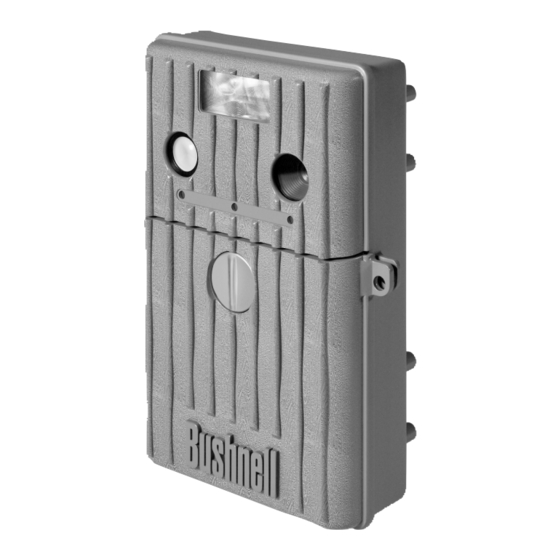
119700/119830 119930/119901 Infrared LED Array Flash Camera Flash Lens Camera Laser Lens Pointer IR Filter Keylock Motion Motion Switch SD Card SD Card Slot Slot Battery Battery Keylock Parts Guide... - Page 8 Switch Position/Setting Switch and Setup Description Switch #/Function CENTER DOWN K1 (Operating Setup Mode) K2 (Image Mode) Still Movie Up/Down/Enter K3 (Day/Night 24 Hour Night Mode) (6AM- (6PM- 6PM) 6AM) K1 K2 K3 K4 K4 (Camera Delay) 2 minutes 1 minute 30 seconds 119700/119830 Control Panel Switch Position/Setting...
- Page 9 1. K1 - Mode Switch (ON/ SETUP/ OFF) : a) Power ON (UP position): Set K1 to ON position, The LCD display will show “BUSHNELL” for about 2 seconds. The LCD will rotate through the DATE\TIME\EVENT&IMAGE displays EVENT nn when pressing the Up and Down keys.
- Page 10 Setup Guide (cont.) (2) SET TIME: When the LCD shows the time, press the ENTER key to modify the time.Press Up or Down button to select 1-12, then press ENTER to confirm the two Set Time digit hour. Then the cursor will move to the minute.Press Up or Down button to 06: 30 PM select 0-59, then press ENTER to confirm the two digit minute.
-
Page 11: Set Day Time
Setup Guide (cont.) If you do not want to set a password when the LCD shows (PW YES) , you Password can press the U/D button to select No, After pressing the ENTER, the LCD None display shows (PW NO), and no password will be set. When you are finished with SETUP, change K1 to the ON (UP) position and the unit will be operating after a 2 minute delay. - Page 12 Setup Guide (cont.) 2. K2 – Image Mode Switch (STILL / MOVIE): Set K2 to either of these settings: (UP) STILL Photo Mode: Image resolution is 2.1MP (119700/119830), or 3.0MP (119930/119901) and photos are stored in JPG format. (DOWN) MOVIE Mode: The camera can record a 15 second movie, the file format is AVI. NOTE: The use of MOVIE Mode must be during daytime with models 119700/119830 .
- Page 13 Setup Guide (cont.) 4. K3 (Models 119700/119830) – (24Hr / DAY/ NIGHT) MODE: K4 (Models 119930/119901)– (24Hr / DAY / NIGHT) MODE: The Trail Scout has three working times: (a) 24Hr: The Trail camera is working all day . When the PIR is sensed the unit will take an image and record an EVENT.
- Page 14 Battery Life— flashes during that time. Methods required for setting date/time and camera imaging settings. Setup— Security (4 methods)— One of the most important requirements of any trail camera. Bushnell units have 4 levels—padlock, tree bracket, cable lock, and software password.
-
Page 15: Sd Card Slot
The unit has a standard SD Card slot. You must push the SD Card in with the SD Card label facing the Bushnell logo into the SD card slot. Pushing it again will release the SD card, and then you can remove the SD card from the SD card slot. - Page 16 Other Setup Notes (cont.) 3. LASER POINTER (Models 119930/119901 Only) The 119930/119901 Trail Scout camera has a Laser pointer. When you mount the unit on a tree or any other fixed surface and cannot sight from behind the Game Camera, you can use the Laser Pointer to align the unit.
- Page 17 Other Setup Notes (cont.) 5. USING A SINGLE REMOTE WITH MULTIPLE CAMERAS (Resetting A Camera’s Remote Code) Your Trail Scout camera is set at the factory to only recognize the code transmitted by the remote unit that it comes with. If you have multiple cameras, you can use one remote with all of them (instead of carrying around mulitple remotes, trying to mark them so you know which remote for which camera, etc.) The cameras that were not packed with the remote you wish to use will need to “learn”...
- Page 18 6. DAY/NIGHT IR FILTER SWITCH (Models 119930/119901 Only) The Model 119930/119901 Trail Scout camera has a slide switch (above the Bushnell logo) to add or remove a filter within the camera’s lens system, which blocks invisible infrared light energy when inserted. With the switch in the DAY position (sun icon), the filter is inserted so that infrared light cannot reach the CMOS...
- Page 19 USING THE DIGITAL TRAIL SCOUT 1. MOUNTING: Mount the trail camera on the tree as shown below. 1. Screw bracket A to the tree. 2. Bolt bracket B on the back of the trail camera. 3. Match bracket B up to bracket A. 4.
-
Page 20: Operating Notes
Using the Trail Scout (cont.) 2. Power ON and Setup switch summary: Turn the knob 90°counterclockwise and open the front cover. (Note: If the password is entered incorrectly 3 Set the K1 to ON position, times,the unit will be powered off automatically. Input correct Password. - Page 21 This warranty does not cover damages caused by misuse, improper interference in a residential installation.This equipment handling, installation, or maintenance provided by someone other than a Bushnell Au- generates, uses and can radiate radio frequency energy thorized Service Department.
- Page 22 ©2006 Bushnell Outdoor Products www.bushnell.com...
Need help?
Do you have a question about the Trailscout 119700 and is the answer not in the manual?
Questions and answers