Advertisement
Table of Contents
- 1 Important Note
- 2 Parts and Controls
- 3 Installing the Batteries and Sd Card
- 4 Loading Batteries
- 5 The Off, On, and Setup Modes
- 6 Off Mode
- 7 SETUP Mode Shortcut Keys/Functions
- 8 Using the Setup Menu to Change Settings
- 9 Parameter Settings Display
- 10 Coordinate Input
- 11 Downloading the Photos/Videos
- 12 Troubleshooting (Faq)
- 13 Technical Specifications
- 14 Two Year Limited Warranty
- Download this manual
Advertisement
Table of Contents

Related Manuals for Bushnell Core


Summary of Contents for Bushnell Core
- Page 2 Quick Start Guide (119936C/119938C/119975C/119977C) For full instruction manual go to: www.bushnell.com To get Started using your Bushnell Trail Camera: 1. Install 6 AA batteries (lithium* or alkaline) and SD card (up to 32GB max.) *lithium batteries are recommended 2. At the location you will place the camera, power it on.
-
Page 3: Important Note
The Core Trail Camera is equipped with built-in infrared LEDs that function as a flash, so that it delivers clear photos or videos (in black & white) even in the dark, and it can take color photos or videos under sufficient daylight. -
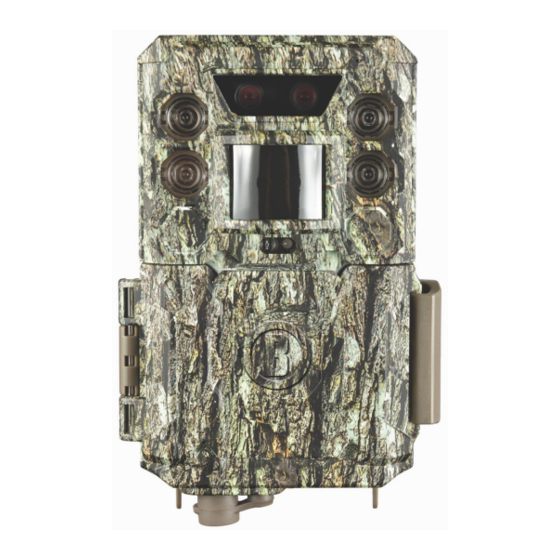
Page 4: Parts And Controls
(still photos), widescreen or fullscreen format still photos, imprintable camera name (user set) along with current data including temperature and moon phase. Applications The Core Trail Camera can be used as a trail camera for hunting or scouting game. It is also suitable for surveillance usage. PARTS AND CONTROLS The Core Trail Camera provides the following connections for external devices: USB port, SD card slot and external DC power in (pg 6, Fig. -
Page 6: Installing The Batteries And Sd Card
INSTALLING THE BATTERIES AND SD CARD Before you begin learning how to use your Core Trail Camera, you will first need to install a set of batteries and insert an SD card. Although that may only take you a minute, there are some important... -
Page 7: The Off, On, And Setup Modes
USING THE Core Trail Camera Once you’ve prepared your Core Trail Camera by properly installing batteries and an SD card, you could simply take it outside, strap it to a tree, switch it on and leave-and you might get some great photos that are exactly what you wanted. -
Page 8: Off Mode
SETUP MODE In the SETUP mode you can check and change the settings of the Core Trail Camera’s with the help of its built-in LCD. These settings, found in the SETUP Menu, let you change the photo or video resolution, interval between photos, switch the time imprint on, etc. -
Page 9: Using The Setup Menu To Change Settings
Changing Parameter Settings in SETUP Mode A wide range of options or “parameters” are provided to allow you to set the Core Trail Camera to your operational preferences. To change the setting of any parameter you must first switch to the SETUP mode. - Page 10 Fig. 4 Selecting Parameter Settings Press Menu (4A) Press Down (4B) Press OK EXAMPLES-Changing the Settings of Some Common Parameters Following this page, you will find tables listing all of the parameters found in the SETUP Menu, along with their possible settings (or range of settings), and a detailed description of what the parameter controls and what the settings do.
- Page 11 Field Scan is a revolutionary new feature for the Bushnell Core Trail Camera, which allows you to monitor your food plots or field edges with time lapse images or video. When set to “On”, the Core Trail Camera will take a photo (or record a video clip) automatically at your choice of intervals (for example, once every five minutes) during one or two blocks of time you set up for each day, without requiring a trigger from an active animal.
- Page 12 (Step 5). As an example of how you might use these two available time blocks, you could setup Field Scan time block "A" for the dawn hours from 6 AM to 8 AM, and block "B" to capture images between 5:30 and 7 PM.
- Page 13 The SETUP Menu – Parameters and Settings List w/Descriptions Parameter Settings (Bold=default) Description Set Clock (Set) Press OK and use the UP/DOWN keys (to change the setting) and LEFT/RIGHT keys (to move to the next field) to set the hour (24-hr format only, “00”=midnight, “12”=noon) and minute, and then (on the lower row), the year, month and date.
- Page 14 Capture Number 1 Photo, 2 Photo, 3 Photo, 4 Selects how many photos are taken in sequence (only affects Photo, 5 Photo per trigger in Camera mode. This setting affects still photos photos taken in Field Scan mode as well (to snap in Camera mode) two photos every 10 minutes, for example).
- Page 15 recording ends and a new video is started if a new trigger occurs. With Interval set to 2 sec or longer, and LED Control=Med/Low, for night videos: same as daytime, but maximum length is 60 seconds before recording ends and a new video is started if a new trigger occurs.
-
Page 16: Coordinate Input
The format you will need to use to enter the coordinates in the Core Trail Camera menu screen is shown below: Note: You may see "negative" latitude or longitude coordinates online. These designate South latitudes and West longitudes. - Page 17 Using the adjustable web belt: Fig. 5 illustrates using the web belt on the Core Trail Camera. Push one end of the belt through the two brackets on the back of the Core Trail Camera. Thread the end of the strap through the buckle.
- Page 18 FAT16 to save photos and videos. Here are some related notes: • You don’t need to be concerned about the file system format of the Core Trail Camera unless your equipment has problems reading the SD card. If this happens, please format the SD card with the Core Trail Camera or in your computer first and then insert the card into your Core Trail Camera and try again.
-
Page 19: Downloading The Photos/Videos
With Windows XP or later, you can then simply use the options in the pop-up window to copy, view, or print your photos (right). On all Windows OS, the Core Trail Camera will also be listed as a “Removable Disk” if you open the “My Computer” window (on Macs, an icon will appear on your desktop). -
Page 20: Troubleshooting (Faq)
5. If the SD card has its write protect switch in the lock position, the camera will not take images. 6. If you have used an SD card in another device before inserting it in your Core Trail Camera, you might want to try formatting the card using the “Format”... - Page 21 Camera won’t power up 1. Make sure that you have installed 8 batteries in the battery compartment. Bushnell recommends using Energizer® Lithium AA batteries in your Core Trail Camera. 2. Make sure that the batteries are installed correctly, observing proper polarity. Always place the negative (flat) end of each battery in contact with the spring side of its slot inside the camera.
- Page 22 7. Short video clips—not recording to the length expected a. Check to make sure that the SD card is not full. b. Make sure that the camera has good batteries in it. Near the end of the battery life, the camera may choose to record shorter video clips to conserve power.
-
Page 23: Technical Specifications
Moisture or Ants Inside Camera 1. To ensure humidity or rain is kept out of the camera, secure the DC In plug firmly in place. 2. Ants can be attracted by low level electronic vibrations, and enter through any gaps between the exterior and interior of the camera. -
Page 24: Two Year Limited Warranty
Operating Humidity 5% - 90% TWO YEAR LIMITED WARRANTY Your Bushnell® product is warranted to be free of defects in materials and workmanship for two years after the date of purchase. In the event of a defect under this warranty, we will, at our option, repair or replace the product, provided that you return the product postage prepaid. - Page 25 Overland Park, Kansas 66214 Vaughan, Ontario L4K 5W5 For products purchased outside the United States or Canada please contact your local dealer for applicable warranty information. In Europe you may also contact Bushnell at: Bushnell Germany GmbH European Service Centre Mathias-Brüggen-Str.
- Page 26 Further information about the subject is available at your community administration, your local waste collection company, or in the store where you purchased this equipment. For further questions or additional information please contact: Bushnell Outdoor Products 9200 Cody, Overland Park, Kansas 66214 (800) 423-3537 • www.bushnell.com ©2019 Bushnell Outdoor Products...
Need help?
Do you have a question about the Core and is the answer not in the manual?
Questions and answers
I bought a Bushnell trail camera, model 1199308 but the online manual does not look like what I bought. The power switch has three settings: on, aim, and off. on the right side I have an up arrow button, an ok button, and a down arrow button. I can't get the thing to work.
The Bushnell trail camera model 1199308 has a power switch with three settings: OFF, AIM (equivalent to SETUP), and ON. The operating instructions based on these settings are:
- OFF mode: Use this mode when replacing the SD card or batteries, transporting the camera, or connecting it to a computer. It is the safe mode where no functions are active.
- AIM (SETUP) mode: In this mode, the LCD screen turns on. Use it to configure settings such as date/time, photo or video mode, and other camera options. This is also where you can test the camera's field of view and motion sensor.
- ON mode: This is the active mode where the camera takes photos or videos based on motion detection. The LCD screen is off to conserve power, and all settings configured in AIM mode are used during operation.
This answer is automatically generated