Advertisement
Quick Links
Download this manual
See also:
User Manual
Quick Start Guide
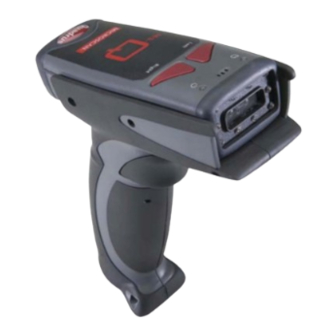
MS-Q Imager
Step 2 — Set Up Hardware
(PS/2)
Note: The PS/2 interface draws its power from the host.
Hardware for PS/2
FIS-6100-XXXXG
1
MS-Q Imager
FIS-6150-XXXXG
2
Keyboard Wedge Cable
60-000018-03
Installation Steps for PS/2
1. Power-off the host and
disconnect the keyboard.
2. Connect the PS/2 cable
(2) to the MS-Q (1).
3. Attach the remaining
connectors to the keyboard
cable and host computer,
as shown at right.
4. Power-on the host computer.
5. Read the PS/2 Mode and
Save Settings symbols.
PS/2
Save
Mode
Settings
Step 1 — Check Required Hardware
Important: It is recommended that battery-powered MS-Q
imagers be charged for 4 hours before first use.
To assemble the MS-Q Imager with Cabled Handle (H2):
1. Insert the flexible connector at the back of the H2 Handle into
the MS-Q's 8-pin DIN connector.
2. Snap the imager onto the H2 Handle over the battery blank. Be
sure that the underside of the imager is latched at the front of
the handle.
3. Secure the flexible connector at the back of the H2 Handle with
the two screws provided.
4. Secure the underside of the imager to the H2 Handle with the
two screws provided.
5. Attach the cable to the bottom of the handle. Secure the cable
and cable clamp with the two screws provided.
3
Note: Detailed instructions for the MS-Q Imager's handle
options are available in the MS-Q Imager User's Manual.
P/N 83-210041 Rev P
Step 2 — Set Up Hardware
Hardware for RS-232
1
MS-Q Imager
RS-232 Kit includes:
2
RS-232 Cable
3
Power Supply
Installation Steps for RS-232
1. Power-off the host.
2. Connect the 8-pin mini-DIN on the RS-232
cable (2) to the MS-Q (1).
3. Connect the 9-pin D-sub connector to your
host computer's serial port.
4. Connect the RS-232 cable to the power
supply cable.
5. Plug in the power supply (3) and power-on
the host.
6. Open a terminal program (HyperTerminal, for example) and
PS/2 Hardware
set 57.6K baud rate, 8 data bits, none parity, 2 stop bits, none
hardware.
7. Read the RS-232 Default Settings Mode symbol below.
8. Read the Save Settings symbol below.
Test Symbol
RS-232 Default
(ABCDEFGHIJKLMNOP)
Settings Mode
5
4
(RS-232)
FIS-6100-XXXXG
FIS-6150-XXXXG
98-000074-XX
RS-232 Hardware
Save
Test Symbol
Settings
(ABCDEFGHIJKLMNOP)
Step 2 — Set Up Hardware
(USB)
Note: The USB interface draws its power from the host.
Hardware for USB
FIS-6100-XXXXG
1
MS-Q Imager
FIS-6150-XXXXG
2
USB Cable
Included
Installation Steps for USB
1. Connect the USB cable (2)
to the MS-Q (1).
2. Connect the USB cable (2)
to the host. You do not
need to power off your host
computer.
3. Open any program in your
host computer that can
receive keyboard text.
4. Read the USB Keyboard
symbol below.
5. Read the Save Settings
symbol below.
Save
USB
Keyboard
Settings
Mode
Step 2 — Set Up Hardware
(Bluetooth)
Hardware for Bluetooth
FIS-6100-XXXXG
1
MS-Q Imager
FIS-6150-XXXXG
2
USB Bluetooth Modem (Default option) 98-000076-10
3
USB Cable
Included with kit
Note: RS-232 options also available
98-000076-07, -08, -09
Installation Steps for Bluetooth
1. Power-off the host.
2. Connect the 8-pin mini-DIN on the
Bluetooth modem (2).
3. Connect the 9-pin D-sub connector (3)
to your host computer's serial port.
4. Connect the RS-232 cable to the power
supply cable (4).
5. Plug in the power supply (4) and
power-on the host.
6. Open a terminal program (HyperTerminal, for example)
and set to 9600 baud rate, 8 data bits, none parity, 1 stop
bit, none hardware.
7. Read the RF Two-Way Mode symbol below.
8. Read the symbol on the Bluetooth modem's top label (2).
9. Read the Save Settings symbol below.
RF Two-Way
Save Settings
Mode
USB Hardware
Test Symbol
(ABCDEFGHIJKLMNOP)
Bluetooth Hardware
Test Symbol
(ABCDEFGHIJKLMNOP)
Advertisement

Related Manuals for Microscan MS-Q Imager


Summary of Contents for Microscan MS-Q Imager
-
Page 1: Quick Start Guide
Included Installation Steps for USB 1. Connect the USB cable (2) To assemble the MS-Q Imager with Cabled Handle (H2): to the MS-Q (1). 1. Insert the flexible connector at the back of the H2 Handle into 2. Connect the USB cable (2) the MS-Q’s 8-pin DIN connector. - Page 2 Step 2 — Set Up Hardware Step 3 — Install ESP (Batch/Battery) (Batch/Battery, cont.) ESP Software can be found on the Microscan Tools CD that is packaged with the MS-Q. Hardware for Batch/Battery Batch Setup - Send and Log Mode 1.
Need help?
Do you have a question about the MS-Q Imager and is the answer not in the manual?
Questions and answers