
Related Manuals for OneAccess ONE300


Summary of Contents for OneAccess ONE300
- Page 1 ONE300 Installation Manual Version B April 2007 http://www.oneaccess-net.com ONE300 – Installation Manual...
- Page 2 OneAccess. OneAccess and the distributors can in no case be held responsible for direct or indirect damage of any kind incurred as a result of any error in the software or guide.
-
Page 3: How To Read This Manual
This section describes technical characteristics such as operating conditions. Chapter 7 – Directives and Standards This chapter details the list of standards, which the device complies with. Appendix – Connection Description This chapter provides the pin-out of cables that are compatible with the router. ONE300 – Installation Manual... -
Page 4: Table Of Contents
T0/S0 Digital Interface (ISDN BRI)......................20 INSTALLATION............................24 Opening the Chassis..........................24 Extension Board ............................25 Connection ...............................26 POWER-UP ..............................27 TECHNICAL CHARACTERISTICS ......................28 Climatic Environment ..........................28 Power Supply ............................28 Dimensions...............................28 DIRECTIVES AND STANDARDS ......................29 Declaration of Conformity ........................29 Standards ..............................30 ANNEXE A: CONSOLE CABLE..........................32 ONE300 – Installation Manual... -
Page 5: Safety Instructions
OneAccess and only by qualified staff as recommended in the installation manual. The ONE300 with FXS interfaces has got a screw located on the rear panel. This must be permanently connected to the main protective earth. ONE300 – Installation Manual... -
Page 6: Directives And Standards
Directives and Standards Declaration of Conformity ONE300 – Installation Manual... -
Page 7: Standards
Standards The ONE300 is designed in conformity with the standards listed hereafter, provided that the basic housing, modules, interface boards and installation kits are mounted as recommended in the corresponding installation manual(s). Safety EN60950-1: 2001, First Safety of information technology equipment, including electrical Edition business equipment. - Page 8 Restricted use of Hazardous Substances (RoHS) The ONE300 respects the European directive on the restricted use 2002/95/EC of Hazardous Substances in electric and electronic equipment. ONE300 – Installation Manual...
-
Page 9: Router Description
Router Description Hardware Description This section details the various types of services offered by the ONE300. The described configurations are the maximum configurations for the motherboard and the extension modules. Other configurations can be derived by under-equipment. Indeed, the ONE300 can have fewer interfaces compared to those presented below. -
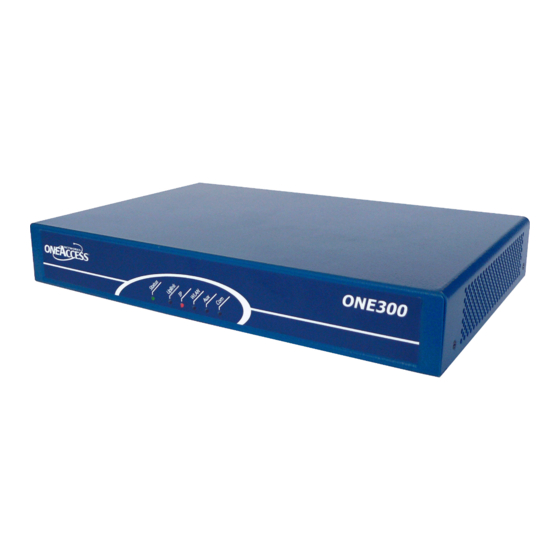
Page 10: Front Panel
At least one interfaces are are down IP Interface is not up (example: PPPoA not connected) WLAN Not used Interface up Traffic in progress No auto Auto Auto configurat configuration configuratio successfully n in completed progress ONE300 – Installation Manual... -
Page 11: Rear Panel
Rear Panel This section details the various types of ONE300 rear panel so that the user can identify the interface type and port numbering. It should be noted that only the fully-loaded configurations are represented. Other configurations can be derived by not providing some interfaces represented on the product. - Page 12 Input for the external power supply connector (DC input jack, 12V-2.2A), • 2 connectors for WLAN antenna. Figure 2. Rear panel with 8 BRI Depending of the ordered configuration of the system, the rear panel may change. ONE300 – Installation Manual...
- Page 13 Input for the external power supply connector (DC input jack, 12V-2.2A) • 2 connectors for WLAN antenna. Figure 3. Rear panel with 1 PRI Depending of the ordered configuration of the system, the rear panel may change. ONE300 – Installation Manual...
-
Page 14: Configuration Identification
16: 16 voice communication channels available • 30: 30 voice communication channels available • W: Wireless LAN Example: ONE300-1P M30 is an ONE300 router equipped with: • 1 IMA access G.SHDSL 8 wires, • 1 PRI interface • 30 voice communications... -
Page 15: Interface Description
Signal Signal Line 2 Line 1 Line 2 Line 3 Line 3 Line 4 Line 1 Line 4 4.1.4 Cables For the connection of the G.SHDSHL interface, use the shielded cable that comes with the equipment. ONE300 – Installation Manual... -
Page 16: Console Interface (Console)
8 bits, 1 bit for stop, no parity. 4.2.2 Connector Pinout RJ45 connector: Signal Signal • TX: Emission • RX: Reception • NC: Not Connected • GND: Ground 4.2.3 Cable The console cable is defined in Appendix A. ONE300 – Installation Manual... -
Page 17: Lan 10/100 Mbps Interface (Ethernet)
TD (-) RD (-) RD (+) 4.3.5 Cables The cables are shielded, crossover/straight cables with 4 twisted pairs. The switch supports auto detection of crossover/straight cable (’auto-MDI/MDI-X detection’); the transmission pairs are (1-2) and receive (3-6). ONE300 – Installation Manual... -
Page 18: Switch Interface (Switch)
TD (-) RD (-) RD (+) 4.4.5 Cables The cables are shielded, crossover/straight cables with 4 twisted pairs. The switch supports auto detection of crossover/straight cable (’auto-MDI/MDI-X detection’); the transmission pairs are (1-2) and receive (3-6). ONE300 – Installation Manual... -
Page 19: Isdn Pri Interface (Pri)
RX (+) TX (-) RX (-) TX (+) 4.5.3 Cables The cable used for the access is a shielded cable, which contains 2 twisted pairs with twisted pairs for the transmission (4-5) and receive (1-2) pairs. ONE300 – Installation Manual... -
Page 20: T0/S0 Digital Interface (Isdn Bri)
The ONE300 supports 8 S0/T0 ISDN interfaces. The interfaces can be configured in TE or NT. The ONE300 can receive a BRI module that has 8 digital interfaces. The connection of the digital voice interface is carried out on the rear panel via RJ45 connectors (1 connector per interface). - Page 21 RNIS 6 RNIS 6 RNIS 7 RNIS 7 The WATCHDOG jumper must always be connected so that OneAccess guarantees the correct operation of the ONE300. Description of a block of jumpers for a BRI interface: 100 Ohms Adaptation 100 Ohms Adaptation...
- Page 22 Power feeding for ISDN terminal disconnected. Configuration without impedance adaptation and with power feeding of the terminal: 100 Ohms impedance adaptation Configuration disconnected. Power feeding for ISDN terminal connected. ONE300 – Installation Manual...
- Page 23 Configuration with impedance adaptation and with power supply of the terminal: 100 Ohms impedance adaptation connected. The first jumper of the pair is Configuration associated with the transmission, the second one with the reception. Power feeding for ISDN terminal connected. ONE300 – Installation Manual...
-
Page 24: Installation
EMC standards as defined in Chapter 7. Directives and Standard Opening the Chassis Unlock the 2 screws located on each side of the cover, Remove the cover. ONE300 – Installation Manual... -
Page 25: Extension Board
Position the module so that the module metallic faceplate fits in the place made available by the removal of the faceplate, • Lower the module while aligning the module with the motherboard connector, • Plug the module into the motherboard connector. • Screw the fixing stand ONE300 – Installation Manual... -
Page 26: Connection
• Secure the power supply connection by installing the DC power supply cord into the plastic ring. The device shall not be used with another power supply than a power supply provided by OneAccess. ONE300 – Installation Manual... -
Page 27: Power-Up
The ’STATUS’ LED light remains steady green if software initialization was successful, • The ’STATUS’ LED blinks in case of software absence or error during software loading. Refer to the Software and ONEOS User Guide for more information. ONE300 – Installation Manual... -
Page 28: Technical Characteristics
≤ 24g / m3 Absolute Humidity ≤ 2500 m Altitude Power Supply External Power Supply 100-240 VAC / 26,5W (12V – 2,2A). Dimensions The dimensions of the housing are: 320 mm Width Height 200 mm Depth ONE300 – Installation Manual... -
Page 29: Directives And Standards
Directives and Standards Declaration of Conformity In progress ONE300 – Installation Manual... -
Page 30: Standards
Standards The ONE300 is designed in conformity with the standards listed hereafter, provided that the basic housing, modules, interface boards and installation kits are mounted as recommended in the corresponding installation manual(s). Security EN60950-1:2001 Safety of information technology equipment, including electrical First Edition business equipment. - Page 31 The ONE300 respects the European directive on the waste 2002/96/EC disposal from the electric and electronic equipment. Restricted use of Hazardous Substances (RoHS) The ONE300 respects the European directive on the restricted use 2002/95/EC of Hazardous Substances in electric and electronic equipment. ONE300 – Installation Manual...
-
Page 32: Annexe A: Console Cable
Annexe A: Console Cable Catalog reference: 4 022 332 B 00 Ed A To PC serial port in terminal mode (Configuration) RJ45 - P1 SIGNAL SUB-D 9 Pts Female - P2 ONE300 – Installation Manual...
Need help?
Do you have a question about the ONE300 and is the answer not in the manual?
Questions and answers
Dear Support Team, We are currently using two firmware versions for our OneAccess 540: ONEOS90-ADVIP_11N-V5.2R1E4_HC1 ONEOS90-MONO-V5.2R2E5 We have noticed that the ONEOS90-MONO-V5.2R2E5 version works correctly with long usernames, while the ONEOS90-ADVIP_11N-V5.2R1E4_HC1 version has issues with this. Could you provide us with an update or a version of ONEOS90-ADVIP_11N where this issue is resolved? Additionally, we would appreciate the correct download link and any relevant documentation for the firmware. Thank you in advance for your help.