KitchenAid KEMS308 Use And Care Manual
Lower electric convection oven
Hide thumbs
Also See for KEMS308:
- Use & care manual (88 pages) ,
- Use and care manual (44 pages) ,
- Use & care manual (44 pages)
Table of Contents
Advertisement
U
KITCHENAID
Models: KEMC308
KEMS308
4452300B
se and Care Guide
®
Lower Electric Convection Oven
KEMC378
KEMS377
A Note to You ...........................................2
Electric Oven Safety................................3
Electric Convection Oven.......................5
Using the electronic oven control..........6
Oven settings.........................................9
Setting the clock ..................................10
Using the timer.....................................10
Baking or convection baking ...............11
Convection baking tips ........................12
Convection roasting.............................12
Convection roasting tips ......................13
Positioning racks and pans .................13
Bakeware choices ...............................14
Using aluminum foil .............................15
Adjusting oven temperature ................15
Using the temperature probe ..............16
Using CONVECT FULL MEAL ...........18
Conversion...........................................20
Broiling .................................................21
Convection broiling ..............................22
Timed cooking......................................24
Dehydrating..........................................26
Proofing (raising) bread.......................27
The oven vent......................................27
Using the Self-Cleaning Cycle.............28
Before you start ...................................28
Before setting the controls ..................29
Setting the controls..............................29
For best cleaning results .....................30
How the cycle works............................30
Electric Convection Oven.....................31
Cleaning Chart.....................................31
Removing the oven door.....................32
Using and replacing oven lights..........33
Troubleshooting.....................................34
Requesting Assistance or Service......36
Warranty..................................................40
In the U.S.A. for assistance or service,
call the Consumer Assistance Center:
1-800-422-1230
In Canada for assistance or service,
see page 37.
KEMS307
KEMS378
www.kitchenaid.com
®
®
Advertisement
Table of Contents

Related Manuals for KitchenAid KEMS308


Summary of Contents for KitchenAid KEMS308
-
Page 1: Table Of Contents
Care Guide KITCHENAID Models: KEMC308 KEMS308 4452300B A Note to You ...2 Electric Oven Safety...3 Getting to Know Your Electric Convection Oven...5 Using Your Electric Convection Oven...6 Using the Self-Cleaning Cycle...28 Caring for Your Electric Convection Oven...31 Troubleshooting...34 Requesting Assistance or Service...36... -
Page 2: A Note To You
Note to You Thank you for buying a KITCHENAID KitchenAid designs the best tools for the most important room in your house. To ensure that you enjoy many years of trouble-free operation, we developed this Use and Care Guide. It contains valuable information concerning how to operate and maintain your new appliance properly. -
Page 3: Important Safety Instructions
lectric Oven Safety Your safety and the safety of others are very important. We have provided many important safety messages in this manual and on your appliance. Always read and obey all safety messages. This is the safety alert symbol. This symbol alerts you to potential hazards that can kill or hurt you and others. - Page 4 lectric Oven Safety IMPORTANT SAFETY INSTRUCTIONS • Placement of Oven Racks – Always place oven racks in desired location while oven is cool. If rack must be moved while oven is hot, do not let potholder contact hot heating element in oven.
-
Page 5: Getting To Know Your
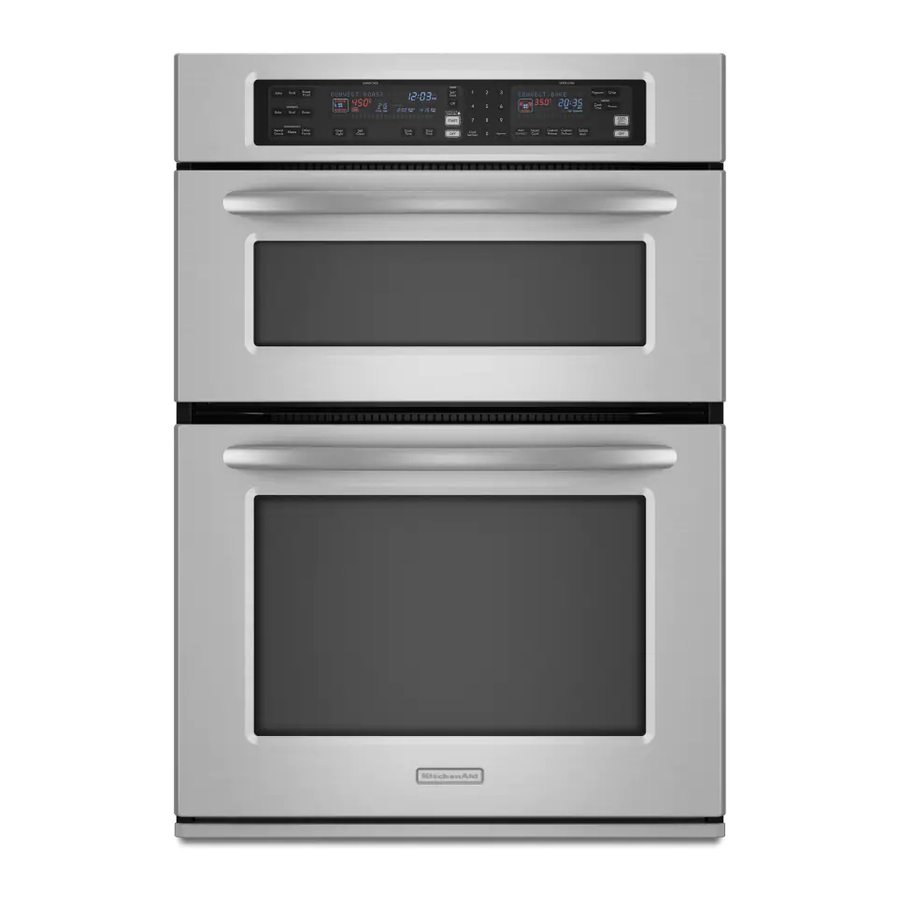
Know Your Electric Convection Oven Oven parts and features Lower convection oven electronic oven controls (p. 6) Upper microwave oven Oven vent (above oven door) (p. 27) Dual broil elements (not shown) Oven light (on left oven wall) (p. -
Page 6: Using Your Electric Convection Oven
Your Electric Convection Oven Using the electronic oven control Oven display (see below) Oven setting EASY pads CONVECT™ (pp. 6, 8, 11, conversion 12, 15, 16, pads 22, 24, 25, (pp. 20, 27) 26, 29) Display/clock • When you first plug in the oven, both displays will be fully lit for a few seconds. - Page 7 TIME (Hold for 5 seconds) To turn on and off timer reminder tones: PRESS (Hold for 5 seconds) sing Your Electric Convection Oven To turn on and off key pad entry and end-of-cycle tones: PRESS (Hold for 5 seconds) A short tone will sound and “Snd” and “ON”...
- Page 8 Your Electric Convection Oven Setting your oven for the Sabbath The Sabbath mode is an oven operation designed for the special needs of Orthodox Jews on the Sabbath or holy days. It is only available to provide a continuous untimed bake function or, if desired, a timed bake function.
-
Page 9: Oven Settings
CONVECTION BROIL Use this setting for broiling thick cuts of meat. sing Your Electric Convection Oven DIAGRAM SETTING INFORMATION • The bottom element and both top elements heat up. • The elements will turn on and off to maintain the oven temperature. -
Page 10: Setting The Clock
Your Electric Convection Oven SETTING CONVECTION ROAST Use this setting for roasting and baking on one rack. CLEAN Use this setting for self-cleaning only. Setting the clock NOTE: You can only set the clock when the lower oven and the microwave oven are not cooking food and when the timer is not counting down. -
Page 11: Using Electric Convection Oven
To change the timer during its operation: 1. Press TIMER SET/START. 2. Enter new desired time. 3. Press TIMER SET/START. sing Your Electric Convection Oven TIMER To cancel the timer during CANCEL SET START ENSOR its operation: You can cancel the Timer any time during its operation. -
Page 12: Convection Baking Tips
Your Electric Convection Oven 3. Set temperature (optional). Do this step if you want to set a tempera- ture other than 350°F (177°C) for Bake. PRESS CONTROL LOCK NOTE: See a reliable cookbook or your convection oven cookbook for tempera- ture recommendations. -
Page 13: Convection Roasting Tips
3. Set temperature (optional). Do this step if you want to set a temperature other than 300°F (149°C). PRESS CONTROL LOCK NOTE: See your convection oven cook- book for temperature recommendations. 4. PRESS START NOTES: • After the temperature reaches 170°F (77°C), the temperature display will... -
Page 14: Bakeware Choices
Your Electric Convection Oven • When cooking with two racks, arrange the racks on the 2nd and 4th rack guides. Two sheets of cookies may be baked if sheets are switched at approximately three quarters of the total bake time. -
Page 15: Using Aluminum Foil
The control will “remember” the selected offset even after the power has been interrupted or lost. sing Your Electric Convection Oven NOTE: DO NOT measure oven temperature with a thermometer. Opening the oven door will lower the oven temperature and give you an inaccurate reading. -
Page 16: Using The Temperature Probe
Your Electric Convection Oven How to determine the amount of adjustment needed The following chart tells you how much to adjust the offset temperature to get the desired cooking results. You can determine cooking results by amount of browning, moistness, and rising times for baked foods. - Page 17 LOCK Do this step if you want to set an oven temperature other than the one dis- played. NOTE: See a reliable cookbook or your convection oven cookbook for oven tem- perature recommendations. 8. PRESS START NOTES: • If you do not choose a cook setting and press START, the oven will default to bake at 350°F (177°C) and start.
-
Page 18: Using Convect Full Meal
Your Electric Convection Oven Using CONVECT FULL MEAL CONVECT FULL MEAL CONVECT FULL MEAL lets you choose from among ten preset oven convection cooking cycles, all using the convection fan. These cycles store commonly used cooking times, cooking temperatures, and probe temperature settings. - Page 19 0 minutes lets you do untimed cooking. 4. To save only, press CONVECT FULL MEAL. To cook with this setting immediately and save it, press START. sing Your Electric Convection Oven TIME or oven temp PROBE TEMP 325°F (163°C) 1 hr 325°F (163°C)
-
Page 20: Using Easy Convect™ Conversion
Your Electric Convection Oven Using EASY CONVECT CONVERSION ONVECT CONVERSION BAKED OTHER MEATS GOODS FOODS EASY CONVECT Conversion lets you convection cook without entering convection cook temperatures and times. Simply enter the standard cook temperature and time for the food to be cooked. The oven will reduce the temperature, or the temperature and time, for convection cooking. -
Page 21: Broiling
• Do not let pot holder or oven mitt touch hot broil element. sing Your Electric Convection Oven ™ CONVERSION (cont) FOODS YOU CAN COOK WITH THIS SETTING Cakes: layer, angel food... -
Page 22: Convection Broiling
PRESS Do this step if you want to set a tempera- ture (up to 500°F [260°C]) other than 450°F (232°C). NOTE: See your convection oven cook- book for temperature recommendations. 5. PRESS START NOTE: If you want to change the convec- tion broiling temperature after broiling has begun, repeat Steps 3, 4, and 5. - Page 23 NOTE: Times are guidelines only and may need to be adjusted for individual tastes. Very thin cuts, such as fish fillets, may not need to be turned. sing Your Electric Convection Oven • Do not cover grid with foil, in order to allow juices to drain.
-
Page 24: Timed Cooking
Your Electric Convection Oven Timed cooking BROIL COOK BAKE MAXI TIME ECONO CONVECTION STOP BAKE BROIL ROAST TIME The electronic clock/oven control will turn the oven on and off at times you set, even when you are not around. - Page 25 PRESS CONTROL LOCK NOTE: See a reliable cookbook for tem- perature recommendations. 4. PRESS COOK TIME sing Your Electric Convection Oven 5. Set cook time. PRESS 6. PRESS 7. Set stop time. PRESS CONTROL LOCK 8. PRESS...
-
Page 26: Dehydrating
Your Electric Convection Oven Dehydrating CONVECTION BAKE You can use your convection oven to dehy- drate a variety of foods. NOTES: • To learn detailed information about dehy- dration, refer to a book written specifically about dehydrating and/or preserving foods. -
Page 27: Proofing (Raising) Bread
Steps 5, 6, and 7. 8. When dehydrating is done, PRESS Proofing (raising) bread You can use your convection oven to proof (raise) bread dough. First proofing: Place the dough in a lightly greased bowl and loosely cover with waxed paper coated with shortening. -
Page 28: Using The Self-Cleaning Cycle
sing the Self-Cleaning Cycle Do not touch the oven during the Self-Cleaning cycle. Keep children away from oven during Self-Cleaning cycle. Do not use commercial oven cleaners in your oven. Failure to follow these instructions can result in burns, or illness from inhaling dangerous fumes. -
Page 29: Before Setting The Controls
NOTES: • Clean the oven before it gets heavily soiled. Cleaning a very soiled oven takes longer and results in more smoke than usual. • Do not block the vent during the Self- Cleaning cycle. Air must move freely for best cleaning results. -
Page 30: For Best Cleaning Results
sing the Self-Cleaning Cycle 3. PRESS 4. Set Stop time. Example for 7:00: PRESS QUANTITY 5. PRESS START NOTE: The door will lock and oven light will go out (if on) right after you press START. 6. After the Self-Cleaning cycle ends: YOU SEE To stop the Self-Cleaning cycle at... -
Page 31: Caring For Your Electric Convection Oven
Your Electric Convection Oven Do not store flammable materials such as gasoline near this appliance. Doing so can result in death, explosion, or fire. Cleaning Chart Before cleaning, always make sure all controls are off and the range is cool. Refer to instructions on all cleaning products before using them to clean your range. -
Page 32: Removing The Oven Door
Your Electric Convection Oven PART CLEANING METHOD Stainless steel surfaces (cont.) • Stubborn stains and baked-on residue • Hard water spots • Oven door glass • • Oven cavity • Food spills containing sugar and/or milk • All other spills Oven racks •... -
Page 33: Using And Replacing The Oven Lights
Your Electric Convection Oven 2. Insert small end of a door removal pin into each door hinge. Insert small end 3. Grasp under handle and gently close door as far as it will shut. Pull door out at bottom to remove. -
Page 34: Troubleshooting
roubleshooting Most cooking problems often are caused by little things you can find and fix without tools of any kind. Check the lists below and on the next page before calling for assistance or service. If you still need help, see “Requesting Assistance or Service” on page 36 or 37. If nothing operates, check the following: •... - Page 35 PROBLEM Unevenly baked items Crust edge browns before pie is done The display is showing “PF” A letter followed by a number shows on the display (for exam- ple “E3,” “F1”) The key pads do not operate If none of these items is causing your problem, see “Requesting Assistance or Service”. CAUSE/SOLUTION •...
-
Page 36: Requesting Assistance Or Service
For further assistance If you need further assistance, you can write to KitchenAid with any questions or concerns at: KitchenAid Brand Home Appliances Consumer Assistance Center c/o Correspondence Dept. -
Page 37: If You Need Service
For further assistance If you need further assistance, you can write to KitchenAid with any questions or concerns at: Consumer Relations Department KitchenAid Canada 1901 Minnesota Court... - Page 38 otes...
- Page 39 otes...
-
Page 40: Warranty
FROM DATE OF or workmanship. PURCHASE. KITCHENAID AND KITCHENAID CANADA SHALL NOT BE LIABLE FOR INCIDENTAL OR CONSEQUENTIAL DAMAGES. Some states or provinces do not allow the exclusion or limitation of incidental or consequential damages, so this exclusion or limitation may not apply to you.
Need help?
Do you have a question about the KEMS308 and is the answer not in the manual?
Questions and answers