Makita LS1018 Instruction Manual
Slide compound miter saw
Hide thumbs
Also See for LS1018:
- Instruction manual (132 pages) ,
- Instruction manual (22 pages) ,
- Instruction manual (128 pages)

Related Manuals for Makita LS1018


Summary of Contents for Makita LS1018
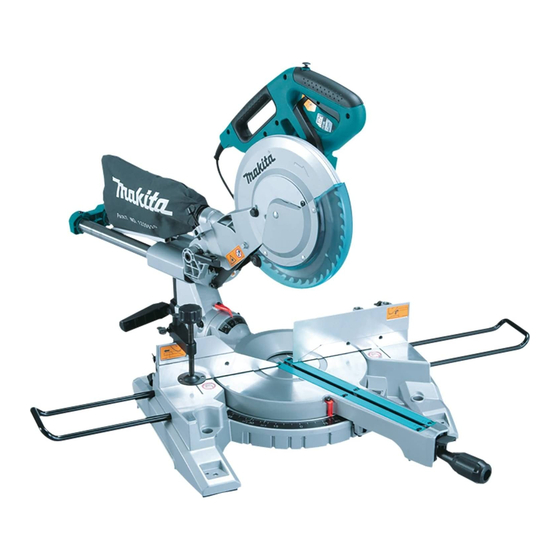
- Page 1 INSTRUCTION MANUAL Slide Compound Miter Saw LS1018 LS1018L 015203 DOUBLE INSULATION IMPORTANT: Read Before Using.
-
Page 2: Table Of Contents
ASSEMBLY ................................11 OPERATION................................14 MAINTENANCE ................................ 19 OPTIONAL ACCESSORIES ............................21 SPECIFICATIONS Model LS1018 / LS1018L Blade diameter 255 mm - 260 mm Blade body thickness 1.6 mm - 2.4 mm Hole diameter For all countries other than European countries 25.4 mm... -
Page 3: General Power Tool Safety Warnings
The technical file in accordance with 2006/42/EC is can also be sawed. available from: ENF002-2 Makita, Jan-Baptist Vinkstraat 2, 3070, Belgium Power supply The tool should be connected only to a power supply of 30.5.2014 the same voltage as indicated on the nameplate, and can only be operated on single-phase AC supply. -
Page 4: Miter Saw Safety Warnings
Do not abuse the cord. Never use the cord for 19. Do not use the power tool if the switch does carrying, pulling or unplugging the power tool. not turn it on and off. Any power tool that cannot Keep cord away from heat, oil, sharp edges or be controlled with the switch is dangerous and moving parts. - Page 5 Wear hearing protection to reduce the risk of 27. Do not use the tool in the presence of flammable hearing loss. liquids or gases. The electrical operation of the tool Wear gloves for handling saw blade (saw could create an explosion and fire when exposed to blades shall be carried in a holder wherever flammable liquids or gases.
-
Page 6: Installation
45. To reduce the emitted noise, always be sure FUNCTIONAL DESCRIPTION that the blade is sharp and clean. 46. The operator is adequately trained in the use, adjustment and operation of the machine. WARNING: Always be sure that the tool is switched off and •... -
Page 7: Positioning Kerf Board
UV light proper support of the workpiece minimizing exposure, contact a Makita service center for a new workpiece tear out. guard. DO NOT DEFEAT OR REMOVE GUARD. -
Page 8: Adjusting The Bevel Angle
WARNING: Adjusting the bevel angle After installing a new blade and with the tool • 1. Lever unplugged, always be sure that the blade does not contact any part of the lower base when the handle is lowered completely. If a blade makes contact with the base it may cause kickback and result in serious personal injury. -
Page 9: Slide Lock Adjustment
To start the tool, push serious personal injury. Return tool to a Makita service the lever to the left, press in the lock-off button and then center for proper repairs BEFORE further usage. - Page 10 NEVER defeat the lock-off button by taping down or • some other means. A switch with a defeated lock-off button may result in unintentional operation and serious personal injury. Electronic function Soft start feature This function allows the smooth start-up of the tool •...
-
Page 11: Assembly
If the flange is installed incorrectly the Use only the Makita socket wrench provided to flange will rub against the machine. • install or remove the blade.Failure to use the... -
Page 12: Securing Workpiece
Dust bag (accessory) 1. Blade case 2. Arrow 1. Dust nozzle 3. Arrow 2. Dust bag 4. Saw blade 3. Fastener 010244 To install the blade, mount it carefully onto the spindle, 011339 making sure that the direction of the arrow on the surface The use of the dust bag makes cutting operations of the blade matches the direction of the arrow on the cleaner and dust collection easier. - Page 13 Guide fence (SLIDING FENCE) adjustment 1. Sub-fence R 2. Screws 1. Sliding fence 2. Clamping screw 010427 The sub-fence R can be removed from the right side of 015204 the guide fence. To remove the sub-fence R, loosen the WARNING: screw which secures the sub-fence R and pull it out.
-
Page 14: Operation
Horizontal vise (optional accessory) Holders 1. Vise plate 1. Holder 2. Vise nut 3. Vise knob 011343 011378 The horizontal vise can be installed in two positions on The holders can be installed on either side as a either the left or right side of the base. When performing convenient means of holding workpieces horizontally. - Page 15 Press cutting (cutting small workpieces) Slide (push) cutting (cutting wide workpieces) 1. Locking screw 1. Locking screw 011409 011410 Workpieces up to 91 mm high and 70 mm wide can Loosen the locking screw counterclockwise so that be cut in the following manner. the carriage can slide freely.
- Page 16 direction is changed during a cut, the precision of Miter cutting the cut will be impaired. Refer to the previously covered "Adjusting the miter Before bevel-cutting, an adjustment of sliding fence • angle". maybe required. Refer to the section titled "Guide fence adjustment".
-
Page 17: Measuring
Lay crown molding with its broad back • 1. Inside corner (hidden) surface down on the turn base 2. Outside corner with its CEILING CONTACT EDGE against the guide fence on the saw. The finished piece to be used will •... - Page 18 NOTICE: 1. Aluminum When the wood facing is attached, do not turn the • extrusion turn base with the handle lowered. The blade 2. Guide fence and/or the wood facing will be damaged. 3. Spacer block 4. Horizontal vise Groove cutting (optional accessory) 1.
-
Page 19: Maintenance
Carrying tool Adjusting the cutting angle This tool is carefully adjusted and aligned at the factory, but rough handling may have affected the alignment. If your tool is not aligned properly, perform the following: Miter angle 1. Hex bolt 2. Guide fence 3. - Page 20 Make sure that the pointer on the arm point to Bevel angle 0° on the bevel scale on the arm holder. If 0° bevel angle they do not point to 0°, loosen the screw which secure the pointer and adjust it so that 1.
-
Page 21: Optional Accessories
Misuse of an accessory or attachment may result in serious personal injury. If you need any assistance for more details regarding these accessories, ask your local Makita Service Center. Steel & Carbide-tipped saw blades • Miter saw blades For smooth and precise cutting in various materials. - Page 24 Makita Jan-Baptist Vinkstraat 2, 3070, Belgium Makita Corporation Anjo, Aichi, Japan www.makita.com JM2328D030...
Need help?
Do you have a question about the LS1018 and is the answer not in the manual?
Questions and answers