Table of Contents
Advertisement
• NEVER attempt to swim after a stalled RC boat!
• Never operate your RC boat while standing in the water.
• Never operate your RC boat in the presence of swimmers.
• Always use a Personal Flotation Device (PFD) when boarding and operating your retrieval craft, i.e. Jon boat or duck boat.
NOTE: Because of the sharp running hardware included with this RC boat, we do not recommend a rubber blow up raft.
• RC boat running hardware is very sharp. Be very careful when working on and around the metal parts.
• While the motor is running pay close attention to the propeller. Do not come in contact with the propeller at any time the
engine is running or serious injury will result.
• AquaCraft products are to be used by ages 14 and over.
™
WARNING:
www.aquacraftmodels.com
™
Advertisement
Table of Contents

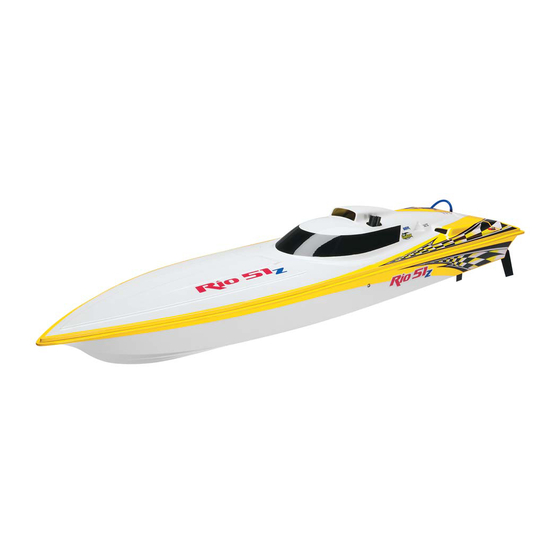
Related Manuals for AquaCraft Rio 51Z


Summary of Contents for AquaCraft Rio 51Z
- Page 1 • While the motor is running pay close attention to the propeller. Do not come in contact with the propeller at any time the engine is running or serious injury will result. • AquaCraft products are to be used by ages 14 and over. www.aquacraftmodels.com...
-
Page 2: Required Items
THANK YOU! THE FOLLOWING TOOLS ARE REQUIRED (NOT INCLUDED) TO Thank you for purchasing the Rio 51Z! We at AquaCraft know how ASSEMBLE AND INSTALL THE BATTERIES IN YOUR RIO 51Z exciting a new R/C boat purchase can be and we know you’re anxious to get started. -
Page 3: Warranty And Service
BOAT WARRANTY SERVICE • If your Rio 51Z should happen to stall, water currents will slowly AquaCraft will warrant your Rio 51Z for 90 days after purchase carry it to shore. The bad news is that the boat could be carried from defects in materials or workmanship of original manufacture. -
Page 4: Spark Plug
PREPARE TO RUN After the 90-day warranty has run out, you can still have your Rio 51Z repaired for a service fee by the experts at AquaCraft. To speed up the repair process, please follow these fi ve simple steps: SPARK PLUG The recommended spark plug is a EMR7H (ZENG7151). -
Page 5: Final Assembly
FINAL ASSEMBLY Some decals are installed on your boat for you. Extra decals provided in your kit allow you to customize your Rio 51Z. Simply peel and stick! See the photos on the box for decal placement example. TRANSMITTER FEATURES 1. - Page 6 3. Reinstall the battery door onto the bottom of the transmitter. 4. Turn the transmitter “ON” using the switch on the transmitter’s side. The battery level indicator light (LED) should glow red. If the light is fl ashing, the batteries are low and need to be replaced. INSTALLING THE RX BATTERIES 1.
- Page 7 3. Place four (4) new “AA” batteries into the receiver battery holder. Be sure to follow the polarity diagram molded into the battery holder. 4. Replace the battery holder inside the radio box. Make sure that it will not interfere with any of the control linkages. 5.
- Page 8 INSTALLING THE RUDDER BLADE 1. Remove the 3mm and 4mm nuts and bolts from the rudder pivot bracket. 2. Insert the rudder into the rudder control arm assembly as shown. Replace the 4 x 15mm screw and 3 x 15mm screw and secure them with the 4mm and 3mm nuts, respectively.
- Page 9 3. Squeeze the throttle trigger on the transmitter; this should open the throat of the carburetor. This is the proper throttle arm position for full throttle. 4. Idle position. 5. Off or stop position. If this is not the case, move the steering servo reverse switch located on the front of the transmitter (2) to the other position.
-
Page 10: Installing The Propeller
INSTALLING THE PROPELLER 1. Use a 10mm wrench to remove the prop nut from the stub shaft. 2. Install the propeller on the shaft; replace the nut, making sure it is tight. 3. Assembly is now complete. -
Page 11: Starting Procedure
2. Turn on the boat’s receiver. • Total run time of the Rio 51Z is approximately 20 minutes 3. Fill the fuel tank with the appropriate gas to oil mixture. (assuming you begin with a full tank of fuel). When you notice an increase in power, it means the fuel tank 4. -
Page 12: Troubleshooting
• Leave the cowl off the boat overnight to let any water evaporate from the hull. Although it is very enjoyable to run the Rio 51Z by yourself or with a buddy, the real fun and excitement of R/C boating is experienced when you get involved in racing. - Page 13 ENGINE MAINTENANCE AND STORAGE RADIO BOX MAINTENANCE • After a day of running, start your engine and choke it while • When fi nished running, open the radio box and leave the it is running to get a lot of fuel into the engine. Run it for radio box lid off overnight to allow any water to evaporate.
- Page 14 Once loose you can rotate the strut up or down depending on the type of handling you are looking to achieve. As an initial starting point, try running the Rio 51Z with a neutral propeller thrust angle. This can be checked by placing a straightedge along the bottom of the hull and checking its relation to the prop shaft.
- Page 15 ADJUSTING THE TRIM PLATES You can also use the trim plates to adjust the ride of the boat. Bending the plates down will help keep the boat from porpoising (the front bouncing up and down). Bending them up will make for a looser (faster) ride but at the same time make the boat unstable.
-
Page 16: Replacement Parts
ZENG1675 ... Carburetor WT-644 ZENG1680 ... Coil (Red) ZENG1699 ... Cover WT-644 To order replacement parts for the Rio 51Z, use the order numbers in ZENG1700 ... Crankcase Bolt M5x30 the Replacement Parts List that follows. Replacement parts are available ZENG1701 ...
Need help?
Do you have a question about the Rio 51Z and is the answer not in the manual?
Questions and answers