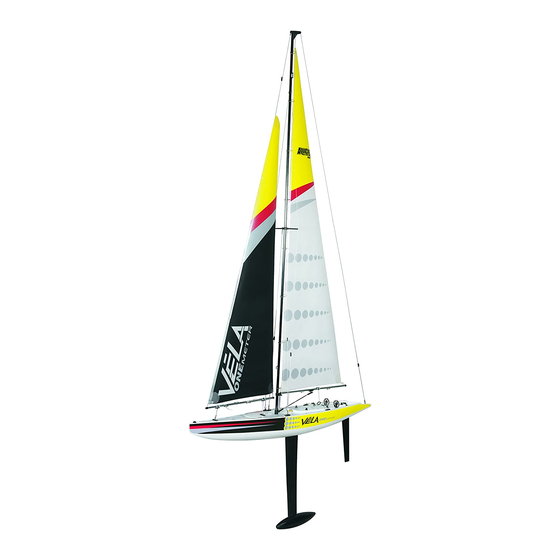
Table of Contents
Advertisement
Quick Links
WARNING:
NEVER attempt to swim after a
stalled R/C boat!.
Never operate your R/C boat while
standing in the water.
Never operate your R/C boat in the
presence of swimmers.
Always use a Personal Flotation
Device (PFD) when boarding and
operating your retrieval craft,
i.e. Jon boat or duck boat. NOTE:
Because of the sharp running
hardware included with this R/C
boat, we do not recommend a
rubber blow up raft.
R/C boat running hardware is very
sharp. Be very careful
when working on and around
the metal parts.
AquaCraft products are to be used
™
by ages 14 and over.
aquacraftmodels.com
Advertisement
Table of Contents

Subscribe to Our Youtube Channel
Summary of Contents for AquaCraft VELA One meter
- Page 1 R/C boat running hardware is very sharp. Be very careful when working on and around the metal parts. AquaCraft products are to be used ™ by ages 14 and over. aquacraftmodels.com...
-
Page 2: Warranty & Service
™ Vela! We want the time you AquaCraft will warrant your Vela for 90 days after the purchase from spend with your new R/C boat to be fun and successful so please fully defects in materials or workmanship of original manufacture. AquaCraft, read the manual. -
Page 3: Cradle Assembly
CRADLE ASSEMBLY Begin by removing the sailboat components from the box and assembling the boat stand. You’re going to need the cradle to aid in the assembly and rigging of your Vela. Use a #2 Phillips screwdriver and the M4X16 wood screws to assemble the cradle. - Page 4 carbon fi ber. The weight of a mast is extremely important because it SAILBOAT TERMINOLOGY cancels out weight in the keel. MASTHEAD: The top of the mast. BACKSTAY: A backstay is the line that runs from the top of the mast PORT: This is the left side of the boat when aboard and facing the front to the stern of the boat.
- Page 5 BACKSTAY MAST MAINSAIL BOOM DECK STERN RUDDER HULL KEEL...
- Page 6 SAILBOAT ASSEMBLY Assemble the rudder, grease and a 2.5mm hex wrench. Remove both hatches from the deck by turning the winch drums 90°. Very lightly grease the rudder post and slip it up into the rudder stuffi ng tube located on the bottom of the boat. Align the tiller arm so the rudder post is able to slide through.
- Page 7 Remove the brass thumb nut from the keel post. Slip the keel into the hole in the bottom of the hull. Using the brass thumb nut, tighten the keel in place. PERFORMANCE TIP: If you are looking for the ultimate in performance and don’t foresee the need to remove the keel, you can epoxy the keel into the bottom of the boat as you assemble it.
- Page 8 Unroll the sails on your work table. The larger sail is the mainsail and the smaller one is the jib. Lay out the mast on your work table. You will notice there are two sections of mast (upper and lower), along with pre-attached and labeled lines. Slip the mast joiner into the lower mast.
- Page 9 Undo the upper hook line of the jib sail and hook it to front hole of the upper stay. Attach the lower hook (A) of the jib boom onto the furthest forward attachment point (A). Match the letters and attach the side load strings B, C, D, and E, as well as the backstay line (F).
- Page 10 Next, slip the mainsail upper attachment line through the hole near the center of the upper stay. Tie off the line on the open cleat near the top of the mast. Open the sail clips and clip the sail on to the mast. Slip the lower mainsail attachment line through the open hole of the boom mast mount.
- Page 11 Slip the rear sail line through the back hole of the boom and tie off the line on the open cleat of the boom. The longer of the winch lines attaches to the jib by slipping the line through the guide on the jib boom and tying off on the forward open cleat.
-
Page 12: Launch Procedure
TRANSMITTER The transmitter is not water resistant and should never come in contact with water. 80° 80° 80° 80° 4. Move the left stick to the full up position. The sails should now open to 80°. It might be necessary to adjust the full tight position again as both of these adjustments are dependent on each other. - Page 13 sails and rigging, but with experience you will gain the ability to fi ne-tune SAILING your sails and rigging for optimal performance, regardless of conditions. For light wind conditions (1-5 mph): Use the adjustment blocks (bowsies) located between the tops of the sails and the masthead to Unlike propeller-driven boats that you basically point and accelerate, tighten the sails so they will respond to the slightest push from the sailboats present an interesting challenge.
-
Page 14: Maintenance
Close-Hauled: Sailing against the wind at (up to) 45° angles. Close-Reached: Sailing against the wind at a much shallower angle. To order replacement parts for the AquaCraft Vela use the stock numbers in the list below. Replacement parts may be purchased from your local Beam Reach: Sailing with the boat at about a 90°... - Page 16 AQUB0201 © 2015 AquaCraft Models, a Hobbico® company.


Need help?
Do you have a question about the VELA One meter and is the answer not in the manual?
Questions and answers