Table of Contents
Advertisement
Advertisement
Table of Contents

Related Manuals for Blendtec PROFESSIONAL 800


Summary of Contents for Blendtec PROFESSIONAL 800
- Page 1 OWNER’S MANUAL AND USER GUIDE...
-
Page 2: Table Of Contents
SECTION 3 - GETTING TO KNOW YOUR BLENDER ��������������������������������4 SECTION 4 - INSTALLATION & OPERATIONAL OVERVIEW ���������������5 4.1 - PROFESSIONAL 750™ ���������������������������������������������������������������������������������������5 4.2 - PROFESSIONAL 800™ ������������������������������������������������������������������������������������10 SECTION 5 - CARE AND CLEANING �������������������������������������������������������������������13 SECTION 6 - TROUBLESHOOTING �����������������������������������������������������������������������14 SECTION 7 - WARRANTY �����������������������������������������������������������������������������������������������16... -
Page 3: Section 1: Important Safeguards
If the blender malfunctions, call your service agent first� If it is dropped or damaged in service adjustments� Removing the cover or attempting to service the blender any way, return the blender to a Blendtec service agent immediately for examination, will void the warranty�... -
Page 4: Section 2: Unpacking
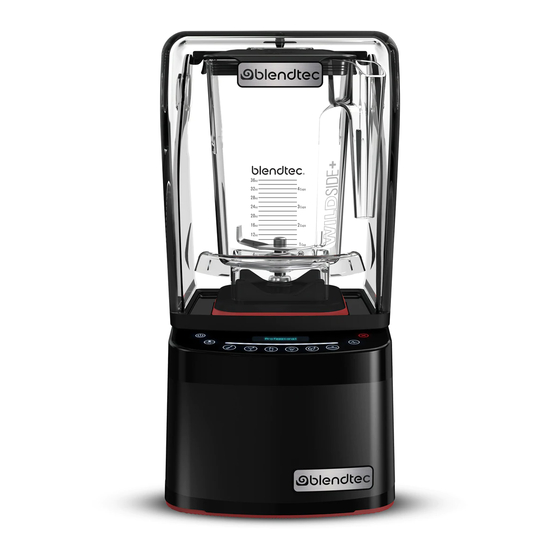
4� Inspect all items to ensure no damage occurred during shipment� 4.1.1 INSTALLATION 5� If any damage has occurred, contact Blendtec customer service (see page 17) Above Counter Installation immediately� 1� Place the blender on a flat, clean, and dry surface� Blender vents should be 2.2 RECORDING YOUR SERIAL NUMBER AND DATE OF PURCHASE... - Page 5 FIGURE 1: BLENDER JAR ASSEMBLY Clear Vented Cap Insert Countertop Hole Template: Blade Assembly 5 ⅞” (149�22 mm) FIGURE 2: MOTOR BASE Blender Drive Socket Motor Base Cover Touch Pad LCD Information Center Motor Base Housing Power Switch 4 ⅜” (111� 1 25 mm) Power Unit FIGURE 3...
- Page 6 4.1.2 QUICK RECIPE INSTRUCTIONS – BATTERS USE THESE STEPS TO GET STARTED RIGHT AWAY. This cycle stays at relatively low speeds for shorter periods of time� This combines your batters, allowing the flavors to blend together properly, without over-mixing� 1� Choose a recipe from the included Blending 101 booklet� To use the Batters cycle, load your jar as indicated in the recipe you are using, 2�...
-
Page 7: Professional 800
USE THESE STEPS TO GET STARTED RIGHT AWAY. the motor housing� 1� Choose a recipe and gather ingredients (try blendtec�com/recipes) 2� Load the blender jar and secure the lid tightly� 3� Place the jar onto the motor base and ensure power is turned on�... -
Page 8: Section 5: Care And Cleaning
4.2.4 ALL ABOUT BLEND CYCLES WHOLE JUICE Blend cycles are timed cycles designed for specific types of blends� These This cycle is designed to completely blend tough and dense ingredients, one-touch cycles speed up, slow down and shut off automatically, so results including carrots, celery, and seeds�... -
Page 9: Section 6: Troubleshooting
Professional 750 or a wvhite power icon on the Professional 800� ging it back in� If the error does not clear, contact your Blendtec service agent� • Make sure the blender is plugged in�... -
Page 10: Section 7: Warranty
Limited Warranty 6.3 NOISE LEVEL CHANGES Blendtec warrants the blender motor to be free of defect in material and If the blender noise level has increased from original levels, determine whether workmanship for the warranty period� During this period, such defects will be the sound is coming from the blender motor or jar�... - Page 11 Many issues can be resolved simply and quickly over the phone� attempt to do your own repairs� Repairs made by persons other than Blendtec 2� If the blender is not under warranty and you wish to have it repaired, please authorized service representatives will void the warranty�...
- Page 12 1206 SOUTH 1680 WEST ©2014 K-TEC, INC., ALL RIGHTS RESERVED BLENDTEC IS A REGISTERED TRADEMARK OREM, UTAH 84058 U.S.A. OF K-TEC, INC. 1-800-BLENDTEC OWN-RD-214 MANUAL, OWNERS, PROSERIES, BLENDTEC.COM ALL MODELS, ENG, REV A, OCTOBER 2014...
Need help?
Do you have a question about the PROFESSIONAL 800 and is the answer not in the manual?
Questions and answers