Advertisement
Advertisement

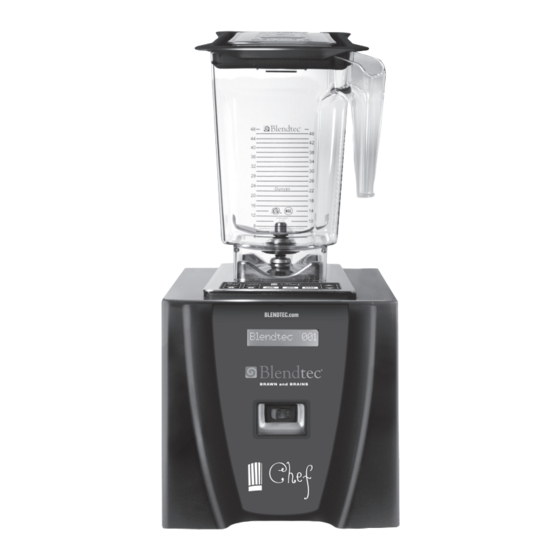
Summary of Contents for Blendtec CHEF
- Page 1 CHEF USER MANUAL...
-
Page 3: Table Of Contents
Table Of Contents Section Page ..Important Safeguards Section 1 ..Component Overview Section 2 ..Unpacking Section 3 ..Installation Section 4 ..Operating Instructions Section 5 ..Warranty and Service Section 6 ..Product Diagrams Section 7... -
Page 5: Section 1: Important Safeguards
SECTION 1: IMPORTANT SAFEGUARDS READ ALL INSTRUCTIONS CAREFULLY BEFORE USING YOUR BLENDTEC MACHINE. 1.1 SAFETY CERTIFICATION The Chef blender (ICB4) and accessories are certified by ETLto UL standard 763, and to CSA standard C22.2 No. 195-m1987, and to CE Standards. 1.2 HEALTH CERTIFICATION The Chef blender and accessories are certified by NSF International. - Page 6 1.8 NEVER OPERATE IF THE UNIT APPEARS DAMAGED If the blender malfunctions call the service agent first. If it is dropped or damaged in any way, return the blender to a Blendtec service agent immediately for examination, repair, electrical or mechanical adjustment, or possible replacement.
-
Page 7: Section 2: Component Overview
This allows for portable operation of the blender. 2.5 POWER SPECIFICATIONS Blendtec Blenders are made with power specifications listed below according to your specific model. -
Page 8: Unpacking
4. Check for and remove any packing material which may have blocked ventilation holes in either the power unit or the black motor stand. 5. Inspect all items to ensure no damage occurred in shipment. 6. If any damage has occurred contact your Blendtec service agent immediately. -
Page 9: Installation
1. Ensure that an electrical receptacle is readily accessible where you locate the equipment. 2. When you receive your Chef blender, the motor base will ship inside the motor base stand. Please make sure the unit is switched off before assembling. - Page 10 4.2 Preparation for In-Counter Installations 1. Identify desired blender location. Consider preferences such as proximity to ingredients, proximity to customers, available counter space, and available electric outlets. 2. Ensure potential site meets all dimensional requirements. (See Figures 3.1-3.3.) • ● C ounter top can be no thicker than 3/4 in (19 mm). A counter top thicker than 3/4 in.
-
Page 11: Section 5: Operating Instructions
3. Thread the power cord through the base of the sound enclosure and the counter top hole being careful not to scratch or damage the enclosure. 4. Gently place the motor base into the sound enclosure and slide it into the hole in the counter top. - Page 12 5.3 AUTOMATIC CYCLE OPERATION Your Chef machine is designed to record, store, and replay manual operations up to 90 seconds long. This allows you to easily create custom blend cycles which are best suited to blending specific recipes and need to be used repeatedly. To use this feature, simply run the blender manually using the speed up/down buttons, then press and hold down the MEMORY 1 MEMORY 2 or MEMORY 3 button.
- Page 13 • Motor: Check to see if the excess noise is coming from the motor. Remove the jar from the base and press any button that starts the motor. Listen to the motor sound without a jar attached. If it is excessively noisy, contact your Blendtec service center.
- Page 14 TRIED EVERYTHING? If none of the preceding suggestions work, contact your Blendtec service agent for further assistance. 5.5 CLEAN BLENDER JAR DAILY 1. Using hot tap water, add 2 cups (1liter) of water and 1 to 2 teaspoons (7 ml) of liquid dish washing soap to the blender jar.
- Page 15 5.8 WEEKLY CLEANING OF MOTOR (Done in addition to daily cleaning while motor is unplugged and removed from enclosure) 1. Fill the blender drive socket (see figure 1.2) with a strong cleaning solution such as 409● or Simple Green● . DO NOT OVERFILL. Overfilling will cause damage to the motor.
-
Page 16: Section 6: Warranty And Service
Warranties begin from date of shipment, or on date of purchase where proof of purchase is provided. Cosmetic damage and abuse are not included within this warranty. 6.2 SERVICE PROCEDURE Should you experience any difficulty in using your Blendtec blender, please do the following: UNDER WARRANTY... - Page 17 Many issues can be resolved simply and quickly over the phone. 2. If you are not under warranty and wish to have your unit repaired, box up your existing unit and ship the unit to your authorized Blendtec service agent. Your Blendtec service agent will bill you for services rendered.
-
Page 19: Section 7 - Product Diagrams
SECTION 7 - PRODUCT DIAGRAMS FIGURE 1.1 - FRONT VIEW: BLENDER MOTOR AND JAR Blade Assembly LCD Screen Power Switch FIGURE 1.2 - TOP VIEW: MOTOR Drive Socket Touchpad... - Page 20 FIGURE 1 - ON COUNTER - CHEF BLENDER (Shown with optional enclosure) 2.59” (65.78 mm)
- Page 21 FIGURE 2 - IN COUNTER - CHEF BLENDER (Shown with optional enclosure) 3.03” (77 mm)
- Page 22 FIGURE 4 - Countertop Hole Template 5-7/8” (149.22 mm) 4-3/8” (111.125 mm)
- Page 24 1206 South 1680 West Orem, UT 84058 801-222-0888 www. blendtec.com OWN-CE-033 Manual Chef Blender Rev 02 July 09...


Need help?
Do you have a question about the CHEF and is the answer not in the manual?
Questions and answers