
Related Manuals for Blaupunkt MP35


Summary of Contents for Blaupunkt MP35
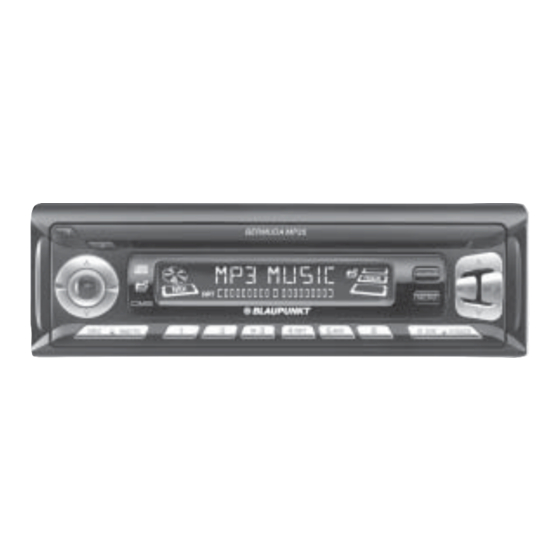
- Page 1 Radio / CD / MP3 Bermuda MP35 7 645 185 510 Operating instructions http://www.blaupunkt.com...
- Page 2 Open here...
- Page 4 CONTROLS Button to switch the unit on/off and to mute the unit. Button to release the control panel. CD Eject button . Volume control. CD-Slot. AUDIO button, to adjust the bass, treble, balance and fader settings and Sound Preset Short press: MENU button, to open the basic settings menu.
-
Page 5: Table Of Contents
Notes and accessories ... 6 Road safety ... 6 Installation ... 6 Accessories ... 6 International telephone information ... 6 Detachable control panel ... 7 Theft protection ... 7 Detaching the control panel ... 7 Attaching the control panel ... 7 Switching on/off ... -
Page 6: Notes And Accessories
NOTES AND ACCESSORIES Notes and accessories Thank you for deciding to purchase a Blaupunkt product. We hope you enjoy using this new piece of equipment. Before using the device for the first time, please read these instructions careful- ly. The Blaupunkt editors are constant-... -
Page 7: Detachable Control Panel
Detachable control panel Theft protection As a way of protecting your equipment against theft, the unit is equipped with a detachable control panel (release pan- el). Without this control panel, the car radio is worthless to a thief. Protect your equipment against theft by taking the control panel with you every time you leave your vehicle. -
Page 8: Switching On/Off
SWITCHING ON/OFF Switching on/off There are various ways of switching the unit on/off: Switching on/off using the vehicle ignition If the unit is correctly connected to the vehicle’s ignition and it was not switched off using ON/OFF button 1, it will switch on/off simultaneously with the ignition. -
Page 9: Adjusting The Volume
Adjusting the volume The volume can be adjusted in steps from 0 (mute) to 66 (maximum). Increase the volume by pressing button 4. Decrease the volume by pressing button 4. Setting the power-on volume You can set the unit’s default power-on volume. -
Page 10: Confirmation Beep
ADJUSTING THE VOLUME Confirmation beep For some functions you will hear a con- firmation beep if you keep a button pressed for longer than two seconds. For instance, after storing a radio sta- tion to a station button you will hear a confirmation beep. -
Page 11: Selecting The Frequency Range/ Memory
To save the setting, switch the device off and on again or wait approx. 8 seconds. The ra- dio starts with the last setting acti- vated (radio, CD/MP3, CD changer or AUX). Selecting the frequency range/ memory This unit can receive programmes broadcast over the FM and AM frequen- cy ranges. -
Page 12: Storing Stations Automatically (Travelstore)
RADIO MODE Storing stations automatically (Travelstore) You can automatically store six stations with the strongest reception in the re- gion. The stations are stored in the FMT or AM memory depending on the se- lected frequency range. Note: Stations that were previously stored in this memory are deleted in the process. -
Page 13: Cd Mode
CDs labelled with the com- pact disc logo. Problems might be ex- perienced when trying to play copy-pro- tected CDs. Blaupunkt cannot guaran- tee the proper functioning of copy-pro- tected CDs! Risk of damage to the CD... -
Page 14: Scanning Tracks (Scan)
CD MODE Scanning tracks (SCAN) You can briefly play all the tracks on a Press the MENU button 7 for longer than two seconds. The next track will then be played for scantime as set in the “Setting the scantime”. Note: You can set the scantime. -
Page 15: Ejecting A Cd
CD MODE When you have finished making your changes, press the MENU button 7 twice. Ejecting a CD button 3. Press the Remove the CD Notes: An ejected CD will be reloaded into the unit if not removed within 10 seconds to protect it from acciden- tal damage. -
Page 16: Switching To Mp3 Mode
MP3 MODE Each directory can be named using a PC. The directory name can be dis- played in the device’s display. Name the directories and files using your CD burn- er software. The software’s operating instructions will provide details on how to do this. -
Page 17: Random Track/File Play (Mix)
Random track/file play (MIX) To play the tracks/files in the current di- rectory in random order, briefly press button 5 MIX ;. “MIX DIR” appears in the display and the MIX symbol lights up. To play all the tracks/files on the insert- ed MP3-CD in random order, press button 5 MIX ;... -
Page 18: Setting The Display
MP3 MODE Setting the display Setting the standard display mode While playing MP3 tracks/files, you can choose to display one of the following standard display modes: Track/file number and playing time Track/file number and clock time Directory number and track/file number Directory number and clock time Directory number and playing time... -
Page 19: Cd Changer Mode
CD changer mode Note: Information on handling CDs, in- serting CDs and operating the CD changer can be found in the oper- ating instructions supplied with your CD changer. Switching to CD changer mode Press the SRC button = repeat- edly until “CHANGER”... -
Page 20: Scanning All Tracks On All Cds (Scan)
CD CHANGER MODE To play the tracks on all the insert- ed CDs in random order, press but- ton 5 MIX ; longer than two sec- onds. “MIX ALL” appears briefly and MIX lights up in the display. Stopping MIX Press button 5 MIX ;... -
Page 21: Clock - Time
CLOCK - Time Briefly displaying the time To display the time, briefly press DIS button :. Setting the time To set the time, press the MENU button 7. button 8 repeat- Press the edly until “CLOCK SET” appears in the display. button 8. -
Page 22: Tone And Volume Distribution Settings
TONE AND VOLUME DISTRIBUTION SETTINGS Tone and volume distribution settings You can adjust the tone settings (bass and treble) separately for each source (radio, CD/MP3, CD changer and AUX). The volume distribution (balance and fader) settings apply to all audio sourc- Adjusting the bass settings Press the AUDIO button 6. -
Page 23: Equalizer And X-Bass
Equalizer and X-BASS X-BASS X-Bass means increased bass at low volumes. You can set the X-Bass in steps rang- ing from OFF to three. Three means that the X-Bass boost is set to maximum and OFF means that X-Bass is switched off. Note: X-BASS setting is shared by all au- dio source (radio, CD/MP3, CD-... -
Page 24: Setting The Level Display
You can obtain this adapter ca- ble (BP no.: 7 607 897 093) from your authorised Blaupunkt dealer. Switching the AUX input on/off Press the MENU button 7. “MENU” appears in the display. -
Page 25: Specifications
Specifications Amplifier Output power: 18W RMS x 4ch @ 14.4V @ 4ohm @ 1% THD Tuner Frequency ranges USA: 87.5 - 107.9 MHz (200 kHz step) 530 - 1710 kHz (10 kHz step) Frequency ranges Europe: 87.5 - 108 MHz (100 kHz step auto/50 kHz manual) 531 - 1602 kHz (9 kHz step) Frequency ranges Thailand: 87.5 - 108 MHz (50 kHz step auto/25 kHz step manual) - Page 26 (TR) 0212-335 06 69 (USA) 800-2662528 Brasil (Mercosur) (BR) +55-19 3745 2769 Malaysia (Asia Pacific) (MAL) +604-6382 474 Blaupunkt GmbH, Robert-Bosch-Straße 200, D-31139 Hildesheim 12/04 - CM/ASA Fax: WWW: 05121-49 4002 http://www.blaupunkt.com 01-610 39 391 02-525 5263 44-898 644 09-435 99236...
Need help?
Do you have a question about the MP35 and is the answer not in the manual?
Questions and answers