Table of Contents
Advertisement
Quick Links
INSTALLER: Leave this manual with party responsible for use and operation.
OWNER: Retain this manual for future reference.
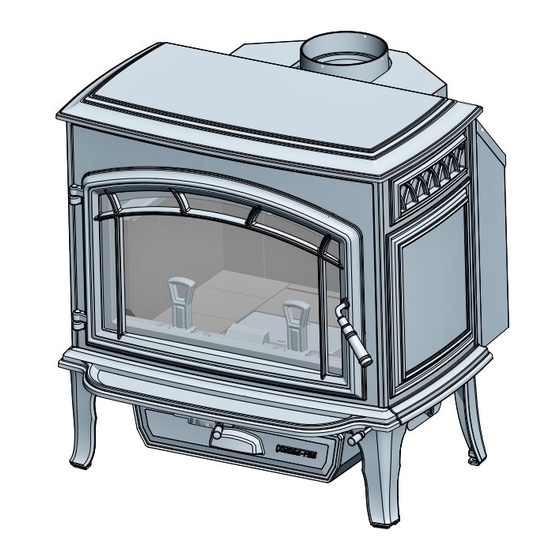
Explorer II Medium Wood Stove
Model(s):
EXPLRMED-MBK
EXPLRMED-PMH
FRONT PAGE
Fire Risk.
For use with solid wood fuel only.
Other fuels may overfire and generate
poisonous gases (i.e. carbon monoxide).
Installation and service of this appliance should
be performed by qualified personnel. Hearth &
Home Technologies recommends NFI certified
professionals, or technicians supervised by an
NFI certified professional.
1
Installation Manual
Installation & Appliance Set-Up
NOTICE: DO NOT DISCARD THIS MANUAL
WARNING
If the information in these instruc-
tions is not followed exactly, a
fire may result causing property
damage, personal injury, or death.
• Do not store or use gasoline or other flam-
mable vapors and liquids in the vicinity of
this or any other appliance.
• Do not overfire - If heater or chimney con-
nector glows, you are overfiring. Overfiring
will void your warranty.
• Comply with all minimum clearances to
combustibles as specified. Failure to
comply may cause house fire.
Hot glass will cause burns.
•
Do not touch glass until it is cooled
•
NEVER allow children to touch glass
•
Keep children away
•
CAREFULLY SUPERVISE children in same room as
fireplace.
•
Alert children and adults to hazards of high temperatures
•
High temperatures may ignite clothing or other
flammable materials.
•
Keep clothing, furniture, draperies and other flammable
materials away.
To obtain a French translation of this manual, please contact
your dealer or visit www.quadrafire.com
Pour obtenir une traduction française de ce manuel, s'il vous
plaît contacter votre revendeur ou visitez www.quadrafire.com
7061-197B
WARNING
WARNING
HOT SURFACES!
Glass and other surfaces are hot
during operation AND cool down.
NOTE
February 18, 2014
Advertisement
Table of Contents

Related Manuals for Quadra-Fire Explorer II Medium EXPLRMED-MBK


Summary of Contents for Quadra-Fire Explorer II Medium EXPLRMED-MBK
- Page 1 Installation Manual Installation & Appliance Set-Up INSTALLER: Leave this manual with party responsible for use and operation. OWNER: Retain this manual for future reference. NOTICE: DO NOT DISCARD THIS MANUAL WARNING If the information in these instruc- Explorer II Medium Wood Stove tions is not followed exactly, a fire may result causing property damage, personal injury, or death.
-
Page 2: Table Of Contents
B. Outside Air Kit Installation ..........15 Getting Started ........4 C. Blower (Optional) ..............16 A. Design and Installation Considerations ......4 D. Reversible Flue Collar and Horizontal Flue Heat Shield ..17 B. Fire Safety .................4 Mobile Home Installation ....18 C. Negative Pressure ............5 Accessory List ........19 D. Tools And Supplies Needed ..........5 E. Inspect Appliance and Components .........5 F. Install Checklist ..............6 Dimensions and Clearances ....7 A. Appliance Dimensions ............7 B. Clearances to Combustibles ..........8 C. Locating Your Stove & Chimney ........9 D. Chimney Termination Requirements ........9 E. 2-10-3 Rule ..............10 Quadra-Fire is a registered trademark of Hearth & Home Technologies. 7061-197B February 18, 2014... -
Page 3: Important Safety Information
Explorer II Medium Wood Stove Fire Risk. Laboratory: Intertek Hearth & Home Technologies disclaims any Report No: 10126132PRT responsibility for, and the warranty will be voided Type: Safety by, the following actions: Standard: UL 1482-07; ULC S627-00 • Installation and use of any damaged appliance. • Modification of the appliance. The Quadra-Fire Explorer Series Wood Stove (ACC) meets • Installation other than as instructed by Hearth & Home the U.S. Environmental Protection Agency’s 1990 particulate Technologies. emission standards. • Installation and/or use of any component part not approved by Hearth & Home Technologies. B. BTU & Efficiency Specifications • Operating appliance without fully assembling all EPA Certified: 2.17 grams per hour components. • Operating appliance without legs attached (if supplied with... -
Page 4: Getting Started
Explorer II Medium Wood Stove Install Guide Getting Started A. Design and Installation Considerations WARNING Consideration must be given to: Fire Risk. • Safety Hearth & Home Technologies disclaims any • Convenience responsibility for, and the warranty will be • Traffic flow voided by, the following actions: • Chimney and chimney connector required • Installation and use of any damaged appliance. It is a good idea to plan your installation on paper, using exact • Modification of the appliance. measurements for clearances and floor protection, before • Installation other than as instructed by Hearth & Home actually beginning the installation. If you are not using an Technologies. -
Page 5: Negative Pressure
Explorer II Medium Wood Stove C. Negative Pressure D. Tools And Supplies Needed Before beginning the installation be sure the following tools and building supplies are available: WARNING Reciprocating saw Framing material Asphyxiation Risk. Pliers High temp caulking material • Negative pressure can cause spillage of com- Hammer Gloves bustion fumes, soot and carbon monoxide. • Appliance needs to draft properly for safety. Phillips screwdriver Framing square Flat blade screwdriver Electric drill and bits Negative pressure results from the imbalance of air avail- Plumb line Safety glasses able for the appliance to operate properly. It can be stron-... -
Page 6: Install Checklist
Explorer II Medium Wood Stove F. Install Checklist ATTENTION INSTALLER: Follow this Standard Work Checklist This standard work checklist is to be used by the installer in conjunction with, not instead of, the instructions contained in this installation manual. Customer: Date Installed: Lot/Address: Location of Fireplace: Installer: Dealer/ Distributor Phone #: Serial #: Model (circle one): EXPLRMED-MBK EXPLRMED-PMH WARNING! Risk of Fire or Explosion! Failure to install fireplace according to these instructions can lead to a fire or explosion. Appliance Install IF NO, WHY? Verified clearances to combustibles. (Pg. 8) -
Page 7: Dimensions And Clearances
Explorer II Medium Wood Stove Dimensions and Clearances A. Appliance Dimensions NOTE: Flue Collar size is 6 inch (152mm) diameter (ID) 12-1/4 20-1/16 28-15/16 7-15/16 Figure 7.2 Top View Figure 7.1 Front View 26-3/4 22-3/16 19-1/2 28-15/16 25-7/8 14-7/8 Figure 7.4 Side View with horizontal flue Figure 7.2 Side View February 18, 2014 7061-197B... -
Page 8: Clearances To Combustibles
Explorer II Medium Wood Stove B. Clearances to Combustibles United States and Canada (UL and ULC) NOTE: Clearances may only be reduced by means approved by the regulatory authority having jurisdiction 36 in.min. Fuel loading door MANTEL 12” MAX 8 in. 8 in. 16 in. from glass 35-1/4 in. min. 203mm (8 in.) 203mm 203mm (8 in.) -
Page 9: Locating Your Stove & Chimney
Explorer II Medium Wood Stove C. Locating Your Stove & Chimney • Consider the appliance location in order to avoid floor and ceiling attic joists and rafters. Location of the appliance and chimney will affect perfor- mance. As shown in Figure 9.1 the chimney should: • Locate termination cap away from trees, adjacent structures, uneven roof lines and other obstructions. • Install through the warm space enclosed by the build- ing envelope. This helps to produce more draft, espe- Your local dealer is the expert in your geographic area and cially during lighting and die down of the fire. can usually make suggestions or discover solutions that will easily correct your flue problem. -
Page 10: 2-10-3 Rule
Explorer II Medium Wood Stove E. 2-10-3 Rule These are safety requirements and are not meant to assure proper flue draft. This appliance is made with a 6 inch (152mm) diameter chimney connector as the flue collar on the unit. • Changing the diameter of the chimney can affect draft and cause poor performance. • It is not recommended to use offsets and elbows at altitudes above 4000 feet above sea level and or when there are other factors that affect flue draft. Less than 10 ft. (305cm) 2 ft. (61cm) 3 ft. (91cm) 2 ft. (61cm) Minimum 10 ft. (305cm) To Nearest Roofline 3 ft. (91cm) Minimum Pitched Roof Figure 10.1 10 ft. (305cm) or more Less than 10 ft. -
Page 11: Chimney Systems
Explorer II Medium Wood Stove Chimney Systems A. Venting Components B. Chimney Systems Chimney Connector: Prefabricated Metal Chimney It is also known as flue pipe or stove pipe. The chimney • Must be minimum 6 inch (152mm) diameter (ID) high connector joins the stove to the chimney. It must be a 6 inch temperature chimney listed to UL 103 HT (2100 F) or (152mm) minimum diameter 24 gauge mild steel black or 26 ULC S629M. gauge blued steel, or an approved air-insulated double wall • Must use components required by the manufacturer venting pipe. - Page 12 Explorer II Medium Wood Stove Thimble Site constructed for masonry chimney installation: Components ceiling 13.5” below ceiling to top • A minimum length of 12 inches [305mm] (longer for of opening Wall thicker walls) of solid insulated factory-built chimney or top of opening is a min.of 4.5”...
-
Page 13: Installing Chimney Components
Explorer II Medium Wood Stove C. Installing Chimney Components Solid Pack Chimney with Metal Supports as a Thimble (Cont’d) Chimney Connector Min. Chimney Clearance to Wall Spacer and Single wall connector or stove pipe. Min. Clearance Combustibles - 2 inch (51mm) 2 inch (51mm) This must be at least 24 gauge mild steel or 26 gauge blue steel. The sections must be attached to the appliance and to 1 inch (25mm) Air Chimney Flue Space to Chimney each other with the crimped (male) end pointing toward the Liner Section stove. All joints, including the connection at the flue collar, Fireclay should be secured with 3 sheet metal screws. Make sure Chimney Liner or to follow the minimum clearances to combustibles. Where Connector... -
Page 14: Appliance Set-Up
Explorer II Medium Wood Stove Appliance Set-Up In Canada, similar floor protection must be provided 18 inches A. Hearth Protection Requirements (457mm) in front and 8 inches (203mm) from the sides and rear of the stove. Figure 14.2 FLOOR PROTECTION: Floor protector must be non-combus- *EXCEPTION: Non-combustible floor protections must tible material, extending beneath heater and to the front, sides extend beneath the flue pipe when installed with horizontal and rear as indicated. The floor must be non-combustible or venting and extend 2 inches (51mm) beyond each side. See otherwise adequately protected from radiant heat given off by Figure 14.4 the unit and from sparks and falling embers. A layer of thin brick or ceramic tile over a combustible floor is not sufficient. It is necessary to install a floor protector of a minimum of 3/8 WARNING inch (9.5mm) thick metal clad millboard or equivalent a min- Fire Risk. imum of 16 inches (406mm) in front of glass and 8 inches Hearth pads must be installed exactly as specified. -
Page 15: Outside Air Kit Installation
Explorer II Medium Wood Stove B. Outside Air Kit Installation WARNING A source of air (oxygen) is necessary in order for combus- tion to take place. Whatever combustion air is consumed Fire Risk. Asphyxiation Risk. by the fire must be replaced. Air is replaced via air leakage Do not draw outside combustion air from: around windows and under doors. In homes that have tightly • Wall, floor or ceiling cavity sealed doors and windows, an outside air source is needed. -
Page 16: Blower (Optional)
Explorer II Medium Wood Stove C. Blower (Optional) CAUTION Tools Required: #2 Phillips head screwdriver Shock Risk. • Do NOT remove grounding prong from plug. 1. Locate bolts supplied with the blower. • Route cord away from appliance. 2. Align holes in mounting flange of blower with bolt holes in • Do NOT route cord under or in front of appliance. appliance. Blower should be positioned at bottom of rear • Plug directly into properly grounded 3 prong receptacle. outer skin as shown in Figure 16.1 3. Re-insert and tighten bolts, securing blower onto outer wall of appliance. 4. Place the bracket containing the snap disc and magnet under the bottom left rear corner. -
Page 17: Reversible Flue Collar And Horizontal Flue Heat Shield
Explorer II Medium Wood Stove D. Reversible Flue Collar and Horizontal Flue Heat Shield Flue collar Convection Tools Required: #2 & #3 Phillips head screwdriver; 1/2" chamber top wrench The flue collar is reversible for either a top or rear venting installation. The appliance is shipped with the flue collar in the top vent position. Converting Collar For Rear Vent Installation Installing Required Horizontal Flue Shield 1. Remove flue collar (#3 Phillips) and convection chamber top (#2 Phillips). 2. Remove 1 bolt from each side of the flue transition and Figure 17.1 retrieve nuts attached to bolts. -
Page 18: Mobile Home Installation
Explorer II Medium Wood Stove Approved for USA Installation only! Mobile Home Installation You must use a Quadra-Fire Outside Air Kit Part CAUTION OAK-ACC for installation in a mobile home. THE STRUCTURAL INTEGRITY OF THE MOBILE HOME 1. An outside air inlet must be provided for combustion. FLOOR, WALL AND CEILING/ROOF MUST BE MAINTAINED 2. Appliance must be secured to the mobile home structure Do NOT cut through: by bolting the legs to the floor. • Floor joist, wall, studs or ceiling trusses. -
Page 19: Accessory List
Component Pack (Includes Baffl e Diverter and Instructions, 2 Matte Black SRV7061-027 Leg Leveling Nuts & 2 Bolts, Touch-Up Paint, Owners Manual & Explorer II Medium Wood Stove SRV7061-028 Warranty Card) Porcelain Mahogany Leveling Assembly 7000-000 Accessory List Matte Black 812-0910 Paint Touch-Up 855-1450 Porcelain Mahogany ACCESSORIES Blower Assembly BK-ACC Blower Control Box W/Switch SRV7000-194 Component Pack 7033-051 Magnet Round SRV7000-140 Snap Disc Bracket Assembly 7033-036 Snap Disc, # 1, Convection Blower SRV230-0470 Speed Control Only (Rheostat) 842-0370 Wire Harness (Blower) 7033-262 Blower, Convection Blower Only 812-4900... -
Page 20: Contact Information
Hearth & Home Technologies 1445 North Highway Colville, WA 99114 Division of HNI INDUSTRIES Please contact your Quadra-Fire dealer with any questions or concerns. For the number of your nearest Quadra-Fire dealer log onto www.quadrafire.com CAUTION DO NOT DISCARD THIS MANUAL...
Need help?
Do you have a question about the Explorer II Medium EXPLRMED-MBK and is the answer not in the manual?
Questions and answers