Table of Contents
Advertisement
Quick Links
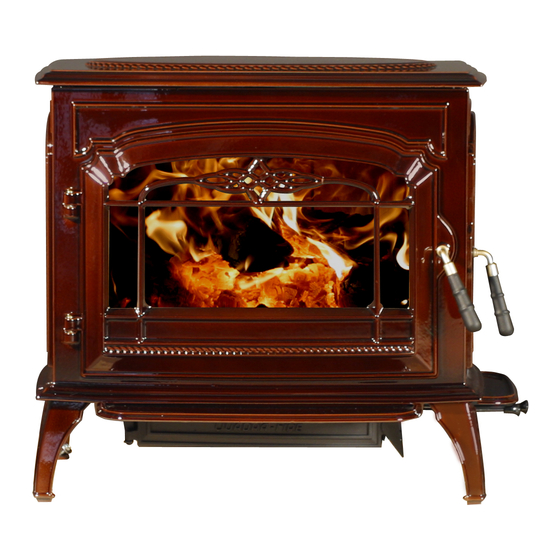
Non-Catalytic, Front/Side Load, Wood Heater
Models:
YOSEMITE-MBK
YOSEMITE-PMH
This manual contains instructions for Installation, Operation & Maintenance.
Please read this entire manual before you install and use your new room heater. Failure to follow
instructions may result in property damage, bodily injury, or even death.
1) When installing your stove, particular attention should be paid to fire protection. If this room heater is not properly installed,
a house fire may result. To reduce the risk of fire, follow the installation instructions. Contact local building or fire officials or
authority having jurisdiction about restrictions, installation inspection and permit requirements in your area.
2) CAUTION: Never use gasoline or gasoline-type lantern fuel, kerosene, charcoal lighter fluid, or similar liquids to start or "freshen
up" a fire in this heater. Keep all such liquids well away from heater while it is in use.
3) During operation, if any part of the stove starts to glow, the stove is in an overfired condition. Close the air controls completely
until the glowing has stopped. OVERFIRING VOIDS YOUR WARRANTY!
4) Cool ashes should be disposed of carefully, using a metal container.
5) Do not burn wet or green wood. Store wood in a dry location.
6) DO NOT BURN GARBAGE OR FLAMMABLE FLUIDS SUCH AS GASOLINE, NAPHTHA OR ENGINE OIL. Do not burn
treated wood, or wood with salt (driftwood, etc.). Burning materials other than wood (including charcoal) under adverse
conditions may generate carbon monoxide in the home, resulting in illness or possible death.
7) Do not permit creosote or soot to accumulate excessively in the chimney or inside the firebox.
8) Check your chimney system thoroughly when installing into an existing metal or masonry chimney. Seek professional
advice if in doubt about its condition.
9) Do not connect this unit to a chimney flue already serving another appliance.
10) Comply with all minimum clearances to combustibles as shown in this manual for this appliance.
11) Build fire on brick firebox floor. Do not use grates, andirons or other methods to support fuel.
12) HOT WHILE IN OPERATION! Keep children, pets, clothing and furniture away. Contact can cause skin burns.
13) Do not connect to any air distribution duct or system.
14) RISK OF FIRE! Do not operate with stove door open without the firescreen or with the ash removal system door open.
15) For further information refer to NFPA 211 (USA) or CAN/CSA-B365 (Canada).
16) Do not operate without fully assembling all components.
17) Do not operate with broken glass.
PRIOR TO FIRST FIRE: Remove all labels from glass. Clean plated surfaces with a glass cleaner and soft cloth
1445 North Highway
Colville, WA 99114-2008
Yosemite
IMPORTANT SAFETY NOTES:
to prevent staining from fingerprint oils.
SAVE THESE INSTRUCTIONS
7004-187F September 1, 2008
R
Portland
Tested and
O-T L
Oregon USA
Listed by
C
US
OMNI-Test Laboratories, Inc.
www.quadrafire.com
Advertisement
Table of Contents

Related Manuals for Quadra-Fire Yosemite YOSEMITE-MBK


Summary of Contents for Quadra-Fire Yosemite YOSEMITE-MBK
-
Page 1: Important Safety Notes
Non-Catalytic, Front/Side Load, Wood Heater Models: YOSEMITE-MBK YOSEMITE-PMH This manual contains instructions for Installation, Operation & Maintenance. Please read this entire manual before you install and use your new room heater. Failure to follow instructions may result in property damage, bodily injury, or even death. 1) When installing your stove, particular attention should be paid to fire protection. -
Page 2: Serial Number Label Location
and Welcome to the Quadra-Fire Family earth & Home Technologies welcomes you to our tradition of excellence! In choosing a Quadra-Fire appliance, you have our assurance of commitment to quality, durability, and performance. This commitment begins with our research of the market, including ‘Voice of the Customer’... -
Page 3: Table Of Contents
PRE-USE CHECK LIST Place the unit in a location near the final installation area and follow the procedures below: Open the stove and remove all the parts and articles packed inside. Inspect all the parts and cast iron body for shipping damage. Contact your dealer if any irregularities are noticed. -
Page 4: Listings & Safety Notices
These installation instructions describe the installation and opera- tion of the QUADRA-FIRE YOSEMITE woodstove. This stove meets the U.S. Environmental Protection Agency’s 1990 particulate emission standards. The Yosemite is listed by OMNI-Test Labora- tories, Inc. to UL Safety Standard 1482, UL737 and ULC S627-00, and (UM) 84-HUD. -
Page 5: Installations Material Needed For Safety 4 Dimensions & Vent Specifications
SAFETY/SERIAL NUMBER LABEL IS LOCATED ON THE BACK OF THE STOVE FRONT VIEW 25-5/8" (651mm) 8-1/4" 19-7/16" (494mm) (210mm) 16-3/4" (426mm) 25-5/16" (643mm) SIDE VIEW 20-7/16" (519mm) 22-7/16" (570mm) 19-5/16" (491mm) 8-5/16" (211mm) Single Wall: Measures 6 inch (152mm) diameter, minimum 24 MSG black or blued steel connector pipe, with a listed factory-built chimney type UL103 HT* suitable for use with solid fuels, or a masonry chimney, and the referenced clearances. -
Page 6: Clearances To Combustibles (Ul And Ulc)
CLEARANCES TO COMBUSTIBLES (UL and ULC) Fuel Door side Non-fuel door side Alcove IF SIDE FUEL LOADING DOOR IS NOT USED: • It must remain in the locked position at all times • Use clearances for non-fuel door side for both sides OMNI-Test Laboratories, Inc Safety Report Test Number: 061-S-54-2 MINIMUM CLEARANCES TO COMBUSTIBLE MATERIALS: In Inches &... -
Page 7: Floor Protection
The floor must be non-combustible material, extending beneath heater and to the front/sides/rear as indicated. The floor must be non-combustible or otherwise adequately protected from radiant heat given off by the unit and from sparks and falling embers. A layer of thin brick or ceramic tile over a combustible floor is not sufficient. In USA installations, it is necessary to install a non-combustible floor protector at least 16 inches in front and 8 inches to both sides of the fuel loading doors. -
Page 8: Horizontal Venting
SIDE FUEL DOOR LOCKED SHUT - CORNER DRAWINGS ARE FOR ILLUSTRATION PUR- POSES ONLY AND ARE NOT TO SCALE. Figure 8A BOTH FUEL DOORS ACCESSIBLE- CORNER Figure 8B Figure 8C Page 8 Yosemite Wood Stove 44-3/4" USA Installations optional coverage 48-1/2"... -
Page 9: Locating Your Stove
LOCATING YOUR STOVE WHEN LOCATING YOUR STOVE consider safety, convenience, traffic flow, and the fact that the stove will need a chimney and chimney connector. It is a good idea to plan your installation on paper, using exact measurements for clearances and floor protection, before actually beginning the installation. -
Page 10: Reversible Flue Collar
REVERSIBLE FLUE COLLAR The flue collar is reversible for either a top or rear venting installation. Accessory Horizontal Flue Heat Shield, Part HTSHLD-7006, is required in rear vent installations. The stove is shipped with the flue collar in the top vent position. CONVERTING COLLAR FOR REAR VENT INSTALLATION Lift off cast top. -
Page 11: Chimney Height Requirements & Draft
CHIMNEY HEIGHT REQUIREMENTS AND DRAFT To be sure that your stove burns properly, the chimney draft (static pressure) should be approximately -.04” water column (W.C.) during a low burn and -.10” W.C. during a high burn, measured 6 inches” (152mm) above the top of the stove after one hour of operation at each burn setting. -
Page 12: Masonry Chimney
MASONRY CHIMNEY or optimal performance, masonry chimneys used to vent this appliance should be lined with a 6 inch stainless steel liner. Installations into a clay flue without a stainless steel liner may reduce draw which affects performance, cause the glass to darken and produce excessive creosote. -
Page 13: Solid Pack Chimney With Metal Supports As A Thimble
SOLID PACK CHIMNEY WITH METAL SUPPORTS AS A THIMBLE For the method of installation to a masonry chimney shown in Figures 14A & 14B on page 14, it will be necessary to purchase a 12 inch (305mm) long, [8 inch (203mm) inside diameter], section of prefabricated listed solid pack chimney to use as a thimble. Purchase a wall spacer, trim collar, and a wall band manufactured to fit the chimney section you purchased. -
Page 14: As A Thimble
SOLID PACK CHIMNEY WITH METAL SUPPORTS AS A THIMBLE (CONT'D) First, make the frame for the thimble, ensuring it is no smaller than 14 inches (356mm) square to maintain a 2 inch (51mm) air space around the chimney section. Attach the wall spacer to the chimney side of the frame. Then insert the frame into the opening, toe nailing it to the wall studs. -
Page 15: Metal Prefabricated Chimney
CONNECTION TO A METAL PREFABRICATED CHIMNEY When a metal prefabricated chimney is used, the manufacturer’s installation instructions must be followed precisely. It will be necessary to install the ceiling support package or wall pass through, “T” section package, firestops (when needed), insulation shield, roof flashing, chimney cap, and any other materials deemed necessary by the instructions of the prefabricated chimney manufacturer. -
Page 16: Mobile Home Installation
MOBILE HOME INSTALLATION An outside air inlet must be provided for combustion and must remain clear of leaves, debris, ice and/or snow. It must be unrestricted while stove is in use to prevent room air starvation which can cause smoke spillage and an inability to maintain a fire. -
Page 17: Outside Air Kit Installation
OUTSIDE AIR KIT INSTALLATION Part 831-1780 Included in Kit: 2 cable ties; oustide air termination cap; mounting screws (Discard the remaining parts). In Stove's Component Pack: Outside air cover plate Items Needed for Installation: 4 inch (102mm) diameter flex pipe in the length as required for your installation;... -
Page 18: Over-Firing Your Appliance
OVER-FIRING YOUR APPLIANCE WARNING Fire Risk Do not over-fire. Over-firing may ignite creosote or will damage the stove and chimney. To prevent over-firing your stove, DO NOT: • Use flammable liquids • Overload with wood • Burn trash or large amounts of scrap lumber •... -
Page 19: Air Controls
FINAL STAGE The final stage of burning is the charcoal stage. This occurs when the flammable gases have been mostly burned and only charcoal remains. This is a naturally clean portion of the burn. The coals burn with hot blue flames. It is very important to reload your stove while enough lively hot coals remain in order to provide the amount of heat needed to dry and rekindle the next load of wood. -
Page 20: Heat Output Setting
For maximum operating efficiency with the lowest emissions, follow these operating procedures: Regardless of desired heat output, when loading stove, burn your stove with both air controls wide open for 5 to 15 minutes. Regulate burn rate (heat output) by using the Primary Air Control (front control). The Start-Up Air Control (rear control) is for initial start-up and reloading. -
Page 21: Correct Baffle & Blanket Placement
CORRECT BAFFLE & BLANKET PLACEMENT WARNING Fire Risk Firebox damage due to improper baffle place- ment is not covered by warranty. Operate the wood burning appliance with the baffle in the correct position only. Not doing so could result in: •... -
Page 22: Opacity
This is the measure of how cleanly your stove is burning. Opacity is measured in percent; 100% opacity is when an object is totally obscured by the smoke column from a chimney, and 0% opacity means that no smoke column can be seen. As you become familiar with your stove, you should periodically check the opacity. -
Page 23: Maintenance
CREOSOTE FORMATION AND NEED FOR REMOVAL: When wood is burned slowly it produces tar and other organic vapors which combine with expelled moisture to form creosote. The creosote vapors condense in the relatively cool chimney flue of a newly-started or a slow-burning fire. As a result, creosote residue accumulates on the flue lining. -
Page 24: Glass Replacement
GLASS CARE (CONT'D) Do not clean the glass with abrasive materials that may scratch or otherwise damage the glass. Scratches on the glass can develop into cracks or breaks. Never attempt to clean the glass while a fire is in the stove. The best method for maintaining clean glass is to operate the stove efficiently by using dry well seasoned wood and burning moderate to hot fires. -
Page 25: Brick Replacement
BRICK REPLACEMENT INSTRUCTIONS The firebox of your stove is lined with high quality firebrick which has exceptional insulating properties. There is no need for a grate, simply build a fire on the firebrick. Be certain coals are completely cold. Remove all old brick and ash from unit and vacuum out firebox. -
Page 26: Service & Maintenance Log
Yosemite Wood Stove Service & Maintenance Log Date of Service Performed By Description of Service Page 26 7004-187F September 1, 2008... -
Page 27: Exploded Views
Exploded Views Item Part Name Air Deflector Door Hinge Bracket Glass Hinge Pin Washer 21.0" Ceramic Blanket 12-1/2" 2.0" 17.0" 7004-187F September 1, 2008 Yosemite Wood Stove Front Door Assembly 5-1/2" * Part number list on following page. Side Door Assembly Page 27... -
Page 28: Service Parts
Service Parts IMPORTANT: THIS IS DATED INFORMATION. at www.quadrafire.com. When ordering, supply serial and model numbers to ensure correct part. Item Air Deflector Ash Removal Door Assembly Ash Lip, Front Ash Lip, Side Ash Pan Back Shield Baffle, Fiber Blanket, Ceramic Blower, Convection Bracket, Magnet Brick with Hole... - Page 29 Service Parts IMPORTANT: THIS IS DATED INFORMATION. at www.quadrafire.com. When ordering, supply serial and model numbers to ensure correct part. Item Latch, Magnet Leveling Bolts & Nuts Manifold Clip/Screws (4) 14,16 Manifold Tubes (3) Paint, Touch-up, Matte Black Paint, Touch-up, Porcelain Crème Paint, Touch-up, Porcelain Green Paint, Touch-up, Porcelain Mahogany Paint, Touch-up, Porcelain Midnight Blue...
-
Page 30: Warranty
Warranty Policy Hearth & Home Technologies LIMITED WARRANTY Hearth & Home Technologies (“HHT”) and its respective brands extends the following warranty for HHT gas, wood, pellet and electric appliances purchased from an authorized HHT dealer and installed in the United States of America or Canada. - Page 31 Hearth & Home Technologies LIMITED WARRANTY (Cont'd) Noise resulting from minor expansion, contraction, or movement of certain parts is normal and complaints related to this noise are not covered by this warranty. HHT’s obligation under this warranty does not extend to damages resulting from: (1) installation, operation or main- tenance of the appliance not in accordance with the installation instructions;...
-
Page 32: Contact Information
Please contact your Quadra-Fire dealer with any questions or concerns. For the number of your nearest Quadra-Fire dealer, Yosemite Wood Stove SERIAL NUMBER: __________________ DATE PURCHASED: __________________ DATE INSTALLED: __________________ This product may be covered by one or more of the following patents: (United States) 4593510, 4686807, 4766876, 4793322, 4811534, 5000162, 5016609, 5076254, 5113843, 5191877, 5218953, 5263471, 5328356, 5341794, 5347983, 5429495, 5452708, 5542407, 5601073, 5613487, 5647340, 5688568, 5762062, 5775408, 5890485, 5931661, 5941237, 5947112, 5996575, 6006743, 6019099, 6048195, 6053165, 6145502, 6170481, 6237588, 6296474, 6374822, 6413079,...
Need help?
Do you have a question about the Yosemite YOSEMITE-MBK and is the answer not in the manual?
Questions and answers