
Related Manuals for PARKZONE F-27 Stryker


Summary of Contents for PARKZONE F-27 Stryker
- Page 1 PKZ1205 05482 14170 ParkZone ™ products are distributed exclusively by Horizon Hobby, Inc. 4105 Fieldstone Road Champaign, IL 61822 © 2004 Horizon Hobby, Inc. www.parkzone.com 6404 6404...
-
Page 2: Instruction Manual
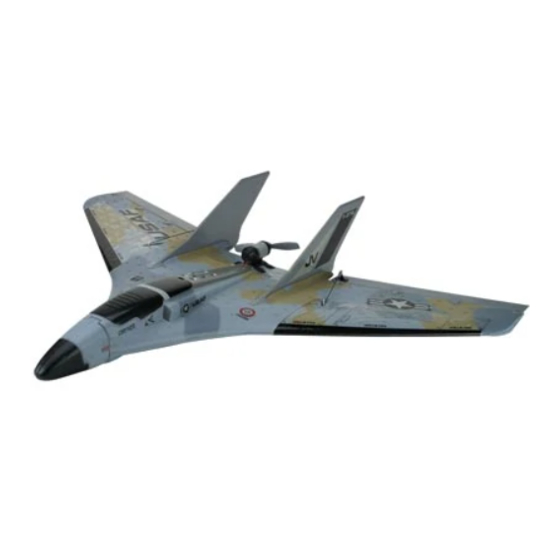
Instruction Manual Wing Span: 37 in (950mm) FM Radio: 3 proportional channels Charge-and-Fly ™ Park Flyer Length: 27 in (700mm) Battery: 8.4V 900mAh Ni-MH Weight: 21 oz (580g) Charger: DC peak detect Motor: 480 Power direct drive Wing: Durable EPP foam... - Page 3 Crash damage is not covered under the warranty! We at ParkZone are committed to giving you the most enjoyable flight experience you can have. Your F-27 Stryker comes with special software that...
- Page 4 continued Step 2 BATTERY CAPACITY MAX. CHARGE RATE CHARGE TIME 300mAh 6V Ni-MH .4 amps 40 minutes Note: Charge times are estimates only for fully 600mAh 4.8V–8.4V Ni-MH .8 amps 40 minutes discharged battery pack. Actual charge 900mAh 7.2V–8.4V Ni-MH 1.2 amps 40 minutes times may vary.
- Page 5 5. Secure battery inside fuselage cavity and replace battery cap. 6. Your F-27 Stryker has a built-in throttle-arming feature which needs to “see” the throttle slider in the off position before it will spin the propeller. Advance the throttle forward and the propeller should spin at a high speed.
- Page 6 1. Turn on transmitter. 2. Install and plug in fully charged aircraft battery. With If you encounter any problems with your F-27 Stryker the stick at neutral and both trim levers centered, the responding properly to the transmitter, do not fly.
- Page 7 Mode B. that you begin flying in this mode until you become more familiar with the F-27 Stryker. A label on the Note: It is possible to change the flight modes during transmitter will show the position of the switch flight.
-
Page 8: Very Important
The 3-channel control system is designed for the experienced radio control pilot and is not intended for the first-time flyer. It is best to have HobbyZone ® Zone 2 experience. First-time pilots of the ParkZone ™ F-27 Stryker ™ should seek the assistance of an experi- enced RC flyer until the additional third channel (pitch control) has been competently mastered. - Page 9 5. Place the fingers of your launching hand into the molded place on the bottom of the aircraft. 6. With the power off, throw your F-27 Stryker ™ firmly with a slight angle upwards, directly into the wind.
- Page 10 continued Step 13 Sharp Turns In order to make a sharper turn, move the stick in the desired direction and add some up elevator (pull back on stick). The plane will make a sharper banking turn. Note: With the throttle slider set at low or off (gliding), the plane will not turn as fast as when you are flying at or near full throttle.
- Page 11 (par- provides up elevator. This allows for better flares for tial up elevator) once your F-27 Stryker has built up landing, better climb rates, more effective turns, and airspeed. Remember, pulling back too quickly or for too better aerobatics.
- Page 12 Step 18 X-Port the designated space on the top of the fuselage. The Your F-27 Stryker comes equipped with firing button is at the top of the transmitter. When the HobbyZone’s exclusive X-Port ™...
-
Page 13: Warnings And Safety
Step 19 Repairing Damage If you happen to crash and your F-27 Stryker™ is in need of repair, you can use CA or epoxy. The foam will bond quite nicely with careful repair work. However, if damage is severe, or if the wings and/or tail is bent, it is best to replace these parts prior to your next flight. -
Page 14: Success Tips
At the very first sign of the F-27 Stryker beginning to 9. Keep your plane in front of you so you don’t have spiral down, immediately release the stick, and give to turn in circles as you fly. -
Page 15: Troubleshooting
Carefully check the parts and operation BEFORE 1. Unplug the battery from the airplane. your first flight. 2. Pack the complete ParkZone™ F-27 Stryker ™ Damage incurred during flying, landing, crashing or (all components in the original box) and place modification is not covered under the warranty. -
Page 16: Replacement Parts
NOTE: Some replacement parts are also HobbyZone replacement parts and may reflect that in packaging. * 9.6V 8-cell battery pack must be charged with a hobby-quality charger. The charger that comes with the F-27 Stryker™ will not properly charge this battery pack. We recommend the E-Flite Pinnacle Plus (EFLC2020).
Need help?
Do you have a question about the F-27 Stryker and is the answer not in the manual?
Questions and answers