Table of Contents
Advertisement
Quick Links
Advertisement
Table of Contents

Related Manuals for Hawking Hi-Gain


Summary of Contents for Hawking Hi-Gain
- Page 2 Trademarks & Copyright © Copyright 2009 Hawking Technologies, Inc. All rights reserved. All other brands and product names are trademarks of their respective companies. No part of this publication may be reproduced in any form or by any means or used to make any derivative (such as translation, transformation or adaptation) without the express written consent of the manufacturer as stipulated by the United States Copyright Act of 1976.
- Page 3 The R&TTE Directive repeals and replaces in the directive 98/13/EEC (Telecommunications Terminal Equipment and Satellite Earth Station Equipment) As of April 8, 2000. Safety This equipment is designed with the utmost care for the safety of those who install and use it. However, special attention must be paid to the dangers of electric shock and static electricity when working with electrical equipment.
-
Page 4: Table Of Contents
AWKING TILITY APPENDIX A – SPECIFICATIONS ........................ 54 INDEX ................................55 VI. PRODUCT SUPPORT INFORMATION ......................58 Note: Manual contents are subject to change without prior notice. Please check the hawking website for the latest information. -
Page 5: Overview
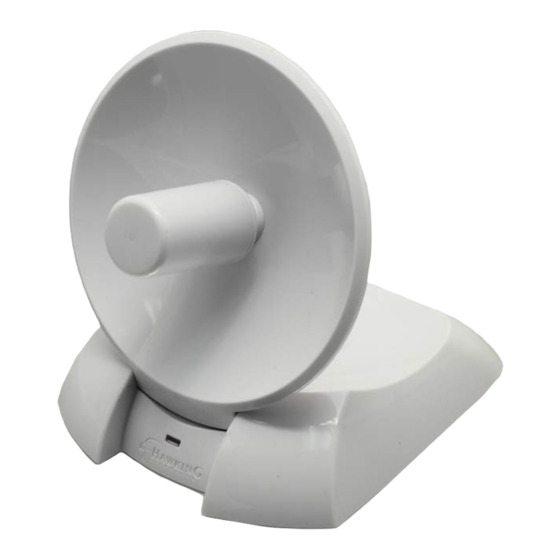
Wireless N USB Dish Adapter. Now you can enjoy the latest Wireless-N technology with excellent speeds, of up to 150Mbps*. Designed with Hi-Gain Dish Technology, the Wireless N USB Adapter extends your wireless network coverage by up to 3 times the speed and 5 times the range more than a standard Wireless-G Network. -
Page 6: Package Contents
2. Package Contents Before you begin the installation, please check the items of your package. The package should include the following items. • One HWDN2 Hi-Gain Wireless N USB Dish Adapter • One USB cable (1.0 meter ~ 39 inches) •... -
Page 7: For Windows Users
II. FOR WINDOWS USERS 1. Installation for Windows 7/ Vista Important! (1) If you have installed the Wireless PC Adapter driver & utility before, please uninstall the old version first. (2) Be sure to save all your work, your system may automatically restart after installation. Insert the included CD an auto load page will appear instantly on you screen. - Page 8 Please wait a while the Wizard prepares for setup. Select “Next” to continue. Please wait during the setup status screen, then Select “Install” to begin Installation. Please wait until the Install Wizard completes. Note: A Windows Security screen might show up at this point.
-
Page 9: Connecting To A Wireless Network (Windows 7)
Connecting to a Wireless Network (Windows 7) At this point, your system may prompt you to restart your computer. Plug in the HWDN2 to an available USB after computer restarts. Please wait until your system completes with the driver installation. When Installation is complete, Control Center will indicate that your network is ready. - Page 10 Congratulations! you are now successfully connected!
-
Page 11: Connecting To A Wireless Network (Windows Vista)
Connecting to a Wireless Network (Windows Vista) At this point, your system may prompt you to restart your computer. Plug in the HWDN2 to an available USB after computer restarts. Your system will automatically search for the installed driver for your HWDN2 adapter and will prompt you when it is ready. -
Page 12: Using Windows Configuration (Windows Vista / 7)
Using Windows Configuration (Windows / 7) It is recommended that you use the Windows Configuration for the Wireless-N Adapter. a. To open up the Windows Configuration, go to Start Connect To b. Select the Network you wish to connect to. If you are connecting to an unsecure network, go to step c. - Page 13 d. If your selected network is a secured (encryption) network, then a window will prompt you to enter security key or passphrase. If you are connecting to a network that is security enabled, but do not have the security key or passphrase, please obtain the passphrase from your Network Administrator.
-
Page 14: Installation (Windows 2000/Xp)
2. Installation (Windows 2000/XP) Important! Please Install the HWDN2 Driver & Utility before connecting the HWDN2 into the USB port on your computer. The HWDN2 Driver & Utility is located on the CD. The following installation was operated under Windows XP. Procedures are similar for Windows 2000. 1. - Page 15 5. Now you’ll see the following message, please click ‘Install’ to begin the installation. Wait while your system begins to install.
- Page 16 6. Select “Yes” to restart your computer, then click “Finish” to complete the driver and utility installation. 7. At this point, your system may prompt you to restart your computer. Plug in the HWDN2 to an available USB after computer restarts. 8.
-
Page 17: Verify Installation (Windows 2000/Xp)
Finally select “Finish” to complete your hardware installation. Verify installation (Windows 2000/XP) 1. Open Control Panel Double-click on System. 2. Select Hardware tab Click on Device Manager. Select and double-click on 802.11N USB wireless LAN card. -
Page 18: Network Configuration (Windows 2000/Xp)
Verify the device status of the 802.11N USB Wireless LAN Card This device is working properly Click OK Network Configuration (Windows 2000/XP) • Go to Start Menu Control Panel Network. • Right-click on Wireless Network. • Select Local Area Connection icon select Properties. -
Page 19: Connect - Using Hwdn2 Wireless Utility
• The HWDN2 Wireless Utility works best with Windows XP and 2000. For Windows 7 and Windows Vista, it is recommended to use the Windows Configuration. 1. Open Up the Hawking Wireless Utility. There are several ways to open up the Hawking Wireless Configuration Utility. - Page 20 To see a list of available wireless networks, select Available Network tab Select Refresh. All detected service set identifiers (SSID) will be listed under SSID column. Encryption/Security/Authentication: If the selected SSID is an open network or has no encryption, “none” will be listed under the Encryption column.) If the selected SSID has encryption (WEP, TKIP, WPA), please enter the password in the...
-
Page 21: Hawking Wireless Utility
3. Hawking Wireless Utility Utility Overview NOTE: The HWDN2 Wireless Utility works best with Windows XP and 2000. For Windows 7 and Windows Vista, it is recommended to use the default Windows Zero Configuration Wireless Utility. There are several parts to the utility screen. Please refer to the following table for the description. -
Page 22: Available Network Tab
PARAMETER DESCRIPTION Refresh - Refresh the list of adapters on your computer: “B“ block Mode - There are two modes: Station and Access Point. If “Station" is selected, the adapter works as a standard wireless adapter. If “Access Point" is selected, the adapter will works as a wireless AP. -
Page 23: General Tab
Parameter Description Available Network(s) This list shows all information of the available wireless networks within the range of your adapter. The information includes SSID, Channel, Encryption, Network Authentication, Signal and etc. If you want to connect to any network on the list, double-click the selected network. -
Page 24: Profile Tab
Encryption It displays the encryption setting of the current connection including None, WEP, TKIP or AES. SSID The SSID (up to 32 printable ASCII characters) is the unique name identified in a WLAN. The ID prevents the unintentional merging of two co-located WLANs. - Page 25 Configure a Network Profile Parameter Description Define a recognizable profile name for you to identify the Profile Name different networks you are saving The SSID (up to 32 printable ASCII characters) is the unique name for the wireless network you are saving. The ID prevents the unintentional merging of two co-located wireless networks.
- Page 26 There are two kinds of network type described as follows. This is a Infrastructure – This operation mode requires the presence of computer-to- an 802.11 Access Point. All communication is done via the computer (ad Access Point or Router. hoc) network; Ad Hoc –...
- Page 27 WPA 802.1X – WPA provides a scheme of mutual authentication using either IEEE 802.1x/Extensible Authentication Protocol (EAP) authentication or pre-shared key (PSK) technology. It provides a high level of assurance to enterprises, small businesses and home users that data will remain protected and that only authorized users may access their networks.
- Page 28 of security and authenticity for digital information and it is the most advanced solution defined by IEEE 802.11i for the security in the wireless network. Note: All devices in the network should use the same encryption method to ensure the communication. WEP Key can be ASCII format.
- Page 29 User’s password in the RADIUS server. Certificate Select the certificate for RADIUS server authentication Status This screen provides information regarding Hawking Technologies, the driver version, settings of the wireless network the adapter is connected to, the link time and link status.
-
Page 30: Statistics
Statistics You can get real time information about packet transmissions and receiving statuses during wireless communications. If you want to recount the statistics value, please click “Reset“. -
Page 31: Wi-Fi Protect Setup (Wps)
Wi-Fi Protected Setup (WPS) Wi-Fi Protected Setup (WPS) is the latest wireless network technology which makes wireless network setup very simple. If you have a WPS-enabled wireless access point, and you want to establish a secure connection to it, you don’t have to configure the wireless access point and setup data encryption by yourself. - Page 32 4. Please wait while the install procedure is running and wait for few seconds to two minutes. If a wireless access point with correct PIN code is found, you’ll be connected to that access point. Push Button Config (PBC) 3.6.2 a.
-
Page 33: Network Security (Wep, Wpa
Network Encryption key, please request it from the Network Administrator or the person who set up your wireless network. After you obtained the network security information, open up Hawking Wireless Utility. Continue below to set up your Network Security Code. - Page 34 Make sure the Network Authentication and Data encryption matches your selected Network. Finally, enter the Network Key. Windows Vista/7 Windows XP/2000 WEP Setup Instructions: (All settings should correspond with settings of the wireless AP that you are connecting to.) a. Network Authentication field: indicates the authentication type of the AP/Router. Please confirm the setting of the AP/Router.
- Page 35 c. Enter in AP encryption keys (64/128bits) in the box Key1~Key4. Please accept the auto selected setting of [Hex]/ [ASCII]. d. Select the current AP encryption keys from Key1~Key4. e. Press [OK] to finish setting. WPA Setup 3.7.2 WPA encryption type can be divided into WPA-PSK, WPA2-PSK, WPA (also known as WPA-EAP), and WPA2 (also known as WPA2-EAP).
-
Page 36: Uninstalling Hawking Utility/Driver
Uninstalling Hawking Utility/Driver Select Uninstall option from the start menu. Select "Yes" to remove all its features. Removing the utility is in progress. HWDN2 Driver and Utility has finished uninstalling. Select Finish. -
Page 37: For Mac Users
III. FOR MAC USERS 1. Installation for Mac OSX 10.4 or later IMPORTANT: • Please do not install the wireless adapter into your Mac desktop or notebook before installing the software program from the CD. • The following installation was operated under Apple OSX 10.5 Leopard. (Installation Procedures are similar in other OS. - Page 38 3. Welcome to the Hawking HWDN2 Hi-Gain Adapter Driver Installer. Select “Continue”. 4. Read the Important information in the following screen, then “Continue”. 5. Software License Agreement: select “Continue”. 6. Click Agree to continue.
- Page 39 7. Select a destination and “Continue”. 8. The driver will take 2.5MB of space on your computer. Click “Install” to continue. 9. If your computer is password protected, please enter your password to continue. 10. Again, make sure you save all your work, then select “Continue Installation”.
-
Page 40: Connecting To Your Wireless Network (Mac 10.5 Or Later)
12. Finally, select “Restart”. 2. Connecting To Your Wireless Network (Mac 10.5 or later) 1. When your computer has successfully restarted. Insert the HWDN2 Hi-Gain Wireless-N USB Dish Adapter into an available USB port on your desktop or notebook computer. - Page 41 HWDN2 in your Network Preference. 2. After plugging in the Adapter, the Hawking HWDN2 Wireless Utility will automatically pop up. You will be asked to enable your WLAN card. When a NOTICE comes up, select “OK”. Then, select “Network Preferences.”...
-
Page 42: Connecting To Your Wireless Network (Mac 10.4~10.4.9)
3. Connecting To Your Wireless Network (Mac 10.4~10.4.9) 1. When your computer has successfully restarted. Insert the HWDN2 Hi-Gain Wireless-N USB Dish Adapter into an available USB port on your desktop or notebook computer. - Page 43 HWDN2 in your Network Preference. 2. After plugging in the Adapter, the Hawking HWDN2 Wireless Utility will automatically pop up. You will be asked to enable your WLAN card. When a NOTICE comes up, select “OK”.
- Page 44 - Please contact a network administrator if you are uncertain of the settings that are required to connect to your network. When you have finished select APPLY NOW to continue. 7. From Hawking HWDN2 Wireless Utility, select “Available Network” tab. Then select your desired Wireless Network (SSID).
-
Page 45: Hawking Hwdn2 Wireless Utility
4. Hawking HWDN2 Wireless Utility The Hawking HWDN2 Wireless Utility is an application that helps you configure the HWDN2A and monitor the link status and statistics of your wireless connection. Each time you insert the HWDN2 the Hawking Wireless Utility should automatically load. -
Page 46: Available Network
Available Network When you open the Wireless Utility, the system will scan all wireless channels to find all access points/stations within the accessible range of your adapter and automatically connect to the wireless device with the highest signal strength. When using the “Available Network” option, all nearby networks will be listed. -
Page 47: Profiles
Connect Button Click “Connect” to connect to the selected network. Add to Profile Button Add the selected network to Profiles list. Profiles The “Profiles List” is for you to manage the networks you connect to frequently. You are able to Add/Delete/Edit/Activate a profile. - Page 48 Parameter Description Define a recognizable profile name for you to identify the different Profile Name networks The SSID (up to 32 printable ASCII characters) is the unique name identified in a WLAN. The ID prevents the unintentional merging of two co-located WLANs.
- Page 49 mode, known as Pre-Shared Key, the user manually enters the starting password in their access point or gateway, as well as in each wireless station in the network. WPA-PSK takes over automatically from that point, keeping unauthorized users that don’t have the matching password from joining the network, while encrypting the data traveling between authorized devices.
- Page 50 wireless network. Note: All devices in the network should use the same encryption method to ensure the communication. WEP Key can be ASCII format. Alphanumeric values or signs are ASCII allowed to be the WEP key. It is more recognizable for user. It is a text string with a maximum of 32 alphanumeric characters, for example: “Test“.
-
Page 51: Link Status Page
Link Status Page The Link Status page gives you information regarding your current wireless channel, transmit rate (speed) and link/signal quality. You will use this utility to figure out which antenna position results in the best performance and connection. Obtaining the Strongest Connection First you must determine where the location of your Wireless Access Point is within your network. -
Page 52: Information
Information By choosing this option, you can the information about the Driver and Utility. Uninstalling Hawking Utility (Mac) 1. Insert the Original Setup CD. Select “Sofware_MAC” folder. - Page 53 2. Select your Mac OS (10.4 or 10.5) and the “Uninstall.command 3. Click on “Password” and enter the password for your computer, then “enter”. If your computer is not password protected, then press enter.
-
Page 54: Appendix A - Specifications
11n (20MHz): MCS0-7 (up to 72Mbps) 11n (40MHz): MCS0-7 (up to 150Mbps) • Security: 64/128-bit WEP Data Encryption, WPA, WPA2 • Antenna: Hi-Gain Dual Antenna – Dish Technology • Drivers: Windows 2000/XP/Vista or Mac 10.4 or later • LEDs: Link/Activity •... -
Page 55: Index
V. INDEX This chapter provides solutions to problems usually encountered during the installation and operation of the adapter. 1. What is the IEEE 802.11n standard? 802.11n is an IEEE 802.11 wireless network standard that increases transmission speeds from a traditional 11Mbps (802.11b) to over 100Mbps. Currently, the HWDN2 supports up to 150Mbps. 802.11n can handle legacy 11a, 11b and 11g transmission in a mixed mode or only 11n nodes for maximum performance. - Page 56 7. What is TKIP? TKIP is a quick-fix method to quickly overcome the inherent weaknesses in WEP security, especially the reuse of encryption keys. TKIP is involved in the IEEE 802.11i WLAN security standard, and the specification might be officially released by early 2003. 8.
- Page 57 13. What is Hi-Gain and dBi? Hi-Gain is Hawking Technologies’ high performance wireless distance extending product line. It encompasses a group of products and technologies used to help solve distance issues accompanied with Wi-Fi products. A unit of measurement on antenna strength and power is dBi. The higher the dBi or gain level of an antenna the more powerful it is.
-
Page 58: Product Support Information
VI. PRODUCT SUPPORT INFORMATION Thank you for choosing Hawking Technologies. Please do not hesitate to contact us if you have any questions regarding the installation of your product. We’re here to help you 24 hours a day, 7 days a week! PHONE SUPPORT •...
Need help?
Do you have a question about the Hi-Gain and is the answer not in the manual?
Questions and answers