Table of Contents
Advertisement
Quick Links
Advertisement
Table of Contents

Related Manuals for Hawking Hi-Gain HWU54DM


Summary of Contents for Hawking Hi-Gain HWU54DM
- Page 2 (2) years from the date of purchase. If the product proves defective during this two -year warranty period, call Hawking Customer Service in order to obtain a Return Authorization number. Warranty is for repair or replacement only. Hawking Technology does not issue any refunds. BE SURE TO HAVE YOUR PROOF OF PURCHASE. RETURN REQUESTS CAN NOT BE PROCESSED WITHOUT PROOF OF PURCHASE.
-
Page 3: Table Of Contents
1 INTRODUCTION ... 1 1.1 Features...1 1.2 Specifications...1 1.3 Package Contents...2 1.4 Wireless Network Options / Qui c k Tutorial ...2 The Peer - to -Peer Network (also known as Ad -Hoc Mode) ... 2 The Access Point Network ... 3 2 INSTALLATION PROCEDURE ... -
Page 4: Introduction
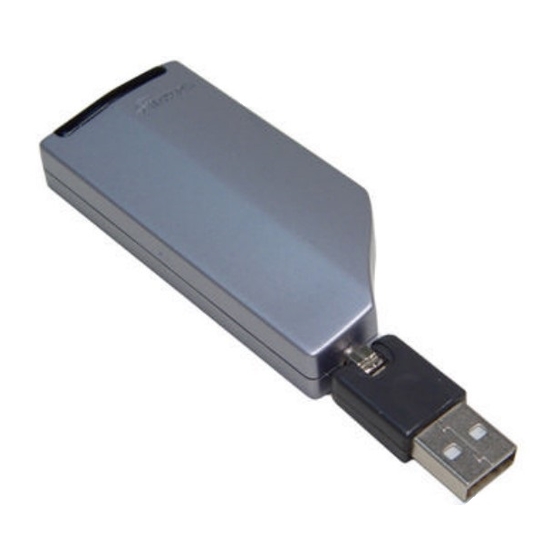
Thank you for purchasing the Hawking Technologies Hi-Gain Mini USB Wireless-G Adapter . The HWU54DM complies with the IEEE 802.11g standard, which supports up to 54Mbps high -speed wireless networking. It is also backwards compatible with IEEE 802.11b devices. The HWU5 4DM is a high quality, high performance wireless product that has been designed with Hawking’s Hi-Gain... -
Page 5: Package Contents
Security: 64/128-bit WEP Data Encryption, WPA, WPA2, AES and IEEE 802.1x Antenna: Hi-Gain 5dBi/5dBi Antenna (Rotate and Swivel) Drivers: Windows 98SE/Me/2000/XP LEDs: Power, Link, Signal Strength indicators (5) : Orange Poor Yellow Good Blue Very good Blue Excellent Orange Link / Activity Blue Power Transmit Power: 16dB m~18dBm (Before Antenna) -
Page 6: The Access Point Network
You can also use one computer as an Internet Server to connect to a wired global network and share files and information with other computers via a wireless LAN. The Access Point Network The network installation allows you to share files, printers, and Internet access much more conveniently. With Wireless LAN Cards, you can connect to the internet or with your network through a wireless access point. -
Page 7: Installation Procedure
2 Installation Procedure Before you proceed with the installation, please notice following descriptions. Note1: Please do not install the HWU54DM into your computer before installing the software program from the CD. Note2: The following installation was operated under Windows XP. (Procedures are similar for Windows 98SE/Me/2000.) - Page 8 E. Select “Optimize for WiFi Mode” and click Next. F. The system will begin to install the software utility for the HWU54DM. Follow the instruction of the program to plug in the Mini USB Adapter into the USB port of your deskt op or laptop computer.
- Page 9 G. The system will automatically detect the Mini USB Adapter and copy the necessary driver files over. H. Windows Hardware may prompt you with a hardware installation warning message. This message is standard issue. Ple ase disregard the message by selecting “ Conitnue Anyway” to continue the HWU54DM setup.
-
Page 10: Verify Device Installation
To verify that the device has been properly installed in your computer and is enabled, go to Start à Settings à Control Panel à System (à Hardware) à Device Manager. Expand the Network adapters item. If the Hawking HWU54DM Mini USB Adapter is listed, it means that your device is proerly installed and enabled. -
Page 11: Network Connection
Once the driver has been installed, you will need to make adjustments to your network settings. In Windows 98SE/ME Go to Start à Settings à Control Panel à Network. Make sure that you have all the following components installed. § Hawking HWU54DM Hi-Gain Wireless Adapter § IPX/SPX-compatible Protocol § NetBEUI § TCP/IP If any components are missing, click on the Add button to install them. - Page 12 4. Highlight Microsoft, and then double click on the item you want to add. Click OK . After returning to the Network screen, you can make your computer is visible on the network by enabling the File and Print Sharing. 5.
-
Page 13: In Windows 2000/Xp
7. When finished, restart your computer to activate the new device. 8. Once the computer has been rebooted, a Logon window will appear and will require you to enter a username and password. Enter a username and password and click OK . Do not click the Cancel button, or you won’t be able to log onto the network. - Page 14 2. Make sure that you have all the following components installed. § Client for Microsoft Networks § NWLink NetBIOS § NWLink IPX/SPX/NetBIOS Compatible Transport Protocol § Internet Protocol (TCP/IP) If any components are missing, click on the Install… button to select the Client/Service/Protocol required.
- Page 15 4. Select the network protocol you wish to add and click OK. This will return you to the Local Area Connections Properties window. 5. To allow your computer to be visible on the network, make sure you have checked off the File and Printer Sharing for Microsoft Networks .
-
Page 16: Configuration Utility
NOTE: If the icon is not present on the taskbar, you can launch the wireless utility from the Start Menu. If the icon doesn’t appear automatically, go to Start à Programs à Hawking HWU54DM Wireless Configuration Utility à Hawking Wireless Configuration Utility, it will appear in the task bar. -
Page 17: Site Survey
Note: Only one configuration utility can be active at a time. When the ZCU is set to be the active utility, opening the TI utility - by double-clicking on the utility icon in the system tray or by right-clicking the icon and selecting Open- launches the ZCU inserted of the TI utility. -
Page 18: Profile
Profile The “Profiles List” is for you to manage the networks you connect to frequently. You are able to Add/Delete/Edit/Activate a profile. Parameter Profiles List Add/Delete/Edit Button Activate Button 4.3.1 Configure the Profile (Add/Edit a Profile) Description The profiles list display all the profiles and the relative information including Profile Name, SSID, Channel, etc. -
Page 19: System Configuration
System Configuration Parameter Profile Name SSID Power Saving Mode Parameter Network Type Transmit Power 11B Preamble Type Description Define a recognizable profile name for you to identify the different networks. The SSID (up to 32 printable ASCII characters) is the unique name identified in a WLAN. -
Page 20: Authentication Vs. Security
RTS Threshold Fragment Threshold Channel 4.3.2 Authentication vs. Security Under the profiles tab, you are able to specify the type of security/authentication mode used to connect with a wireless network. To access, create a new profile or click “edit” on one of the profiles and select the “Authentication and Security”... - Page 21 Parameter Authentication Type Parameter Encryption Mode Description This setting has to be consistent with the wireless n etworks that the adapter intends to connect to. All security keys within a network must match to allow successful communications. Open – No authentication is needed among the wireless network. Shared –...
-
Page 22: Enable Wpa In Windows Xp
WPA Pre-Shared Key WEP Key (Key1 ~ Key4) 4.3.3 Enable WPA in Windows XP You can opt to use the XP’s built-in wireless Zero Configuration Utility (ZCU) to control your wireless adapter settings and to enable security with full WPA and WEP authentication. This option disables Hawking’s wireless utility settings. - Page 23 To enable the WPA function in Windows XP, the following software systems are required: 1. Right-click the Windows wireless networks icon located on your taskbar as shown below. Select “View Available Wireless Networks” to open up the Wireless Networks window. If you get the following message below, please follow the next step.
- Page 24 4. In the Wireless Networks tab, s elect your preferred wireless network you are connected to and click on “Properties”.
- Page 25 5. Under the Association tab, select the type of Network Authentication your wireless network uses and determine the type of data encryption, if available. Ask your administrator for network information, if you need help. A list of network authentication terms is described on the next page. 6.
- Page 26 Parameter Network Authentication Parameter Data Encryption Description Open –No authentication is needed among the wireless network. Shared – Only wireless stations using a shared key (WEP Key identified) are allowed to connecting each other. WPA – This mode is for enterprise with an authentication server (Radius Server), WPA-enabled access point, and a WPA-enabled client.
-
Page 27: Link Status
Link Status From the “Link Status ” option, you can view all the information of the network you are connecting to. You can use this tool in while at the same time repositioning the Hi-Gain antenna to find the optimal location for antenna placement. -
Page 28: Reading The Link Status Page And Obtaining The Strongest Connection
Noise Level Reading the Link Status Page and Obtaining the Strongest Connection The Link Status page gives you information regarding your current wireless channel, transmit rate (speed) and link/signal quality. You will use this utility to figure out which antenna position results in the best performance and connection. -
Page 29: Statistics
Statistics This option enables you to view the available statistic information with its Tx counts (Tx success, Tx error, RTS Success and RTS Failed), and its Rx counts (Rx success, Rx error). You may reset the counters by clicking ”Reset Counter”. Advanced This option enables you to configure more advanced settings, for example: wireless mode, protection mode and etc. - Page 30 Tx BURST B/G Protection Fast Roaming Tx Rate Turn Off RF Button CCX 2.0 802.11 B or G only – This card can be compatible with both 802.11g and 802.11b wireless stations. If there are only 802.11b wireless stations in the network, you can set the card to this mode. The same goes with 802.11g only wireless stations.
-
Page 31: About
When settings have been made, select “Apply” to place the changes into effect. About By choosing this option, you can click view softw are and driver version information, IP address and gateway address. The MAC Address of the network adapter is displayed in the screen as well. -
Page 32: Uninstallation
5 UNINSTALLATION In case you need to uninstall the Utility and driver, please refer to below steps. (As you uninstall the utility, the driver will be uninstalled as well.) 1. Go to Start à Programs àWireless BETA à Uninstall - Utility. 2. -
Page 33: Troubleshooting
6 Troubleshooting This chapter provides solutions to problems usually encountered during the installation and operation of the adapter. 1. What is the IEEE 802.11g standard? 802.11g is the new IEEE standard for high-speed wireless LAN communications that provides for up to 54 Mbps data rate in the 2.4 GHz band. 802.11g is quickly becoming the next mainstream wireless LAN technology for the home, office and public networks. - Page 34 6. What is BSS ID? A specific Ad hoc LAN is called a Basic Service Set (BSS). Computers in a BSS must be configured with the same BSS ID. 7. What is WEP? WEP is Wired Equivalent Privacy, a data privacy mechanism based on a 40 bit shared key algorithm, as described in the IEEE 802 .11 standard.
- Page 35 (concentrated narrow wireless signal) to create a stronger link directly to the access point. 16. How do I get an Optimal Wireless Connection with the HWU54DM? If pointing the antenna directly at the access point is not providing a sufficient signal connection then you can try bouncing the signals off walls.
Need help?
Do you have a question about the Hi-Gain HWU54DM and is the answer not in the manual?
Questions and answers