Table of Contents
Advertisement
Quick Links
Advertisement
Table of Contents

Related Manuals for Hawking HWDN2


Summary of Contents for Hawking HWDN2
- Page 2 (1) year from the date of purchase. If the product proves defective during this one-year warranty period, call Hawking Customer Service in order to obtain a Return Authorization number. Warranty is for repair or replacement only. Hawking Technology does not issue any refunds.
-
Page 3: Table Of Contents
VERIFY INSTALLATION (WINDOW 2000/XP) ..............14 7.2. NETWORK CONFIGURATION (WIN 2000/XP) ..............15 SETUP WLAN (WIN 2000/XP) ....................... 16 – USING HAWKING CONFIGURATION-UTILITY ................16 8.1. NETWORK SECURITY (WEP, WPA…) .................. 18 8.1.1. WEP S ........................... -
Page 4: Introduction
USB port. Now, you can stream HD video, play games online, download music, images and data while maintaining your freedom of mobility. The HWDN2 is also packed with security applications. For more security-sensitive applications, the HWDN2 supports Hardware-based IEEE 802.11i encryption/decryption engine, including 64-bit/128-bit WEP, TKIP, and AES. -
Page 5: Package Contents
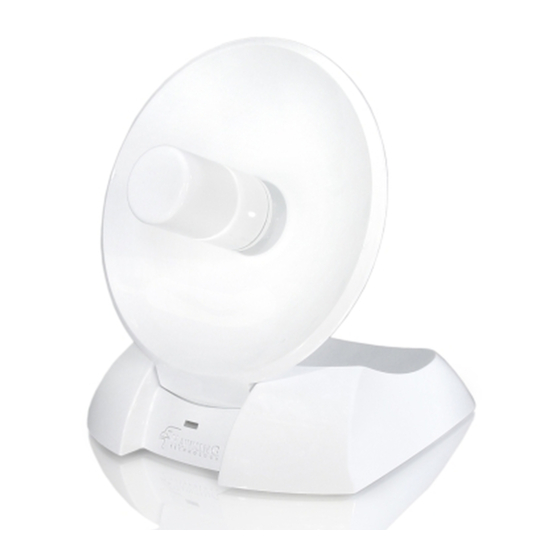
3. PACKAGE CONTENTS Before you begin the installation, please check the items of your package. The package should include the following items. • One HWDN2 Hi-Gain Wireless-150N USB Dish Adapter • One USB cable (39” or 3.25 ft.) • One CD-ROM with User’s Manual & Drivers •... -
Page 6: System Requirements
5. SYSTEM REQUIREMENTS To begin using the HWDN2 Dish Adapter, your PC/Notebook must meet the following minimum requirements: • Operating System – Microsoft Windows 2000/XP/Vista • An Available USB Port on your Laptop or Desktop • 256MB system memory or larger •... - Page 7 Select Install to begin the Installation Please wait a while as the installation process take place. After installation is complete, exit the wizard by clicking on the Finish button. Now, plug in your HWDN2 adapter.
-
Page 8: Using Windows Configuration (Vista)
USING WINDOWS CONFIGURATION (VISTA) 6.1. It is recommended that you use the Windows Configuration for the Wireless-N Adapter. a. To open up the Windows Configuration, go to Start Connect To b. Select the Network you wish to connect to. If you are connecting to an unsecure network, go to step c. - Page 9 c. If you are connecting to an open network (unsecured network), a warning may appear indicating that the network is an unsecured network. Select Connect Anyway and skip step d. If your selected network is a secured (encryption) network, then a window will prompt you to enter security key or passphrase.
- Page 10 Please wait while your HWDN2 is connecting. The HWDN2 Wireless Dish Adapter is now connected, you may save this network as your preferred network.
-
Page 11: Installation (Windows 2000/Xp)
(WINDOWS 2000/XP) Important! Please Install the HWDN2 Driver & Utility before connecting the HWDN2 into the USB port on your computer. The HWDN2 Driver & Utility is located on the CD. Insert the support CD into your CD Drive. The CD drive should auto-load the following. - Page 12 Choose HWDN2 Configuration Utility & click next and then click install. Await instructions as you see the setup progress as shown below...
- Page 13 It may give you the option to restart. Click Finish. Restart your computer if the wizard prompted you to do so. Otherwise, please plug the Hawking HWDN2 Wireless Dish Adapter into an available USB port on your desktop or notebook.
-
Page 14: Verify Installation (Window 2000/Xp)
7.1. Verify installation (WINDOW 2000/XP) 1. Open Control Panel Double-click on System. 2. Select Hardware tab Click on Device Manager. Select and double-click on 802.11N USB wireless LAN card. -
Page 15: Network Configuration (Win 2000/Xp)
Verify the device status of the 802.11N USB Wireless LAN Card This device is working properly Click OK 7.2. Network Configuration (WIN 2000/XP) • Go to Start Menu Control Panel Network. • Right-click on Wireless Network. • Select Local Area Connection icon select Properties. -
Page 16: Setup Wlan (Win 2000/Xp)
Configuration utility will first automatically link with the Wireless AP if there is no security key required. If the connection is successful, a message will appear on taskbar. The following steps guide you on how to initially setup a wireless network connection. The Hawking Configuration Utility should appear on the bottom right taskbar. - Page 17 Mouse over the “Hawk” icon and you’ll get a brief description and status of your WLAN. For example, the figure below shows the HWDN2 is connected to an NRouter. Right click on the “HAWK” icon and it will open up a menu as shown below...
-
Page 18: Network Security (Wep, Wpa
When you are successfully connected, a blue arrow icon will appear on the left, next to the selected AP. When the HWDN2 fails to connect, the status bar (bottom left of the HWDN2 Wireless Utility) will show “Disconnected”. NETWORK SECURITY (WEP, WPA…) 8.1. - Page 19 An Authentication and Security Window (figure 7.1b) should appear shortly. Figure 7.1b WEP Setup Instructions: (All settings should correspond with settings of the wireless AP that you are connecting to.) a. Authentication Type field: indicates the authentication type of the AP/Router. Please confirm the setting of the AP/Router.
-
Page 20: Wpa Setup
8.1.2. WPA Setup WPA encryption type can be divided into WPA-PSK, WPA2-PSK, WPA (also known as WPA-EAP), and WPA2 (also known as WPA2-EAP). All settings should correspond with the wireless AP that you wish to connect to. WPA-PSK and WPA2-PSK Setting the Authentication and Security Page: a. - Page 21 WPA and WPA2 1. If you wish to connect to an AP with WPA or WPA2 authentication, select the AP or SSID and select Connect. (For example, for the SSID being selected, the security settings must correspond to this Wireless Access Point) Setting the Authentication and Security Page: a.
-
Page 22: Adding Profiles
Click OK to finish setting. Adding Profiles 8.2. 1. Select an AP in the SSID column (example: Wireless-N Router Click Add to Profile and the page shown below will appear. 2. Setting items in the configuration tab: • Profile Name: Enter the connected AP profile, eg: PROF1. •... - Page 23 • Network Type: [Infrastructure] or [Ad Hoc] type. We recommend you to select [Infrastructure]. • Transmit power: the amount of power used by a radio transceiver to send the signal out. User can choose power value by sliding the bar. •...
-
Page 24: Wps Configuration
WPS Configuration 8.3. Wi-Fi Protected Setup (WPS) configuration function - provides easy procedures to set up wireless security. Wi-Fi Protected Setup gives you a variety of setup options. It uses familiar methodologies such as typing in a Personal Identification Number /numeric code (PIN method), and pushing a button (Push-Button Configuration, or PBC) to enable users to automatically configure network names and strong WPA2 (Wi-Fi Protected Access 2TM) data encryption and authentication. -
Page 25: Qos
WMM provides prioritized media access and is based on the Enhanced Distributed Channel Access (EDCA) method. Click WMM Enable to turn on the WMM capability. Click WMM – Power Save Enable and this can improve the power savings by atleast 15% as far as the HWDN2 power consumption is concerned. -
Page 26: Advanced Settings
In order to keep the connection stable, please select [Auto] to automatically confirm which mode the wireless network is working. TX-Burst: Turbo Mode. When it is checked and the HWDN2 Wireless-N Adapter is connected to an Access Point with TX-Burst function, the transmission throughput will be improved. -
Page 27: Statistics
11. Statistics The Statistics tab displays detailed information about Wireless LAN TX/RX. • Transmit Statistics: Statistic of transmitted frames. • Receive Statistics: Statistic of received frames. • [Reset Counters]: Click [Reset Counter] to start over at zero the statistic numbers of transmitting and receiving data. -
Page 28: Link Status
12. Link Status To view Link Status click on the arrow button in the lower-right hand corner of the utility window. This tab displays the information of the Wireless connection status. • Status: Displays the linked AP name and MAC address. When [Disconnect] appears in this box, the connection is failed. -
Page 29: About
13. About The About tab displays version information of 1. Driver 2. Utility 3. EEPROM binary 4. Firmware 5. MAC address of the PHY 6. Default Gateway... -
Page 30: Uninstalling Hawking Utility/Driver
14. Uninstalling Hawking Utility/Driver Select Uninstall option from the start menu. You can see the wizard preparing for uninstallation Select Remove All. When asked if you are sure you want to remove application and all its features, click Yes. - Page 31 Removing the utility is in progress. At any time you may press cancel to abort uninstallation.
- Page 32 You will need to restart your computer to ensure a clean removal of the Hawking Utility.
-
Page 33: Appendix A - Specifications
APPENDIX A – SPECIFICATIONS Data Rates 1, 2, 5.5, 6, 9, 11, 12, 18, 24, 36, 48, 54, 72, 84, 100 and 150Mbps (with 2-stream on both ends) Standards / Compliance IEEE802.3, IEEE802.3u, IEEE802.11b, IEEE802.11g, 802.11n 2.0 Regulation Certifications FCC Part 15, ETSI 150/328/CE Operating Voltage 5 V ±... - Page 34 Networking Topology Ad-Hoc, Infrastructure Security WPA/WPA2 (AES, 64,128-WEP with shared-key authentication) Cisco CCS V1.0, V2.0 and V3.0 compliant Physical Form Factor USB 2.0/1.1 Dimensions (H x W x D) 70(L) mm x 57.5(W) mm x 16(H) mm Weight 55 g/ 2.0oz Environmental Temperature Range Operating: 0°C to 50°C...
-
Page 35: Index
802.11n is an IEEE 802.11 wireless network standard that increases transmission speeds from a traditional 11Mbps (802.11b) to over 100Mbps. Currently, the HWDN2 supports up to 150Mbps. 802.11n can handle legacy 11b and 11g transmission in a mixed mode or only 11n nodes for maximum performance. - Page 36 7. What is TKIP? TKIP is a quick-fix method to quickly overcome the inherent weaknesses in WEP security, especially the reuse of encryption keys. TKIP is involved in the IEEE 802.11i WLAN security standard, and the specification might be officially released by early 2003. 8.
- Page 37 15. How do I get an Optimal Wireless Connection with the HWDN2? If pointing the antenna directly at the access point is not providing a sufficient signal connection then you can try bouncing the signals off walls.
-
Page 38: Product Support Information
PRODUCT SUPPORT INFORMATION Thank you for choosing Hawking Technologies. Please do not hesitate to contact us if you have any questions regarding the installation of your product. We’re here to help you 24 hours a day, 7 days a week! PHONE SUPPORT •...
Need help?
Do you have a question about the HWDN2 and is the answer not in the manual?
Questions and answers