Table of Contents
Advertisement
Operating Instructions
GB
English, 1
I6G52/UK
COOKER AND OVEN
Contents
Installation, 2-6
Positioning and levelling
Electrical connection
Cooking advice table for the oven
GB
Advertisement
Table of Contents

Related Manuals for Indesit I6G52/UK


Summary of Contents for Indesit I6G52/UK
-
Page 1: Table Of Contents
Description of the appliance, 7 Overall view Control panel Start-up and use,8-11 Using the hob Using the cooking timer Cooking modes I6G52/UK Cooking advice table for the oven Precautions and tips, 12 General safety Disposal Respecting and conserving the environment Care and maintenance, 13... -
Page 2: Warning,2
Installation WARNING WARNING: The appliance and its • accessible parts become hot ! Before operating your new appliance please read during use. this instruction booklet carefully. It contains Care should be taken to avoid important information concerning the safe installation •... -
Page 3: Gas Connection
Gas connection The legs* fit into the slots on the underside of the base of T he cooker should be connected to the gas-supply the cooker. by a corgi registered installer. During installation of this product it is essential to fit an approved gas tap to isolate the supply from the appliance for the convenience of any subsequent removal or servicing. - Page 4 ! The installation must comply with gas safety • the mains cable is wired directly into a 13 amp (installation and use) regulations 1984. In all cases cable outlet, controlled by a switch, (in for the above, by low, a qualified, corgi approved compliance with BS 5733) which is accessible engineer must be called for installation.
-
Page 5: Adapting To Different Types Of Gas
Disposing of the appliance ! The hob burners do not require primary air adjustment. ! After adjusting the appliance so it may be used When disposing of the appliance please remove the with a different type of gas, replace the old rating plug by cutting the mains cable as close as label with a new one that corresponds to the new possible to the plug body and dispose of it as... -
Page 6: Table Of Characteristics
Voltage and see data plate frequency I6G52/UK Directive 2002/40/EC on the label of electric ovens. Standard EN 50304 Energy consumption for Forced convection heating mode:... -
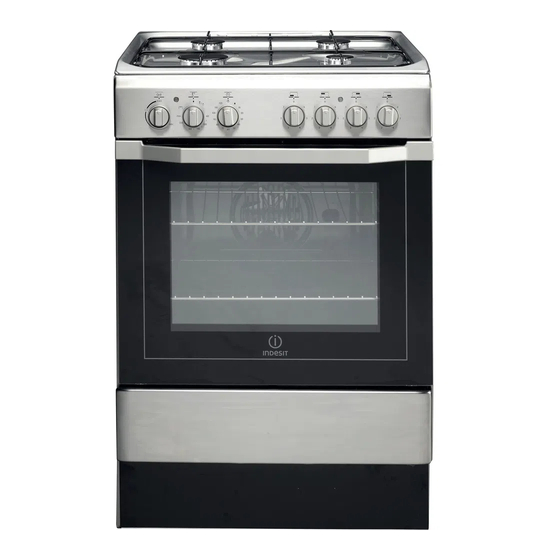
Page 7: Description Of The Appliance
Description of the appliance Overall view Gas burner Containment surface for spills Hob grid GUIDE RAILS Control panel for the sliding racks position 5 GRILL rack position 4 position 3 DRIPPING PAN position 2 position 1 Adjustable foot Adjustable foot Control panel Electronic Lighting for Hob Burners Termostat Knob... -
Page 8: Start-Up And Use,8-11
Start-up and use Using the hob Practical advice on using the burners Practical advice on using the burners Practical advice on using the burners Practical advice on using the burners Practical advice on using the burners For the burners to work in the most efficient way possible and to save Lighting the burners on the amount of gas consumed, it is recommended that only pans For each BURNER knob there is a full ring showing the strength of the... -
Page 9: Using The Cooking Timer
Using the cooking timer Fan Assisted Mode 1. To set the buzzer, turn the COOKING TIMER knob Position of thermostat knob: Between 60 60°C and clockwise almost one complete revolution. M a x M a x M a x . M a x M a x 2. - Page 10 Fan Assisted Grill Using the grill pan kit Position of thermostat knob: between 60 60°C and 200°C. The grill pan handle is detachable from the pan to The top central heating element and the fan come on. facilitate cleaning and storage. Fix the pan handle This combination of features increases the securely before use: effectiveness of the unidirectional thermal radiation of...
-
Page 11: Oven Cooking Advice Table
WARNING! The oven is provided with a stop sys- tem to extract the racks and prevent them from coming out of the oven.(1) As shown in the drawing, to extract them comple- tely, simply lift the racks, holding them on the front part, and pull (2). -
Page 12: Precautions And Tips
Precautions and tips ! This appliance has been designed and manufactured • Do not rest heavy objects on the open oven door. in compliance with international safety standards. • Do not place flammable materials in the lower The following warnings are provided for safety oven compartment. -
Page 13: Care And Maintenance
Care and maintenance Switching the appliance off Replacing the oven light bulb Disconnect your appliance from the electricity supply before carrying out any work on it. 1. After disconnecting the oven from the electricity mains, remove the glass lid covering the lamp Cleaning the appliance socket ( see figure ). -
Page 14: Removing And Fitting The Oven Door
Removing and fitting the oven door: Removing and fitting the oven door: 6.Replace the glass. WARNING! Oven must not be operated with inner WARNING! Oven must not be operated with inner WARNING! Oven must not be operated with inner 1.Open the door door glass removed! door glass removed! door glass removed! - Page 16 04/2013- 195109397.00 XEROX FABRIANO...
Need help?
Do you have a question about the I6G52/UK and is the answer not in the manual?
Questions and answers