Table of Contents
Advertisement
Quick Links
Advertisement
Table of Contents

Related Manuals for Tascam CD-240


Summary of Contents for Tascam CD-240
- Page 1 D01240720A CD-240 CD/NETWORK PLAYER OWNER'S MANUAL...
- Page 2 Trademarks and other legal statement TASCAM is a trademark of TEAC Corporation, registered in the U.S. and other countries. MPEG Layer-3 audio coding technology licensed from Fraunhofer IIS and Thomson. “DSD” is a registered trademark. This product is protected by certain intellectual property rights of Microsoft.
-
Page 3: Important Safety Instructions
IMPORTANT SAFETY INSTRUCTIONS Model for USA This device complies with part 15 of the FCC Rules. Operation is subject to the following two conditions: (1) This device may not cause harmful interference, and (2) this device must accept any interference received, including interference that may cause CAUTION: TO REDUCE THE RISK OF ELECTRIC SHOCK, DO NOT undesired operation. -
Page 4: Precautions Concerning Batteries
IMPORTANT SAFETY INSTRUCTIONS (continued) CAUTION 1) Read these instructions. 2) Keep these instructions. o Do not expose this apparatus to drips or splashes. 3) Heed all warnings. o Do not place any objects filled with liquids, such as vases, on 4) Follow all instructions. - Page 5 This product contains a semiconductor laser system inside the For European Customers cabinet and is classified as a “CLASS 1 LASER PRODUCT”. To prevent being exposed to the laser beam, do not try to open Disposal of electrical and electronic equipment the enclosure.
-
Page 6: Table Of Contents
Contents Thank you for choosing TASCAM. Inputting characters ........45 Read this manual carefully to get the best performance Troubleshooting . -
Page 7: Before Use
Moreover, do not place it on top of an 2) In the TASCAM Downloads section, click the desired lan- amplifier or other equipment that generates heat. guage to open the Downloads website page for that Doing so could cause discoloration or deformation. -
Page 8: Using An Ipod Or Iphone
Using an iPod or iPhone Downloading the remote app This unit can be connected to and used with the following If you install the app on an iPod touch/iPhone or Android iPod/iPhone models. device, you can use it over a wireless network for basic con- iPhone 5s, iPhone 5c, iPhone 5 trol of the unit. -
Page 9: Notes About Discs
Notes about discs Types of discs that can be played CD-R/CD-RW discs by this unit This unit can play discs that are in audio CD format (CD-DA) and CD-R/CD-RW that have files in MP3 and WAV formats. o Be sure to finalize discs created by CD recorders. CDs with the “COMPACT disc DIGITAL AUDIO”... -
Page 10: Handling Discs
Notes about discs (continued) Handling discs Maintenance o Always load discs with their labeled sides up. o If the side of the disc that has the data encoded on it o Be careful when handling discs. If the side that contains (unlabeled side) becomes dirty with fingerprints or the data (unlabeled side) is scratched, smudged with dust, use a soft cloth to wipe the surface from the cen-... - Page 11 MP3/WAV formats Precautions when creating MP3/ WAV discs using a computer This unit can play MP3 and WAV files that have been recorded on a CD-R or CD-RW disc. o This unit cannot play back discs that were not written in o Playable audio file formats conformity to the ISO 9660 standard.
-
Page 12: Usb And Networks
USB and Networks Audio files playable by this unit Ogg Vorbis File extension .ogg, .OGG Sampling frequency 8 kHz, 11.025 kHz, 16 kHz, 22.05 kHz, This unit can play the following types of audio files over a 32 kHz, 44.1 kHz, 48 kHz USB or network connection. - Page 13 Notes about USB flash drives Note about DLNA This unit can use USB flash drives.* The Digital Living Network Alliance (DLNA) is a group that * The USB ports on this unit only support USB flash drives is advancing the standardization of reciprocal connections (also known as “thumb drives”...
-
Page 14: Connections
Connections Power outlet Audio input Audio input Amplifier, etc. Amplifier or digital Amplifier, etc. recording device (CD recorder, MD deck, etc.) digital recording device such as a CD recorder. (They Analog audio output (ANALOG OUTPUT) can be connected to different devices at the same jacks time.) Use these to output two channels of analog audio. -
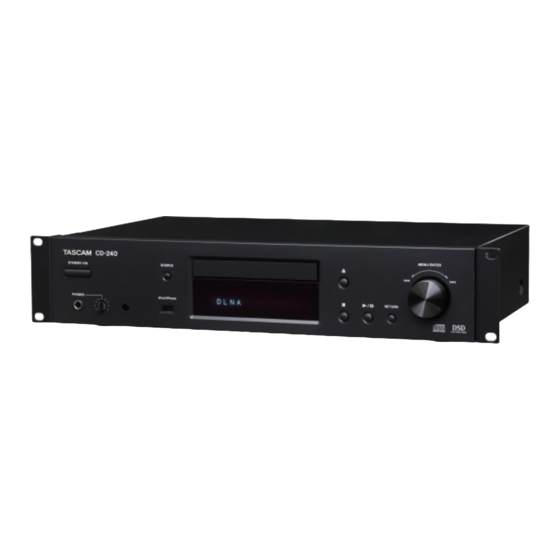
Page 15: Names And Functions Of Parts (Main Unit)
Names and functions of parts (main unit) o Do not connect computers or similar devices to STANDBY/ON button this unit’s USB ports. Audio from computers cannot Press this button to turn the unit on or put it in standby be input through this unit's USB ports. mode. -
Page 16: Names And Functions Of Parts (Remote Control)
Names and functions of parts (remote control) STANDBY/ON (¤) button Press this button to turn the unit on or put it in standby mode. SOURCE buttons Use these buttons to select the source. o After selecting USB, press the USB button to switch between USB (F) and USB (R). -
Page 17: Using The Remote Control
Using the remote control Skip (.//)/ Search (m/,) buttons Precautions for use Use to skip to the previous or next track. Use also when selecting folders and files. V Misuse of batteries could cause them to rupture Press and hold to search backward/forward. or leak leading to fire, injury or the staining of items nearby. -
Page 18: Information Shown On The Display
Information shown on the display number is shown beneath the indicator. Auto Standby (ASb) indicator This indicator appears when the Auto Standby func- Message display area tion is on. Track information and menus appear here. Format indicators When the source is set to USB or NET, the DSD or AAC The following icons appear in the message display area. -
Page 19: Basic Operation
Basic operation In this section, we explain operations that are the same in Auto Standby function every mode. When the Auto Standby function is On, the unit will auto- Press the STANDBY/ON button to turn the matically enter standby mode if there is no audio input and unit on. -
Page 20: Starting Playback
Basic operation (continued) Starting playback Skipping to search for a track Press the play/pause (y/9) button. Turn the MENU/ENTER (.//) dial to skip to tracks before or after the current track. Keep turning until the desired track is selected. During playback, the y icon appears at the top of the display. - Page 21 Searching for part of a track Playback order of audio files During playback, press a remote control search (m/,) Discs with audio files store them in folders in the same way button to search backward/forward. Release the button that files are ordinarily managed on a computer. Moreover, when you find the desired part.
-
Page 22: Information Shown On The Display (Cd/Usb/Net)
Information shown on the display (CD/USB/NET) Press the DISPLAY button during audio file playback to During MP3/WAV disc playback change the information shown on the display. Various file information, including the title, artist and album ID3 tag information for the MP3/WAV file playing back is shown. - Page 23 During USB/NET playback Various file information, including the title, artist and album ID3 tag information for the audio file playing back is shown. Title (if file has ID3 tag) Artist (if file has ID3 tag) Album (if file has ID3 tag) Elapsed time of current track Playback time of current track File format, sampling rate and bit depth...
-
Page 24: Listening To Cds
Listening to CDs This unit can play the following types of discs and files. Press the tray open/close (-) button to Discs: CD-DA, CD-R, CD-RW close it. Files: MP3, WAV Press the SOURCE button to change the source to CD. V CAUTION Be careful not to let your fingers be pinched when the tray closes. - Page 25 Press the play/pause (7/9) button. Direct playback using track numbers In addition to using the skip buttons to select tracks, you can input a track by number and start playback. During playback or when stopped, you can use the remote control number buttons to select a track by number.
- Page 26 Listening to CDs (continued) Use the skip (.//) buttons to select Selecting tracks on MP3/WAV folders and files on the same level. discs Navigation mode You can select files and folders using the folder hierarchy. When stopped, press the stop (8) button. To select files and subfolders inside another folder, after selecting that folder, press the play (7) button.
- Page 27 All folder mode Use the skip (.//) buttons to select a You can also select folders and files in this mode, but all file. folders are treated equally regardless of position in the folder structure. When stopped, press the pause (9) button. After selecting the desired file, press the ENTER button or play (7) button.
-
Page 28: Program Playback
Listening to CDs (continued) Example Program playback Program playback can be used with audio CDs and MP3/ WAV discs. This unit can have up to 25 tracks in the program. Track number Playback time o Add tracks to the program when the unit is stopped. When using an audio CD, you can also select tracks using the number buttons (“Direct playback using Press the PROGRAM button. - Page 29 Skipping to search for a track Adding tracks to the end of the program Press the skip (.//) buttons to play tracks from ear- When stopped, use the skip (.//) buttons to show lier or later in the program. Keep pressing until the desired the track that you want to add and press the play (7) but- track is selected.
-
Page 30: Listening To Files On A Usb Flash Drive
Listening to files on a USB flash drive When playing audio files from a USB flash drive, unless Press the MENU/ENTER (.//) dial. using repeat playback set to Repeat All, only the audio files in the same level of a single folder will be played back (page 32). -
Page 31: Shuffle Playback (Cd/Usb)
Shuffle playback (CD/USB) o Using the remote control, you can select tracks Use this function to play back tracks in random order. with the direction (k/j) buttons and then press Press the SHUFFLE button to turn shuffle playback on/off. the play (7) button. o When a folder is selected, the first track in that folder will start playing back. -
Page 32: Repeat Playback (Cd/Usb)
Repeat playback (CD/USB) Listening to an iPod/iPhone Press the REPEAT button to cycle through repeat modes as The Apple products that can be connected to and used follows. with this unit are listed in “Using an iPod or iPhone” on page 8. -
Page 33: Using Network Services
Using network services My Favorites To use a network service, follow the procedure below to select it. To listen to Internet radio programs, you can add them to the “My Favorites” item in the network service menu. DLNA (media sharing) Press the NET button to open the network This allows you to play audio files in a shared library. -
Page 34: My Favorites
My Favorites This unit supports Internet radio stations that use the PLS, Input this unit's IP address into the Internet M3U and podcast (RSS) formats. Even if an Internet radio browser URL field. station uses one of these formats, playback might not This unit's WEB Setup information screen will open in always be possible depending on the type of data and the Internet browser. - Page 35 NOTE Starting playback o To see similar stations, press and hold the remote con- trol MENU button, use the direction (k/j) buttons to select “Stations like this” and press the ENTER button. Press the NET button. o If you want to add a new radio station to the My Favorites menu, select the blank item in the list and press and hold the MENU button and use the ENTER Select “My Favorites”...
-
Page 36: Dlna
DLNA When using DLNA, the unit can play audio files in shared Use the direction (k/j/l/;) buttons to libraries and show their tag information, including artist select “DLNA” and press the ENTER button. names, genres and album names. o A computer must be connected to the same network as this unit in order to use DLNA. - Page 37 Use the direction (k/j) buttons to select Click the “Play To” button and select this the audio file that you want to play, and unit from the Play To list. press the ENTER button or play (7) button. Open the Windows Media Player Play To dialog box, and start playback from this unit.
-
Page 38: Home Media
Home Media This unit can play audio files that are in a shared folder on a Use the direction (k/j) buttons to select computer or network attached storage (NAS) device on the the server that you want to use and press same network. -
Page 39: Setting Up Windows Media Player
Setting up Windows Media Player As an example, we explain how to set Windows Media Select this unit from the device list, then Player 12 in this section. click “Customize...” Connect your computer to a network. Connect this unit to the network. If you have a problem connecting to the network, see the “DLNA”... -
Page 40: Making Shared Folder Settings
Making shared folder settings For “Public folder sharing”, select “Turn on Windows 8 sharing so anyone with network access can read and write files in the Public folders”. Check the name of the domain or work- group to which your computer is assigned. Before setting folder sharing, confirm that the com- puter is assigned to the same domain or workgroup as this unit. - Page 41 Open “Control Panel”, and then “Network Click “Save changes”. and Sharing Center”. Copy the music files you want to play back o If “View by” is set to “Category” in the Control Panel, with this unit into the “Public Music” sub- open “Network and Internet”, and then “Network and Sharing Center”.
-
Page 42: Settings
Settings Follow the procedures below to open the menu and change source. settings. You can also turn the MENU/ENTER (.//) dial on the main unit to do this. Press the MENU button. o You can also press and hold the MENU/ENTER Press the ENTER button. - Page 43 Press the ENTER button to confirm the MP3 Setting change. You can set how MP3/WAV file information is shown and how MP3/WAV discs are played back, for example. These settings can only be changed when the disc is stopped. BAD NAME Set how MP3/WAV file information is shown.
- Page 44 Settings (continued) HIDE NUMBER ASb (Auto Standby) The unit can hide numbers that are attached to the begin- nings of track and folder names. When the Auto Standby function is on, the unit will auto- Disable (default setting) matically enter standby mode if 20 minutes pass under the conditions described below.
- Page 45 Inputting characters The submenus appear in the following order. Follow these procedures to input characters when using the NET Setting and My Favorites menus, for example. IP Address View/set the IP address. Use the remote control direction (k/j/l/;) MAC Address buttons to select a character or symbol and View this unit's MAC address.
- Page 46 Troubleshooting If you experience a problem with this unit, please check e If a blank disc is loaded, replace it with a disc that has the following items before requesting service. recordings on it. If it still does not operate correctly, contact the retailer e Depending on the quality of the disc and the condi- where you purchased the unit.
-
Page 47: Restoring Factory Default Settings
e You cannot adjust the unit volume using an iPod/ e Confirm that the password for the user account is iPhone. correct. e Check the file format. e If the computer is using antivirus or security software, Internet radio the unit might not be able to connect to it. Cannot connect to the Internet. - Page 48 Specifications Audio formats Ogg Vorbis Sampling frequency ..8 kHz, 11.025 kHz, 16 kHz, 22.05 kHz, 32 kHz, 44.1 kHz, 48 kHz Bit rate ......48 kbps–500 kbps or VBR CD-DA Sampling frequency .
-
Page 49: Audio Performance
Audio performance General Frequency response ..10 Hz–70 kHz (+0.5 dB, −3 dB) Power supply Signal-to-noise ratio ....... 114 dB Model for Europe . - Page 51 WHAT IS AND IS NOT COVERED garantie légale dans le pays d’achat. En cas de défaut ou de Your unit must be serviced by an authorized TASCAM service problème, veuillez contacter le revendeur chez qui vous avez station in the United States. (This warranty is not enforceable Except as specified below, this warranty covers all defects in acheté...
- Page 52 ✂ WARRANTY Model/Modèle/Modell Owner’s name/Nom du possesseur/Name des Eigentümers Modello/Modelo/ 型号 Nome del proprietario/Nombre del propietario/ 顾客姓名 CD-240 Serial No./No de Série/Seriennummer Address/Adresse/Adresse Numero di serie/Número de serie/ 序列号 Indirizzo/Dirección/ 顾客地址 Date of purchase/Date de l’achat/Datum des Kaufs Dealer’s name/Nom du détaillant/Name des Händlers Data dell’acquisto/Fecha de compra/ 购买日期...
Need help?
Do you have a question about the CD-240 and is the answer not in the manual?
Questions and answers