Table of Contents
Advertisement
Advertisement
Table of Contents

Related Manuals for Wasp HC1


Summary of Contents for Wasp HC1
- Page 1 Wasp HC1...
- Page 2 Wasp Technologies reserves the right to make changes to any software or product to improve reliability, function, or design. Wasp Technologies does not assume any product liability arising out of, or in connection with, the application or use of any product, circuit, or application described herein.
-
Page 3: Table Of Contents
1.4 Tour of the HC1 ......................4 1.4.1 HC1 Front and Right View ................4 1.4.2 HC1 Rear and Left View ................5 1.5 Turning on the HC1 for the First Time ............... 6 1.6 Installing the Battery ....................6 Battery Compartment Tab ....................6... - Page 4 Wasp HC1 User Manual 1.7 Charging the Battery ....................8 1.8 Checking the LED status ..................9 1.9 Checking the Battery Status ..................9 1.10 Keypads and Functions ..................10 1.11 Using the Function Keys ..................11 1.12 Using Alpha Keys ....................12 Chapter 2 –...
- Page 5 Wasp HC1 User Manual Chapter 5 – Advanced Settings ..................28 5.1 Performing a Hardware Reset ................28 5.1.1 Performing a Warm Boot ................28 5.1.2 Performing a Cold Boot ................28 System Specifications....................... 30 Support ..........................32...
-
Page 6: Regulatory Compliance Information
Wasp HC1 User Manual Regulatory Compliance Information FCC Warning Statement This equipment has been tested and found to comply with the limits for a Class B digital device, pursuant to part 15 of the FCC rules. These limits are designed to provide reasonable protection against harmful interference in a residential installation. -
Page 7: Rf Radiation Exposure Statement
Wasp HC1 User Manual RF Radiation Exposure Statement For body contact during operation, this phone has been tested and meets FCC RF exposure guidelines when used with an accessory that contains no metal and that positions the handset a minimum of 1.5 cm from the body. Use of other accessories may not ensure compliance with FCC RF exposure guidelines. -
Page 8: Laser Information
Wasp HC1 User Manual Laser Information The Wasp HC1 series is certified in the U.S. to conform to the requirements of DHHS/CDRH 21CFR Subchapter J and to the requirements of IEC 825-1. Class II and Class 2 products are not considered to be hazardous. -
Page 9: Battery Charge Notice
If the main battery is removed, the backup battery ensures the data on SDRAM is safe for up to 2 hours. To prevent data loss, do not leave the HC1 uncharged with the main battery removed for an extended period. See the Charging the Battery unit on for more details. -
Page 10: Storage And Safety Notice
Warranty The following items covered under the Limited Warranty are free from defects during normal use: Wasp HC1 – 1-year limited warranty. Lithium-Ion battery – 6-month limited warranty. Warranty becomes void if equipment is modified, improperly installed or used, damaged by accident or neglect, or if any parts are improperly installed or replaced by the user. -
Page 11: Chapter 1 - Getting Started
1.1 Introducing the Wasp HC1 Thank you for purchasing the Wasp HC1 Rugged Mobile Computer. The Wasp HC1 is a rugged handheld computer designed to empower your mobile workforce in today’s aggressive business environment. As productivity and efficiency define the benchmark for success, the HC1 provides field-based... -
Page 12: Features
Wasp HC1 User Manual 1.2 Features Audio Powerful system Microsoft Windows Mobile 6.5 operating Speaker system Receiver (Headphone) Marvell PXA320 processor with speed of Expansion slot up to 806 MHz MicroSD memory card slot, supporting... -
Page 13: Hc1 Product Introduction & Accessory Kit
Wasp HC1 User Manual 1.3 HC1 Product Introduction & Accessory Kit HC1 Terminal Manual CD Stylus Battery Elastic Stylus String Hand Strap Power Adaptor Plugs... -
Page 14: Tour Of The Hc1
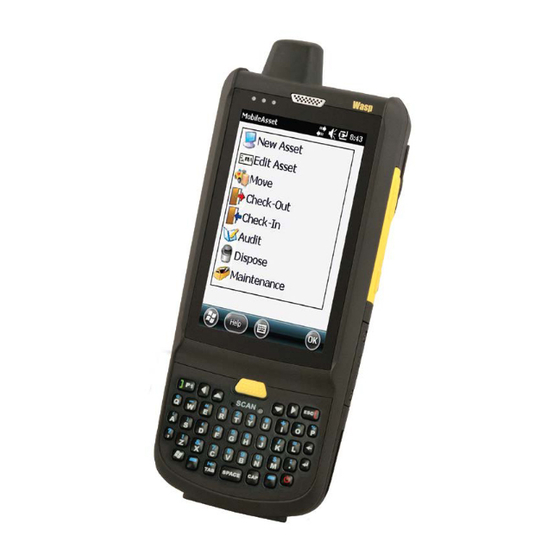
Wasp HC1 User Manual 1.4 Tour of the HC1 The following sections describe the main components and features of the HC1. 1.4.1 HC1 Front and Right View LED indicators Power button LCD touch screen Universal connector 3A Microphone Scanner trigger button... -
Page 15: Hc1 Rear And Left View
Wasp HC1 User Manual 1.4.2 HC1 Rear and Left View Barcode scanner window Speaker Earphone jack 5M/AF camera Microphone LED flash light Battery compartment Battery compartment tab Antenna Scanner trigger button Stylus Volume up/down... -
Page 16: Turning On The Hc1 For The First Time
Wasp HC1 User Manual 1.5 Turning on the HC1 for the First Time After you have initially charged your device for about 16 hours, the device is ready to be used. You can now start up your device. You can then calibrate the display, learn some basic stylus usage, and set up the system time zone, date and time. - Page 17 Wasp HC1 User Manual Slide and position the battery pack, making sure the battery contacts are aligned with the contacts in the compartment. Battery Compartment Contacts Plastic Tab Use your thumb to snap the battery down for it to be in place.
-
Page 18: Charging The Battery
Wasp HC1 User Manual 1.7 Charging the Battery Before using the terminal for the first time, you need to charge it for about 16 hours. After that, you can charge the terminal for 4 hours to recharge the battery to full capacity. Charge the terminal using the USB charging cable or the docking station. -
Page 19: Checking The Led Status
Wasp HC1 User Manual 1.8 Checking the LED status Terminal LED indicators from left to right: --GPRS/Bluetooth Communication -- Scan -- Power Status Description Flashing Yellow GPRS module is enabled. GPRS/Bluetooth Flashing Blue Bluetooth module is enabled. Scan Solid Red... -
Page 20: Keypads And Functions
Right cursor key Up cursor key Down cursor key When the HC1 turns on, the numeric mode is on by default. When you toggle to alpha mode, the CAPS mode is off by default. Use the Alpha key to toggle to CAPS. -
Page 21: Using The Function Keys
Wasp HC1 User Manual 1.11 Using the Function Keys For QWERTY Keypad Description Description Keypad backlight toggling Screen backlight toggling Decrease screen backlight Increase screen backlight brightness brightness Softkey 2 Softkey 1 END TALK TALK Scanner setting Task manager execution... -
Page 22: Using Alpha Keys
Wasp HC1 User Manual 1.12 Using Alpha Keys Alpha On Alpha Off CAPS Off CAPS On Space, @, $, “, 0 Space, @, $, “, 0 +, -, \, %, 1 +, -, \, %, 1 a, b, c, 2... -
Page 23: Chapter 2 - Using The Hardware
Chapter 2 – Using the Hardware 2.1 Using the MicroSD Memory Card The HC1 has an expansion slot compatible with a range of MicroSD memory cards, which are primarily used to back up or transfer files and data. 2.1.1 Inserting a Memory Card Remove the two screws on the MicroSD slot shield and remove the shield. -
Page 24: Using The Sim Card
Wasp HC1 User Manual 2.2 Using the SIM Card The HC1 has a slot for a GPRS SIM card inside the battery compartment. CAUTION! Before installing the SIM card, please backup your data to prevent data loss because of a low backup battery. -
Page 25: Using The Barcode Laser Scanner
Wasp HC1 User Manual 2.3 Using the Barcode Laser Scanner The HC1 has an integrated laser scanner, which reads all major 1D barcode labels with excellent performance. NOTE: The reading software must be enabled in order to operate the scanner. This can be a user-loaded application or a pre-loaded utility such as Scanner Settings and Scan2Key. - Page 26 Wasp HC1 User Manual Aim the laser scanner at the selected barcode, and press either one of the scanner trigger buttons on the device. If you enable Auto-Scan, you don’t have to press any button. Aim the laser scanner at the selected barcode while the laser emits light at regular intervals.
-
Page 27: Chapter 3 - Getting Connected
Wasp HC1 User Manual Chapter 3 – Getting Connected The HC1 enables users to link to a host computer using an RS-232 cable, or Bluetooth, WiFi, or GPRS connection for data communication. This chapter provides an overview of the HC1 communication options. -
Page 28: Connecting The Device To Your Computer
Synchronization will be initialized and will take place if you’ve chosen to synchronize periodically or upon connection. NOTE: Your computer can create a partnership with multiple HC1. Also, a HC1 can create a partnership with up to two computers. -
Page 29: Wifi Connection
Wasp HC1 User Manual 3.2 WIFI Connection A wireless network can be added either when the network is detected or by manually entering network settings. Before following these instructions, make sure if authentication information is needed. 3.2.1 Using the Summit Utilities You can use the Summit Client Utility tool to setup or change the WiFi settings. - Page 30 Wasp HC1 User Manual Tap Profile to scan available APs Scan Available AP Under Profile tab, tap Scan for available AP. You may select a desired AP to create a new profile. Tap Configure.
- Page 31 Wasp HC1 User Manual Tap Yes to create the new profile. Enter the WEP key or network key. Tap OK. Commit and Activate Tap Commit to activate the setting. Under the Main tab, select the profile you want to activate...
-
Page 32: U-Center Mobile For Quick Gps Connection
Wasp HC1 User Manual Under the Status tab, you can see the IP address, signal strength and quality. Tap OK to exit the Summit Client Utility. If you want to disconnect the AP, tap Disable Radio. 3.3 u-Center Mobile for Quick GPS Connection Before you start to use your device for GPS navigation, use the u-CenterMobile program first to download ephemeris data (current satellite position and timing information) onto your device. -
Page 33: To Open U-Center Mobile
Wasp HC1 User Manual 3.3.1 To Open u-Center Mobile Tap Start → u-CenterMobile. The u-CenterMobile program appears. 3.3.2 To Download Data Please follow the following steps to download the ephemeris data. Tap Rx → Autobauding. - Page 34 Wasp HC1 User Manual Tap Rx → Port. Select COM4. The tool starts to download the ephemeris data (current satellite position and timing information). When the download is finished, you will see the data shown in the upper right corner.
-
Page 35: Chapter 4 - Barcode Scanner Programs
Wasp HC1 User Manual Chapter 4 – Barcode Scanner Programs The HC1 provides an option for the barcode scanner, allowing you to scan and decode various types of 1D/2D barcodes. 4.1 Scanner Settings When it is necessary for the user to change the default barcode symbology for a different application, the Scanner Control Panel provides the ability to change default symbology, place delimiter characters behind scanned data, and save the settings. -
Page 36: Barcode Symbologies
Wasp HC1 User Manual 4.3 Barcode Symbologies Char Check Transmit Barcode Enable / / Digit Check Others Symbology Disable verification Char/digit Australian Send bar width data Post British Post YES Canadian Post Codabar Transmit start & stop char, *data length... -
Page 37: Barcode Symbologies 2D
Wasp HC1 User Manual Char Check Transmit Barcode Enable / / Digit Check Others Symbology Disable verification Char/digit *data length (Databar) UPC A 2 digit addenda, 5 digit addenda, Addenda required, Include addenda separator, Send number system UPC E 2 digit addenda, 5 digit addenda,... -
Page 38: Chapter 5 - Advanced Settings
Wasp HC1 User Manual Chapter 5 – Advanced Settings 5.1 Performing a Hardware Reset You may have to perform a reset if the device freezes (i.e., the device no longer responds to the buttons or tapping on the screen). A soft reset allows your device to get a fresh start, similar to rebooting a computer. - Page 39 RAM memory. Method 2: From Hardware To start the cold boot for the HC1, press and hold the left trigger button and then press the reset button with a stylus. NOTE: When you perform hard reset, the data and time settings will not be retained. Formats,...
-
Page 40: System Specifications
Wasp HC1 User Manual Appendix I System Specifications Marvell PXA320 806MHz Mobile DDR: 256MB Memory NaNDFlash: 512MB Phone version -- Windows Embedded Handheld 6.5 professional version Without phone version -- Windows Embedded Handheld 6.5 classic version Numeric keypad -- Total 26 keys (including power key) - Page 41 Wasp HC1 User Manual Environmental sealing IP65 BT + WIFI + Camera Models BT + WIFI + Camera + GPS + 3.5G Regulatory CE, FCC, VCCI, CCC, NCC Approvals Microsoft Visual Studio 2005 Software Microsoft Windows Mobile 6.5 SDK Manual CD...
-
Page 42: Support
Wasp HC1 User Manual Appendix II Support The professional support team at Wasp Barcode Technologies is available to quickly answer questions or assist with technical-related issues. Should an equipment problem occur, please contact a Wasp support representative. For complete contact information please visit: http://www.waspbarcode.com/...
Need help?
Do you have a question about the HC1 and is the answer not in the manual?
Questions and answers