Table of Contents
Advertisement
Advertisement
Table of Contents

Subscribe to Our Youtube Channel
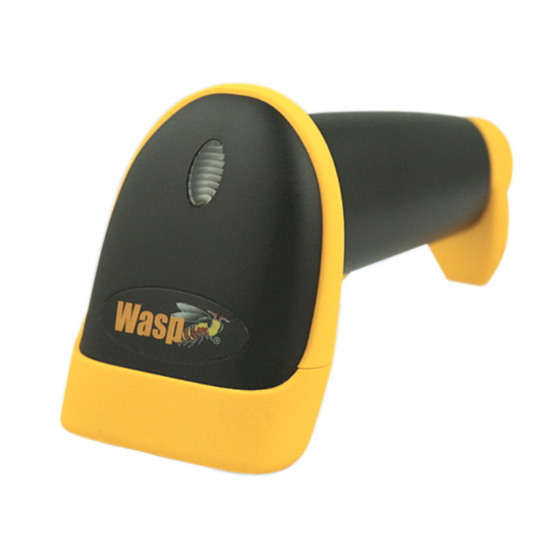
Related Manuals for Wasp WLR8950


Summary of Contents for Wasp WLR8950
- Page 1 WLR8950 User Manual...
-
Page 2: Table Of Contents
Table of Contents Chapter 1. Introduction Chapter 2. Barcode Symbologies Chapter 3. Installation Chapter 4. Quick Start Chapter 5. Setup & Configuration Factory Default Auto-Sense Stand Mode Keyboard Connection Interface Selections Beep Settings Beep and Delay Interblock Delay Upper/Lower Case Keyboard Language Preamble/Postamble Terminator... -
Page 3: Introduction
Of all the hand held barcode scanning devices on the market, the CCD reader is the easiest to use and most cost effective for the typical business user. The Wasp WLR8950 series scanners are extended distance scanners with a depth of reading of up to one foot depending on the mil size of the barcode. -
Page 4: Barcode Symbologies
Wasp WLR8950 Scanners can read barcodes with X-dimensions as low as 5 mils (0.005 in/0.13mm). Wasp WLR8950 Scanners can read the most popular barcode symbologies including Code 39, Code 93, Code 128, Interleaved 2 of 5, UPC-A, UPC-E, EAN/JAN-8, EAN/JAN-13, Codabar, and MSI/Plessey. -
Page 5: Installation
1. Turn off your computer. 2. Unplug your PC keyboard cable and plug the male end (Din 6) of the WLR8950 Scanner directly into your PC keyboard port. Plug your keyboard cable into the other end (female Din 6) of the the scanner. -
Page 6: Quick Start
Chapter 4 Quick Start Your Wasp WLR8950 Scanners are ready for use. The default settings of the scanners have been pre-programmed for the most common barcode configurations. Use the “WLR8950 Setup & Configuration” sections only to customize the scanners settings. Please review the “Enable Barcode Symbologies”... -
Page 7: Setup & Configuration
In order to configure Wasp WLR8950 Scanners, you must familiarize yourself with the setup procedures on the following pages. The default settings of the Wasp WLR8950 Scanners are identified on each page and clearly marked using an asterisk (*). The default settings have been preprogrammed for the most common barcode configurations. -
Page 8: Auto-Sense Stand Mode
FACTORY DEFAULT, KEYBOARD CONNECTION AND INTERFACE SELECTIONS Auto-Sense Stand Mode Scan the Auto-Sense Stand Mode barcode to enable the hands-free autosense feature of the WLR8950 Scanners. If you desire to turn this mode “off,” scan the Trigger Only barcode. Auto-Sense Mode Enable Trigger Only Magnetic Switch is available after activating Auto-Sense Stand Mode. -
Page 9: Beep Settings
BEEP AND DELAY The ‘Beep and Delay’ configuration supports the general control options for the Wasp WLR8950 Scanners. These options include the tone, intercharacter delay, and interblock delay. The High, Low and Med settings refer to the tone of the beep, not the volume. -
Page 10: Interblock Delay
Chapter 5 BEEP AND DELAY Interblock Delay Intercharacter Delay 0ms * 140us * 10ms 500us 50ms 100ms 200ms 16ms 500ms *Default... -
Page 11: Upper/Lower Case
Chapter 5 UPPER/LOWER CASE AND KEYBOARD LANGUAGE Upper/Lower Case Caps Lock Auto (For PC XT/AT only): • In Auto Trace mode, the scanner will keep track of the Caps Lock status automatically. For some PCs, the scanning performance may be compromised because of the auto tracing. If the scanning performance is poor (or cannot scan) or the scanner cannot output the upper/lower case characters correctly, try to select one of the next two choices instead of auto tracing. -
Page 12: Preamble/Postamble
Chapter 5 PREAMBLE/POSTAMBLE , TERMINATOR AND LABEL TYPE Preamble/Postamble The ‘Preamble/Postamble’ configuration is used to add a prefix or suffix set of characters to the barcode value. Up to 8 characters may be added for each option separately. Preamble and postamble characters can function concurrently, but need to be configured separately. -
Page 13: Label Type Positive/Negative
Chapter 5 LABEL TYPE POSITIVE/NEGATIVE AND CODE ID Label Type Positive/Negative Enable Negative Label Disable Negative Label (Positive & Negative Enable) (Positive Label Enable) Code ID The ‘Code ID’ option sends a specific value when a particular barcode symbology is scanned. For example, if ‘Code ID’ is enabled and Code 39 is scanned, an “M”... -
Page 14: Bi-Color Light Source Settings
Chapter 5 BI-COLOR LIGHT SOURCE SETTINGS Cycle Mode The following settings are supported by bi-color models. GREEN > RED RED > GREEN GREEN > BI-COLOR RED > BI-COLOR NOTES: 1. Illumination color will switch back and forth from one to the other when a good read does not occur. 2. -
Page 15: Enable/Disable Barcode Symbologies
Chapter 5 ENABLE/DISABLE BARCODE SYMBOLOGIES Enable Disable Enable All Disable All MSI Plessey MSI Plessey * Interleaved 2 of 5 * Interleaved 2 of 5 Code 128 * Code 128 Codabar * Codabar Code 39 Code 39 * UPC A * UPC A UPC E * UPC E... -
Page 16: Code 39 Settings
Chapter 5 CODE 39 SETTINGS Code 39 is variable length and is the most frequently used symbology in industrial barcode systems today. It is extensively used within the Department of Defense (DOD). The principal feature is to encode messages using the full alphanumeric character set. Standard Code 39 contains only 43 characters (0-9, A-Z, $, /, %, +, -, ., SPACE) and can be extended to a 128 character symbology (full ASCII) by combining one of the special characters (S, /, %, +) with a letter (A-Z) to form the characters that are not present in the standard Code 39 symbology. -
Page 17: Interleaved 2 Of 5 And Code 93 Settings
Chapter 5 INTERLEAVED 2 OF 5 AND CODE 93 SETTINGS Interleaved 2 of 5 is a variable length, even numbered, numeric barcode. It is typically used in industrial and master carton labeling and also in the automobile industry. The symbology uses bars to represent the first digit of a pair and the interleaved (white) spaces to represent the second digit of a character pair. -
Page 18: Code 128 And Ucc/Ean 128 Settings
Chapter 5 CODE 128 AND UCC/EAN 128 SETTINGS Code 128 is the most flexible of all the common linear symbologies. It supports alpha and numeric characters easily, has the highest number of characters per inch, and is variable length. See page 7 for information on setting the minimum and maximum lengths. Enable Code 128 * Minimum Length (5 *) Disable Code 128... -
Page 19: Msi Plessey Settings
Chapter 5 MSI PLESSEY SETTINGS MSI Plessey is a variable length numeric symbology and is primarily used in marking retail shelves. Each character consists of four bars with intervening spaces for each encoded digit, one or two symbol check digits, and a reverse start code. See page 7 for information on setting the minimum and maximum lengths. -
Page 20: Codabar Settings
Chapter 5 CODABAR SETTINGS Codabar is a variable length symbology capable of encoding six special alphanumeric characters, capital letters A through D, T, N, *, E, and all numeric digits. Codabar is one of the oldest barcode symbologies and is still used in some library applications. It should not be considered for new applications except under unusual circumstances. -
Page 21: Upc-A And Upc-A Supplement Settings
Chapter 5 UPC-A AND UPC-A SUPPLEMENT SETTINGS UPC-A (Universal Product Code-A) is fixed length and is the most common UPC barcode for retail product labeling. It is seen in most grocery stores across the United States. The symbology encodes a 12-digit number. The first six digits are assigned from the Uniform Code Council (UCC). -
Page 22: Upc-E And Upc-E Supplement Settings
Chapter 5 UPC-E AND UPC-E SUPPLEMENT SETTINGS UPC-E (Universal Product Code-E) is fixed length and is a compressed six digit code used for marking small packages, including magazines and paperback books. UPC-E symbols are UPC-A symbols that have been zero suppressed (i.e. consecutive zeros are not included in the symbol). -
Page 23: Ean-8 And Ean-8 Supplement Settings
Chapter 5 EAN-8 AND EAN-8 SUPPLEMENT SETTINGS The EAN/JAN-8 is fixed length and is similar to the UPC-E code, but includes two more digits for the country code. The nominal height for the EAN/JAN-8 barcode is one inch. The reduced size is 80% of the nominal size. EAN-8 Enable * EAN-8 Disable Send Leading Digit *... -
Page 24: Ean-13 And Ean-13 Supplement Settings
Chapter 5 EAN-13 AND EAN-13 SUPPLEMENT SETTINGS The EAN/JAN-13 (European Article Number/Japanese Article Number) is fixed length and is similar to the UPC-A symbology, but encodes a 13th digit. The nominal height for the EAN/JAN-8 barcode is one inch. The reduced size is 80% of the nominal size. EAN-13 Enable * EAN-13 Disable Send Leading Digit *... -
Page 25: Appendix A Barcode Test Symbols
Appendix A BARCODE TEST SYMBOLS Note: Make sure that the appropriate barcode symbology is configured properly and enabled before trying to scan. Use the ‘Barcode Symbologies’ configuration beginning on page 15 to enable specific symbologies. Code 39* Code 93 Interleaved 2 of 5 * Codabar * Code 128* MSI/Plessey... - Page 26 Appendix A BARCODE TEST SYMBOLS UPC-E* UPC-E w/5 digit supplement UPC-E w/2 digit supplement EAN/JAN-13* EAN/JAN-13 w/5 digit supplement EAN/JAN-13 w/2 digit supplement EAN/JAN-8* EAN/JAN-8 w/5 digit supplement EAN/JAN-8 w/2 digit supplement *Default...
-
Page 27: Ascii Table
Appendix B ASCII TABLE Use this ASCII Table to add preamble and postamble characters to your barcode value. Please refer to the appropriate configuration section for the number of characters that can be configured. - Page 28 Appendix B ASCII TABLE “ & < ‘ >...
- Page 29 Appendix B ASCII TABLE...
- Page 30 Appendix B ASCII TABLE...
-
Page 31: Appendix C Function Codes For Pc
Appendix C FUNCTION CODES FOR PC Cursor Right Cursor Up Cursor Left Cursor Down Back Tab Page Up Page Down Home Enter Back Space... -
Page 32: Appendix D Technical Specifications
Appendix D TECHNICAL SPECIFICATIONS MODEL WLR8950 PERFORMANCE Sensor 2660 pixels CCD linear imager sensor Depth of Field 30mm to 330mm (40 mil) ± 20mm Best Resolution 0.127mm ( 5mil). Scan Rate 45 scan / sec Decoding Rate 100 scan / sec ( 10m / sec) -
Page 33: Warranty Information
This warranty is limited to repair or replacement at Wasp Barcode Technologies option, with reasonable promptness after being notified. These provisions do not prolong the original warranty term for any product which has been repaired or replaced by Wasp Barcode Technologies. -
Page 34: Faq
Q: How do I configure the scanner for a notebook (or laptop) computer? A: Scan the “Notebook” barcode on page 8. Q: How do I change the terminator to a Tab? A: Scan the “Tab” barcode on page 12. Q: How do I remove the terminator? A: Scan the “None”... -
Page 35: Product Support
Product Support If you experience any problems with the Wasp WLR8950 Series Scanners that you are unable to resolve, call for technical assistance at (214) 547-4100 ext 2, Monday through Friday, 8:00 AM - 5:00 PM Central Standard Time. Visit www.waspbarcode.com/support... - Page 36 Wasp Barcode Technologies 1400 10th Street Plano, TX 75074 www.waspbarcode.com...
Need help?
Do you have a question about the WLR8950 and is the answer not in the manual?
Questions and answers