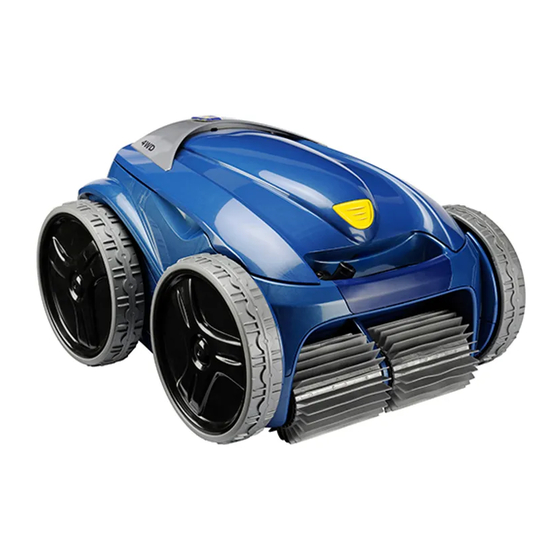
Page 1
Instructions for installation and use English H0402400.A - W2503A - 2013/02...
Page 2
• Read this manual carefully before installing, maintaining or repairing this device! • The symbol indicates important information that must be taken into account in order to avoid risk of personal injury and/or damage to the appliance. • The symbol indicates useful information. Exclusive use: pool water cleaning (must not be used for any other purpose). Warnings Failure to comply with the following warnings can result in permanent injury, electrocution or drowning. PREVENT ELECTRICAL SHOCK To reduce risk of electrical shock: • Connect unit to receptacle protected by a Ground Fault Circuit Interrupter (GFCI) or a Residual Current Device (RCD) having a rated residual operating current not exceeding 30mA. • While the control unit is water resistant, it is not intended for any type of sustained contact with water. Therefore, ...
USE OF THE CLEANER IN A VINYL LINER POOL Certain vinyl liner patterns are particularly susceptible to rapid surface wear of pattern removal caused by objects coming into contact with the vinyl surface, including pool brushes, pool toys, floats, fountains, chlorine dispensers, and automatic pool cleaners. Some vinyl liner patterns can be seriously scratched or abraded simply by rubbing the surface with a pool brush. Ink from the pattern can also rub off during the installation process or when it comes into contact with objects in the pool. Zodiac Group Australia Pty Ltd., is not responsible for, and the Limited Warranty does not cover, pattern removal, abrasion or markings on vinyl liners. ...
1. Information before use 1.1 Important Check that your appliance has not been damaged during transport (shocks, broken parts, etc.). If you find any problems don't hesitate to contact your reseller before using the cleaner. 1.2 Technical specifications 220‐240 VAC, 50 Hz; short‐circuit‐proof safety isolating type Control unit voltage Robot supply voltage 30 V DC Installed load 150 W Cable length 18 m or 21 m (V4 4WD) Cleaner size (WxDxH) 43 x 48 x 27 cm Pack size (WxDxH) ...
Page 5
1.4 Package content and assembly of the transport caddy 4 H0402400.A2 EN – 2013‐02...
1.5 Immersing the cleaner Do not allow bathing when the cleaner is in the pool. Place the cleaner vertically into the water (1) and move it slightly in all directions so that the air contained in the cleaner escapes (2). It is essential that the cleaner sinks on its own and settles on the pool bottom. Spread out the required length of cable by the pool. For optimum operation we recommend that you place the caddy with the control box at the centre of the pool length (3). 1.6 Electrical connection Place the control box on the caddy at a distance of at least 3.5 metres from the edge of the pool ...
2.2 V4 4WD Navigation DAYS/HOURS/MINUTES selection Validate the selection Display of the time DAYS / HOURS / MINUTES and setting the time Programming cleaning cycles Cancels programming and setting the time Indication Removal from pool mode "Clean filter" Start / Stop the cleaner Cleaning intensity* Low intensity Intensive Pool shape* Surface area to be cleaned* ...
Page 8
3.3 Removing the cleaner from the water You can use the “remove from pool” mode during the cleaning cycle or at the end of the cycle by using the control box or the remote control (V4 4WD). Using the control box, a short press on the button. The message is displayed. The cleaner moves towards a pool wall and climbs up to the waterline. Using the remote control unit (V4 4WD) : (see § 5.1). To remove the cleaner from the pool at a specific location BEFORE pressing the “remove‐ from –water” mode Using the control box : ‐ Press the button on the control box to make the cleaner turn to the left and to direct it in the ...
4. Program cleaning cycles for when you are away It is not recommended to unplug the power cord once the programmed cleaning cycles have completed as this will delete the time settings. The time setting will be saved for approximately 2 minutes if the power cord is disconnected. 4.1. Setting the time To set the time, press the button for a longer time (3 seconds). The days of the week begin flashing: , then the leds . Select the current day using the and buttons. Validate using the button Once the day has been memorised, the hour flashes: Select the current hour using the and buttons Validate using the button Once the hour has been memorised, the minutes flash: Select the current minutes using the and buttons. ...
Page 10
To programme a cycle, press the button for a longer time (3 seconds). The led stops flashing The days of the week flash twice. The LED and the current date and time flash. This is a reminder of the current date and time you entered in order to help you to programme. Press to start programming. If the LEDs flash it means that the time setting is not complete. To continue with the cleaning cycle programming, it is essential to set the time first. To do this follow the instructions in § 4.1. Select the day to programme using the and buttons. Validate using the button. Once the day has been memorised, the hour flashes: Select the hour to programme using the and buttons. Validate using the button ...
5. Remote control (V4 4WD) 5.1 Using the remote control By default, the remote control is already synchronised with the control box. To power on the remote control press the button for a long time (3 seconds). The screen displays the remote mode: 2 possible functions : ‐ Pilot the cleaner: Hold the remote control unit and move it in the desired direction using the movements illustrated below: ...
6. Maintenance 6.1 Cleaning the filter The cleaner performance can be reduced if the filter is full or dirty. Make sure you clean the filter regularly with clean water for efficient pool cleaning. Filter access "Clean filter" indicator (V4 4WD) If the indicator on the control box lights, it is strongly recommended to clean the filter in order to perfect the cleaning. If the indicator comes on during a cleaning cycle, it will remain on until the end of the cycle. 6.2 Replacing the brushes The cleaner is fitted with PVC brushes. They have wear indicators (1). To remove worn brushes, remove the tabs from the holes in which they are fixed. To fit new brushes start by fitting the side without tabs under the brush holder (2). Roll the brush around its support and slide the tabs into the fixing holes (3). Pull on the end of each tab (4) until its edge passes through the slit. ...
7. Troubleshooting In the event of malfunction, the control box indicates the error code on the screen. Pressing a key deletes the error code and turns off the control box. The screen switches to standby after 10 minutes. To turn the screen back on, just press any key. When an error is detected, the control box temporarily suspends the programme (the led is turned off). Press the key for a longer period to revalidate the current programming. 7.1 Meaning of error codes and possible causes Problems Solutions Cleaner malfunction, please contact your reseller. Error codes: 1 to 3 Pump motor overconsumption, check for the presence of pebbles or hair Error code: 4 in the fan, clean the filter. Overconsumption of the drive motors. Check that nothing is stopping the Error codes: 5 to 6 brushes from turning correctly (sand, cable, etc.). To do this turn the wheel to the left and then right one 1/4 turn in both directions. Robot operating outside the pool Error codes: 7 to 8 Check that the cleaner is correctly connected to the control box. Error code: 10 If the problem continues contact your reseller. The screen displays the • This means that the remote control batteries are too low. message when the remote control mode is active (V4 4WD) ...
and simultaneously for at least 5 seconds. This is the information that is displayed in order every 3 seconds: The total cleaner operating time (in hours), example display: The last cleaner error code (if the cleaner has had at least one error), example display: The cleaner operating time at the error (if the cleaner has had at least one error), example display: Once this information has been displayed, the control box returns to the menu, with the screen on: 8. Product compliance The manufacturer reserves the right to modify these specifications without notice. Although the cleaning robots have been tested in a large variety of Swimming pools, Zodiac cannot be held responsible in the case of a non perfect adaptation of the robot to a particular swimming pool. 13 H0402400.A2 EN – 2013‐02...
Page 16
Ph: +612 8786 6800 | FAX +61 2 9756 3987 For more information visit www.zodiac.com.au or call 1800 688 552 ZODIAC® is a registered trademark of Zodiac International, S.A.S.U., used under license. All trademarks referenced herein are the property of their respective owners.
Need help?
Do you have a question about the V3 4WD and is the answer not in the manual?
Questions and answers