Table of Contents
Advertisement
Quick Links
Advertisement
Table of Contents

Subscribe to Our Youtube Channel
Related Manuals for WILSON AUDIO ALEXANDRIA X-2


Summary of Contents for WILSON AUDIO ALEXANDRIA X-2
- Page 2 W I L S O N A U D I O S P E C I A L T I E S , I N C .
- Page 3 W I L S O N A U D I O S P E C I A L T I E S , I N C .
- Page 4 The information in this manual is the sole property of Wilson Audio Specialties, Inc. Any reproduction in whole or in part, without the express written permission of Wilson Audio Specialties, Inc., is prohibited. No material contained herein may be transmitted in any form or by any means, electronic or mechanical, for any purpose, without the express written permission of Wilson Audio Specialties, Inc.
-
Page 5: Table Of Contents
A B L E O N T E N T S ABLE OF ONTENTS ............................ABLE OF RAPHICS ..............................LEXANDRIA IMENSIONS ..............................NTRODUCTION ..............................SPHERICAL ROUP ELAY VIII 1.0 - R ........................1-1 ECTION COUSTICS ) ..........................1-1 INAL ISTENING ETUP VOICING ................................. - Page 6 X-2 O ’ LEXANDRIA WNER ANUAL ABLE OF ONTENTS 3.2 - G .................... 3-4 ECTION ROUP ELAY LIGNMENT LATE 3.3 - M ....................3-6 ECTION OUNTING THE PPER MODULES ................................ 3-6 ATERIALS EQUIRED ..............................3-6 OUNTING ROCEDURE ’ S ......................3-8 ONNECTING THE PPER ODULES...
- Page 7 A B L E O F R A P H I C S ABLE OF RAPHICS 1 - A X-2 D ....................... IGURE LEXANDRIA IMENSIONS 2 - A ’ ....................IGURE LEXANDRIA ODULES VIII 3 - A ........ IGURE SPHERICAL ROUP ELAY CCOUNTS FOR...
-
Page 8: Alexandria Dimensions
LEXANDRIA IMENSIONS ® PPER RRAY ROSSOVER IGURE W I L S O N A U D I O S P E C I A L T I E S , I N C . - Page 9 N T R O D U C T I O N W I L S O N A U D I O S P E C I A L T I E S , I N C .
- Page 10 W I L S O N A U D I O S P E C I A L T I E S , I N C .
-
Page 11: Introduction
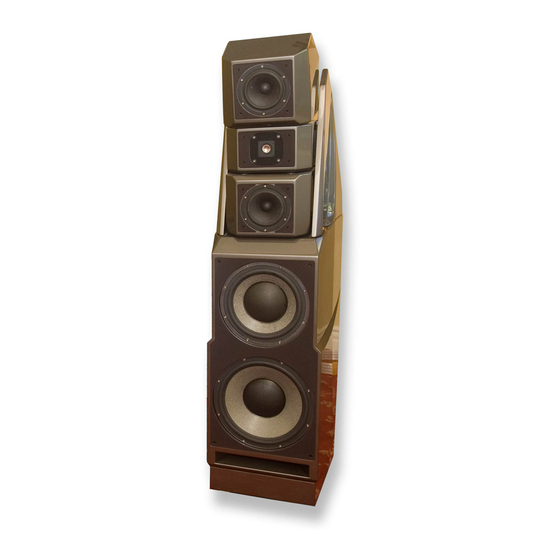
N T R O D U C T I O N NTRODUCTION From all of us at Wilson Audio Specialties — thank you for purchasing the Alexandria® X-2 loudspeaker. The information contained within the pages of this manual will inform and instruct you as to how you may enhance and prolong the enjoyment of your Alexandria loudspeaker. -
Page 12: Aspherical Group Delay
The signature curves in Alexandria’s cabinet are a further evolution of Wilson’s philosophy that truly great forms follow a corresponding function. They are a visual metaphor for the solution Wilson Audio pioneered to ad- dress issues of phase coherence exacer- bated by large speaker systems. - Page 13 N T R O D U C T I O N With Alexandria®, for the first time ever, you and others you listen with, will hear your favorite recordings and soundtracks with true time coherency, full frequency range, unfettered dynamics, and vanishingly low distor- tion.
- Page 14 W I L S O N A U D I O S P E C I A L T I E S , I N C .
- Page 15 1 . 0 - R E C T I O N O O M C O U S T I C S W I L S O N A U D I O S P E C I A L T I E S , I N C .
- Page 16 W I L S O N A U D I O S P E C I A L T I E S , I N C .
-
Page 17: Section 1.0 - Room Acoustics
While will also outline some detailed suggestions on the setup of the Alexandria®, we strongly suggest that you have your local Wilson Audio dealer perform the final speaker “voicing” with you. Wilson dealers are specially trained in setting up Wilson loudspeakers and will ensure that you realize the full value of your purchase. - Page 18 ’ LEXANDRIA ® WNER ANUAL 3. At some point during your progression forward into the room, you will observe a sonic transition in your voice; it will sound more tonally correct and less spatially diffuse (your assistant can now precisely localize the exact origin of your voice).
-
Page 19: Section 1.1 - Room Reflections
1 . 1 - R E C T I O N O O M E F L E C T I O N S 1.1 - R ECTION EFLECTIONS Probably the most obnoxious form of reflection is called “slap echo.” With slap echo, primarily midrange and high frequency sounds reflect off of two parallel hard surfaces. -
Page 20: Standing Waves
’ LEXANDRIA ® WNER ANUAL properly, diffusers create a smoother and more open sound. Some diffusers, due to their construction, create narrow midrange peaks and suck-out the warmth region. Do not use diffusers on the wall behind the speakers or on the side walls directly beside the speakers. -
Page 21: Comb Filter Effect
1 . 1 - R E C T I O N O O M E F L E C T I O N S OMB FILTER EFFECT The comb filter effect is a special type of standing wave noticeable primarily at higher frequencies and shorter wavelengths. -
Page 22: Section 1.2 Resonances
’ LEXANDRIA ® WNER ANUAL 1.2 R ECTION ESONANCES Resonance in listening rooms is generally caused by two sources: • Structures within the listening room. • The volume of air itself within the listening room. TRUCTURAL ESONANCE Structural resonances are familiar to most people as buzzes and rattles, but this type of resonance usually only occurs at extremely high volume levels and is usually masked by the music. -
Page 23: Section 1.3 - I Nyour Room
1 . 3 - I E C T I O N O U R O O M 1.3 - I ECTION HAPES Standing waves are pressure waves propagated by the interaction of sound and opposing parallel walls. This interaction creates patterns of low and high acoustical pressure zones that accentuate and attenuate particular frequencies. - Page 24 ’ LEXANDRIA ® WNER ANUAL W I L S O N A U D I O S P E C I A L T I E S , I N C .
-
Page 25: Speaker Placement Vs . Listening Position
1 . 3 - I E C T I O N O U R O O M If your optimum position is located on a couch, you should center the loudspeakers on the center position of the couch. If the seating area consists of multiple rows of chairs, the second row should be optimized for the best sound quality. -
Page 26: Summary
’ LEXANDRIA ® WNER ANUAL A very important aspect of speaker placement is how far from the back wall to place the speakers. The closer to the back wall, the more pronounced the low bass energy and centering of the image will be. However, this comes at a definite reduction in stage size and bloom as well as a deterioration of upper bass quality. - Page 27 1-11 W I L S O N A U D I O S P E C I A L T I E S , I N C .
- Page 29 2 . 0 - U X - 2 E C T I O N N C R A T I N G T H E L E X A N D R I A...
- Page 30 W I L S O N A U D I O S P E C I A L T I E S , I N C .
-
Page 31: Section 2.0 - Uncrating The Alexendria
2 . 0 - U E C T I O N N C R AT I N G T H E L E X A N D R I A Note: You will have many modules to unpack that will need to be separated into right and left channels. - Page 32 Be very careful not to scratch the module during this process. 4. Finally, move the woofer cabinets over to the “ zone of neutrality” as determined by the Wilson Audio setup procedure. If you have not yet performed this room analysis, please refer to Section 1.0 of this manual.
-
Page 33: Uncrating The Upper Array Modules
2 . 0 - U E C T I O N N C R AT I N G T H E L E X A N D R I A NCRATING THE PPER RRAY ODULES 1. Locate the two crates labeled “Upper Modules.” Remove the three upper modules, as well as the group delay alignment plates, from each crate (see Figure 8). -
Page 34: Uncrating The Crossover Cover
’ LEXANDRIA ® WNER ANUAL NCRATING THE ROSSOVER OVER 1. Locate the crate labeled “Crossover Cover” (see Figure 9). This crate contains the two rear crossover covers. Remove them from the crate. Take care to observe the serial number and place the covers with the corresponding channel’s modules. -
Page 35: Spike Assembly
2 . 0 - U E C T I O N N C R A T I N G T H E L E X A N D R I A PIKE SSEMBLY • Remove the mechanical diodes and move the nut to about two threads from the point. This will allow for greater movement when leveling the loudspeaker system. -
Page 36: Crate Contents Checklist
’ LEXANDRIA ® WNER ANUAL RATE ONTENTS HECKLIST Now that you have everything unpacked, you can inventory your items. 1 - Owners manual 2 -Bass modules (left & right channel) 2 - Lower mid-range modules (left & right channel) 2 - High frequency modules (left & right channel) 2 - Upper mid-range modules (left &... - Page 37 2 . 1 - C E C T I O N R A T E O N T E N T S H E C K L I S T 12 - #1 Tether bolts 12 - #2 Tether bolts 12 - Tether bolt threaded covers 2 - Polishing cloths 8 - Brass spike pads...
-
Page 39: Ection Lexandria Ystem Etup
3 . 0 - A ® S E C T I O N L E X A N D R I A Y S T E M E T U P... - Page 40 W I L S O N A U D I O S P E C I A L T I E S , I N C .
-
Page 41: Initial Assembly
In order to realize the capabilities of the Alexandria®, we strongly recommend that you have it installed by a trained Wilson Audio installer. Your dealer will have a person trained in the art of the Alex- andria® installation. If you choose to do this installation yourself, here are some guidelines to assist you. - Page 42 Alexandria Group Delay Alignment Tables from Section 8 ULSE LIGNMENT Group delay alignment accuracy of the Alexandria has been established and verified by Wilson Audio. The graphs and charts used in this section are a result of this testing. ETUP As indicated in Figure 12, the Alexandria®...
-
Page 43: Ection Eometric Ime Omain Lignment
3 . 1 - G E C T I O N E O M E T R I C I M E O M A I N L I G N M E N T LIGNMENT ROCEDURE Each upper modules’ rear spike rests in a specific numbered indent that determines its individual group delay position within the modular array. -
Page 44: Alexandria X-2 Owner
’ LEXANDRIA ® WNER ANUAL DENTIFICATION OF LIGNMENT PIKES AND ETHER OLTS 1. Repeat each step of this procedure on the left and right channels simultaneously. 2. Remove the Group Delay Tables from Section 8 in this booklet and place them close by for easy reference. - Page 45 3 . 2 - I E C T I O N N S TA L L I N G R O U P E L AY L I G N M E N T L A T E • The correct Lower Midrange Module Spike as determined by the Section 8 Table. •...
-
Page 46: Materials Required
’ LEXANDRIA ® WNER ANUAL • Attach the plate to the top of the Woofer Module (see Figure 15). Ensure that the tether bolts stay in place. • Secure the plate with the eight 10 - 32 x 1" bolts, placing the metal washers beneath each bolt. •... - Page 47 3 . 3 - M E C T I O N O U N T I N G P P E R R R AY O D U L E S the woofer enclosure (see Figure 17). Ensure that the Tether Bolts are protruding through the slots provided in the module handle.
-
Page 48: Connecting The Upper Modules ' Signal Cable
’ LEXANDRIA ® WNER ANUAL ing down, carefully lower the UMRM between the alignment wings. Set the front two spikes on top of the HFM enclosure, into the tracks. Install the rear spike by lifting the rear of the UMRM and carefully screwing it in. - Page 49 3 . 2 - M E C T I O N O U N T I N G P P E R R R AY O D U L E S The upper range signal cables are labeled so that they can be easily attached to their appropriate module. This is accomplished as follows: •...
-
Page 50: Section 3.4 - Locking Down The Upper Modules
’ LEXANDRIA ® WNER ANUAL • Locate the cable marked “Rear Tweeter.” Locate the binding post on the rear of the Upper Midrange Module labeled “Rear Tweeter.” Carefully thread the speaker cable up through the hole located in the wing support and through a corresponding hole located on the module support blade just below the speaker terminal (see Figure 19). -
Page 51: Materials Required
Note: This is a two person job. Do not attempt this by yourself. The Alexandrias weigh over 700 LBS and may seriously injure someone if tipped over. • 8 sets of spikes • The Wilson Audio Jack • The jack socket wrench • ¾” open ended wrench 3-11 W I L S O N A U D I O S P E C I A L T I E S , I N C . -
Page 52: Installation Procedure
Lock the rear casters to prevent the Alexandria® from moving. • Slide the Wilson Audio Jack under the front of the Alexandria®, centered between the casters, so that the jack’s lift bolt is exposed. Place the lift plate so it is positioned about an inch behind the front facade of the Alexandria®... -
Page 53: Leveling The Alexandria X-2
3 . 4 - S E C T I O N P I K E N S TA L L A T I O N Note: Be very careful NOT TO CROSS THREAD the spikes. The base of the Alexandrias is made of “X”... - Page 54 ’ LEXANDRIA ® WNER ANUAL 3.6 - E ECTION XTENSION PIKES Place one end of the expansion spike sub-assembliesinto the last hole of the spike track. Expand the sub- assembly until the upper end comes into contact with the dimple in the middle of the brass spike pad found on the underside of the wing braces.
-
Page 55: Section 3.7 - Installing The
3 . 6 - A E C T I O N T T A C H O V E R 3.7 - I ECTION NSTALLING THE OVER Attach back cover to woofer using 1/4” - 20 x 1 1/2” button head Allen bolts and plastic washers (see Figure 23). -
Page 56: Section 3.8 - Resistors
By removing the lower access plate on the back cover of your Alexandrias, you may gain access to the resistor plate (see Figure 24). These resistors serve several functions. Note: Only Wilson Audio replacement resistors should be used in your Alexandrias. Changing the value or brand of resistor will have a deleterious affect on the sonic performance of your loudspeakers and may void your Wilson Audio Warranty. - Page 57 3 . 7 - A E C T I O N T TA C H O V E R 25 - R IGURE ESISTOR LATE 3-17 W I L S O N A U D I O S P E C I A L T I E S , I N C .
- Page 59 4 . 0 - E C T I O N...
- Page 60 W I L S O N A U D I O S P E C I A L T I E S , I N C .
-
Page 61: Painted Finish
4 . 0 - C E C T I O N A R E F O R T H E L E X A N D R I A 4.0 - P ECTION AINTED INISH Your Alexandria loudspeakers are hand painted with WilsonGloss paint and hand polished to a high luster. While the finish seems quite dry to the touch, final curing and complete hardening takes place over a period of several weeks. -
Page 62: Break I N Period
All audio equipment will sound its best after its components have been broken in for some period of use. Wilson Audio breaks in all woofers and mid-range drivers for a 12 hour period. All drivers are then tested, calibrated, and matched for their acoustical properties. In your listening room, expect 25 to 50 percent of break-in to be complete after two hours of playing music fairly loudly. -
Page 63: Conclusion
4 . 1 - A E C T I O N L E X A N D R I A A B I N E T O N S T U C T I O N A highly cross-linked, thermoset adhesive is used for the construction of the enclosure. It was also chosen for its excellent bond strength, solvent resistance, hardness, and optimum vibrational characteristics. - Page 64 W I L S O N A U D I O S P E C I A L T I E S , I N C .
- Page 65 5 . 0 - W E C T I O N A R R A N T Y N F O R M AT I O N W I L S O N A U D I O S P E C I A L T I E S , I N C .
- Page 66 W I L S O N A U D I O S P E C I A L T I E S , I N C .
-
Page 67: Ection Arranty Nformation
Wilson Audio’s factory is required, the dealer or customer must first obtain a return authorization. Pur- chaser must pay for shipping to Wilson Audio, and Wilson Audio will pay for shipping of its choice to return the product to purchaser. A RETURNED PRODUCT MUST BE ACCOMPANIED BY A WRITTEN DESCRIP- TION OF THE DEFECT. - Page 68 Wil- son Audio by the dealer at dealer’s sole expense. Wilson Audio will pay return freight of its choice. A returned product must be accompanied by a written description of the defect. Dealer owned demonstration equipment sold...
- Page 69 5 . 0 - W E C T I O N A R R A N T Y N F O R M AT I O N AGES TO THE PURCHASER. Some states do not allow limitations on how long an implied warranty lasts or an exclusion or limitation of incidental or consequential damages, so the above limitations or exclusions may not apply to you.
-
Page 71: Ection Roubleshooting
6 . 0 - T E C T I O N R O U B L E S H O O T I N G... - Page 72 W I L S O N A U D I O S P E C I A L T I E S , I N C .
- Page 73 6 . 0 - T E C T I O N R O U B L E S H O O T I N G 6.0 - T ECTION ROUBLESHOOTING ETUP IFFICULTIES Problem Possible Solution One channel is not operating... Check interconnects from source.
- Page 74 Now turn on the amplifier. If the problem is solved: Call your Wilson Audio dealer. There may be a problem with the crossover or the speaker’s internal wiring. If the problem persists continue to the next step.
- Page 75 6 . 0 - T E C T I O N R O U B L E S H O O T I N G If the problem is solved: You have a short in your speaker cables. Check for frayed ends, holes (from spike feet), or make sure that your spade lug is not touching the chassis while it is connected to the binding post.
- Page 77 7 . 0 - S E C T I O N P E C I F I C A T I O N S...
- Page 78 W I L S O N A U D I O S P E C I A L T I E S , I N C .
-
Page 79: Section 7.0 - Specifications
7 . 0 - S E C T I O N P E C I F I C A T I O N S 7.0 - S ECTION PECIFICATIONS Enclosure Type: Front Ported - Woofer Closed - Mid Frequency Closed - High Frequency Woofer Diameter: 1 - 13 inch, 30.5 cm 1 - 15 inch, 38 cm... - Page 81 8 - T E C T I O N I M I N G A B L E S...
- Page 82 W I L S O N A U D I O S P E C I A L T I E S , I N C .
-
Page 83: Ection Iming Ables
8 - T E C T I O N I M I N G A B L E S OR A RAPHICAL LLUSTRATION OF THIS OMOGRAPH N THE W I L S O N A U D I O S P E C I A L T I E S , I N C . - Page 84 ’ LEXANDRIA ® WNER ANUAL W I L S O N A U D I O S P E C I A L T I E S , I N C .
- Page 85 8 - T E C T I O N I M I N G A B L E S OR A RAPHICAL LLUSTRATION OF THIS OMOGRAPH N THE W I L S O N A U D I O S P E C I A L T I E S , I N C .
- Page 86 ’ LEXANDRIA ® WNER ANUAL W I L S O N A U D I O S P E C I A L T I E S , I N C .
- Page 87 8 - T E C T I O N I M I N G A B L E S OR A RAPHICAL LLUSTRATION OF THIS OMOGRAPH N THE W I L S O N A U D I O S P E C I A L T I E S , I N C .
- Page 88 ’ LEXANDRIA ® WNER ANUAL W I L S O N A U D I O S P E C I A L T I E S , I N C .
-
Page 89: Ection Ether Olt Ables
8 . 1 - T E C T I O N E T H E R O LT A B L E S W I L S O N A U D I O S P E C I A L T I E S , I N C . - Page 90 ’ LEXANDRIA ® WNER ANUAL W I L S O N A U D I O S P E C I A L T I E S , I N C .
- Page 91 8 . 1 - T E C T I O N E T H E R O LT A B L E S W I L S O N A U D I O S P E C I A L T I E S , I N C .
- Page 92 W I L S O N A U D I O S P E C I A L T I E S , I N C .
- Page 93 W I L S O N A U D I O S P E C I A L T I E S , I N C .
Need help?
Do you have a question about the ALEXANDRIA X-2 and is the answer not in the manual?
Questions and answers