Advertisement
Quick Links
Advertisement

Related Manuals for WILSON AUDIO Sasha DAW


Summary of Contents for WILSON AUDIO Sasha DAW
- Page 1 n s t a l l at I o n a n d a r e u I d e...
- Page 2 S a s h a daw I n s ta l l at i o n a n d C a r e G u i d e o n t e n t s 1 — Wa s P s �...
- Page 3 S a s h a DAW I n s ta l l at i o n a n d C a r e G u i d e 2 � 4 — m � � � � � � � � � � � � � � � � � � � � � � � 2 7 �...
- Page 4 1 — Wa s P s e C t I o n e t u P W i l s o n A u d i o S p e c i a l t i e s...
- Page 5 Please take the time before you attempt to setup up your Sasha DAW to An instructional video outlining the Wilson Audio Setup Procedure ( WASP) review the contents of your Sasha DAW tool and spike kit. Set these items in an can be found here: www.wilsonaudio.com/WASP. The proper positioning of your accessible area as you will need them during the setup process.
- Page 6 S a s h a DAW I n s ta l l at i o n a n d C a r e G u i d e 1 . 2 —WA S P e c t i o n most effective method for setting up Wilson loudspeakers.
- Page 7 S a s h a DAW I n s ta l l at i o n a n d C a r e G u i d e 1 . 2 —WA S P e c t i o n and “outer ”...
- Page 8 If you were to extend the inner and outer boundaries of the Zone and change the tonal balance of the music. Adhering to the Wilson Audio Setup for the sidewalls and the front wall (behind the speakers), they would intersect.
- Page 9 The Sasha DAW is designed for maximum phase coherence and pulse replication accuracy when each speaker is aimed directly at the listener. Thus, Sasha DAW should be “toed in.” In other words, the lis- tener, when seated in the listening position looking for ward with his/her head in a rested position, should just barely see the sur face of the inner side of each Sasha DAW.
- Page 10 2 — s d aW a e C t I o n a s h a s s e m b ly W i l s o n A u d i o S p e c i a l t i e s...
- Page 11 Uncrating the Woofer Module the lid. Remove the lid. A minimum of two strong adults is required to set up the Sasha DAW. Lo- The Upper Module crate contains the owner ’s manual and tool cate the two largest crates labeled “Sasha DAW Lower.” These contain the woofer kit.
- Page 12 • Full-Line Product Brochure shipping needs. • Warranty Registration Form Note: Before setting up the Sasha DAW, study carefully Sec tion 1, “In Your • (1x) Polishing Cloth Room.” It provides valuable information on determining the ideal room • (8x) ½”-13 Spike with Nut location for your speakers.
-
Page 13: Section 2.3-Initial Assembly
• Propagation Delay Correction Tables (Section 5). The rear of the Sasha DAW Upper Module assembly rests on a specific step • Known listening position in the Alignment Block. The position of the Upper Module is facilitated by the •... - Page 14 The Second, “Sasha DAW Alignment Block Step,” specifies the step on which the rear spike will rest. Make a mark on the char t Number 1 “Sasha DAW Upper Module Spike Length” indicating the proper rear spike for this module eiGHt...
- Page 15 Note: Please ensure that you do not inver t the polarit y of the umbilicals in Refer to table labeled “Sasha DAW Upper Alignment Block Step” the Sasha DAW. Such an inversion will produce enter taining ambient ef- in Section 5. Using the numbers engraved on the side of the fec ts, but destroys the linearit y and harmonic struc ture of the system.
- Page 16 3 — F e C t I o n I n a l e t u P W i l s o n A u d i o S p e c i a l t i e s...
- Page 17 Screw the all-thread set screw into the diode until it meets the are attached to the bottom of Sasha DAW, the set up and fine tuning of your spike for your system. Make sure the allen head por tion of the Hread loudspeaker should be completed.
-
Page 18: Section 3.3-Removing The Protective Film
Place a level on the front to back oriented axis. If it is level, Ensure the speaker sur face is room temperature before remov- then Sasha DAW is level. If the Sasha DAW is leaning one way or ing the protective film. Removing the protective film when the the other, following the same process as above, lengthen the speaker sur face is cold can damage the paint sur face. - Page 19 The protective film should not be left on the painted sur face The Woofer Damping resistor affects the way the Sasha DAW ’s woofers for extended periods of time nor exposed to heat sources and couple to the amplifier.
- Page 20 4 — s e C t I o n P e C I F I C at I o n s W i l s o n A u d i o S p e c i a l t i e s...
-
Page 21: Section 4.1-Specifications
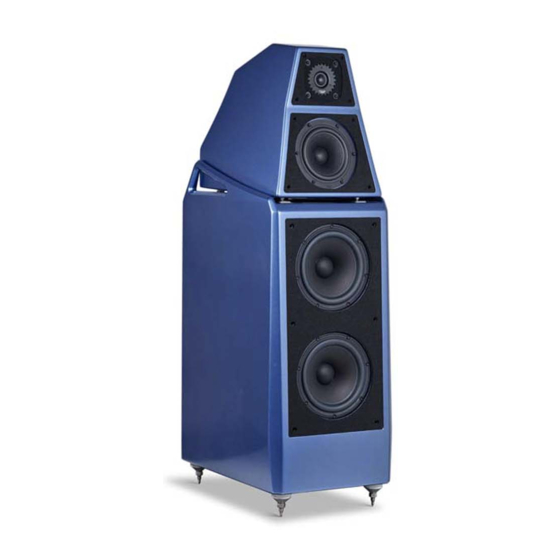
Overall Dimensions: Height – 44 3/4 inches (113.67 cm) Width – 14 1/2 inches (36.83 cm) Depth – 22 15/16inches (58.26 cm) Sasha DAW Weight Per Channel: 236 lbs (107.05 kg) System Shipping Weight (approx.): 710 lbs (322.05 kg) W i l s o n... - Page 22 5 — t e C t I o n I m e a l I G n m e n t h a r t s W i l s o n A u d i o S p e c i a l t i e s...
- Page 23 S a s h a DAW I n s ta l l at i o n a n d C a r e G u i d e i m e l i g n m e n t h A r t S Section 5—Propagation Delay Nomographs W i l s o n A u d i o...
- Page 24 6 — W e C t I o n a r r a n t y W i l s o n A u d i o S p e c i a l t i e s...
-
Page 25: Section 6-Warranty Details
Warranty Registration Form to Wilson Audio. Alternatively, the warranty may be filled out on-line. BY A WRIT TEN DESCRIPTION OF THE DEFEC T. Wilson Audio reser ves the right to modify the design of any product without obligation to purchasers of previously Requirement No. - Page 26 Wilson Audio within 30 days after product deliver y to customer and the the product, unless the product is purchased by the subsequent purchaser from...
- Page 27 S a s h a DAW I n s ta l l at i o n a n d C a r e G u i d e above limitations or exclusions may not apply to you. This Limited Warran- t y gives you specific legal rights, and you may also have other rights, which var y from state to state.
Need help?
Do you have a question about the Sasha DAW and is the answer not in the manual?
Questions and answers