Table of Contents
Advertisement
Quick Links
Advertisement
Table of Contents

Related Manuals for WILSON AUDIO WATT/Puppy


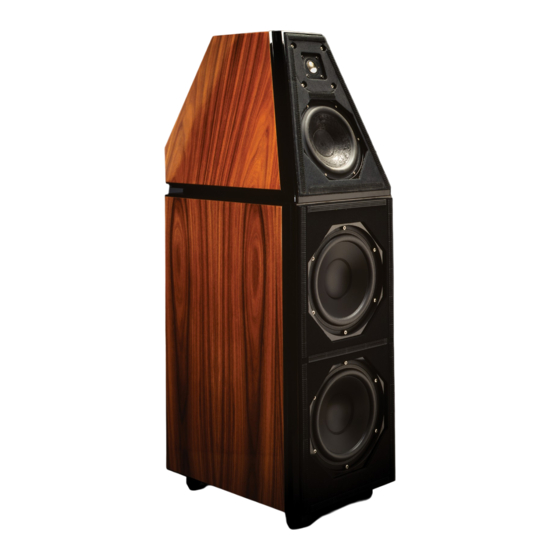
Summary of Contents for WILSON AUDIO WATT/Puppy
- Page 1 n s t a l l a t I o n a n d a r e u I d e...
- Page 2 D e a l e r s W i l s o n A u d i o ® i s a r e g i s t e r e d t r a d e m a r k o f W i l s o n A u d i o S p e c i a l t i e s , I n c . W i l s o n A u d i o ( S t y l i z e d ) ®...
- Page 3 Table of Con ten t s...
-
Page 4: Table Of Contents
WAT T/P u P P y n s TA l l AT I o n A n d A r e u I d e o n T e n T s 1 — WA s P s � � � � � � � � � � � � � � � � � � � � � � � � � � � � � � � � � � � � � � � � � � � � � � � � � � � � � 5 e C T I o n e T u P Z o n e o f N e u t r a l i t y : L e f t a n d R i g h t C h a n n e l �... - Page 5 A b l e o F o n T e n T s S e c t i o n 4 � 4 — R e s i s t o r s � � � � � � � � � � � � � � � � � � � � � � � � � � � � � � � � � � � � � � � � � � � � � � � � � � � � � � � � 3 1 5 —...
-
Page 7: Wa S P S
1—WA s P s e C T I o n e T u P W i l s o n A u d i o S p e c i a l t i e s... -
Page 8: Zone Of Neutrality: Left And Right Channel
A r e u I d e Section 1—WASP An instructional video outlining the Wilson Audio Setup Procedure ( WASP) can be found here: www.wilsonaudio.com/wasp The proper positioning of The WAT T/Puppy within your room is critical in order to extract its formidable per formance envelope. - Page 9 1 —WA s P e C T I o n to assist you during this process. Listen to how your voice “frees up” from the added bass energy impar ted by the rear wall boundar y. Also, notice that your voice is quite spatially diffuse (to your assistant, your voice will sound spatially large and difficult to localize) as you begin to ease away from the rear wall.
- Page 10 I d e When carefully followed, the WASP has proven to be the most effective method for setting up Wilson Audio loudspeakers. A u t h e n t i c E x c e l l e n c e...
- Page 11 Speaker Placement Versus Listening Position The location of your listening position is as impor tant as the careful setup of your Wilson Audio loudspeakers. A guideline, but not a fixed rule, is the listening position should ideally be no more than 1.1 to 1.25 times the distance between the tweeters on each speaker.
- Page 12 Adhering to the Wilson Audio Setup Procedure outlined in this section, and as shown in the instructional video we link to, is the best method with which to position your loudspeakers.
- Page 13 1 —WA s P e C T I o n W i l s o n A u d i o S p e c i a l t i e s...
-
Page 15: C T I O N
2—u WATT/ P e C T I o n n C r AT I n G u P P y W i l s o n A u d i o S p e c i a l t i e s... - Page 16 Section 2—Uncrating The WATT/Puppy Note: Please remove any jewelry such as rings, watches, necklaces, and bracelets along with covering belt buckles and zippers during this process to avoid damaging The WATT/Puppy’s painted surface. Initial Check The WAT T/Puppy is shipped in a total of two wooden crates (see page 12 for visual guide). Upon receiv- ing these crates, please check their condition.
- Page 17 2 — u WAT T/P e C T I o n n C r AT I n G u P P y One of the crates contains this Installation and Care Guide, the Tool Kit, and the Spike Kit (see page 16). Remove these and all other documents found in the crate and place in a safe, easy to retrieve location.
- Page 18 TA l l AT I o n A n d A r e u I d e You will be using tools/par ts in these kits throughout the installation process. Keep The WAT T/Puppy Tool Kit and Spike Kit at hand. The WATT/Puppy The WATT/Puppy Tool Kit Spike Kit...
- Page 19 2 — u WAT T/P e C T I o n n C r AT I n G u P P y W i l s o n A u d i o S p e c i a l t i e s...
-
Page 21: C T I O N 3 - A S S E M B L I N G T H E Wat T / P U P P Y
3—A WATT/P e C T I o n s s e m b l I n G u P P y W i l s o n A u d i o S p e c i a l t i e s... - Page 22 WAT T/P u P P y n s TA l l AT I o n A n d A r e u I d e Note: Before setting up The WAT T/Puppy, please carefully study Sec tion 1 and/or watch the WASP video linked in the same sec tion.
- Page 23 For each distance/ear height combination there is a custom alignment geometr y. To make correct in-home setup of The WAT T/Puppy possible without test equipment, Wilson Audio has provided the correct geometric time domain alignment for different distance/ear height combina- tions.
- Page 24 WAT T/P u P P y n s TA l l AT I o n A n d A r e u I d e Determine the alignment of the WAT T as follows. Repeat each step of this proce - dure on the left and right channels simultaneously.
-
Page 25: S E C T I O N 3 � 3 - M O U N T I N G T H E W A T
3 � 3 — m WAT T e C T I o n o u n T I n G T h e Refer to the Time Alignment Char t (see Section 6) and locate the corresponding ear height and listening distance for the char t. Make a mark on the char t labeled “... -
Page 26: S E C T I O N 3 � 4 - U M B I L I C A L C O N N E C T I O N
WAT T/P u P P y n s TA l l AT I o n A n d A r e u I d e Section 3.4—Umbilical Connections The correct connection of the two umbilicals to the WAT T is as follows: Locate the binding post labeled “MID FREQUENCY.”... - Page 27 3 � 4 — u e C T I o n m b I l I C A l o n n e C T I o n s Note: Please ensure that you do not inver t the polarit y of the umbilicals or Adjustable Spike connec t the cables to the wrong binding posts on The WAT T/Puppy.
-
Page 29: C T I O N I N A L E T U P
4—F e C T I o n I n A l e T u P W i l s o n A u d i o S p e c i a l t i e s... -
Page 30: S E C T I O N 4 � 1 - S P I K I N G T H E W A T T / P U P P
I d e Section 4.1—Spiking The WATT/Puppy Your Dealer is trained in the ar t and science of the Wilson Audio Setup Procedure (WASP) outlined in Sec tion 1. Before the Spike & Diode assemblies are attached to the bottom of The WAT T/Puppy, the setup and S et- Scre w fine tuning of your loudspeaker should be completed. - Page 31 Note: This is a t wo person job. Do not attempt this by yourself. The WAT T/Puppy is heav y and may seriously injure someone if tipped over. An assistant should stand to the rear of The WAT T/ Puppy to steady it. Using the Wilson Audio Jack is recommended and simplifies this process. Installation Procedure Take care to mark the exact location of The WAT T/Puppys with masking tape to en- sure the speakers can be returned to their exact setup position.
-
Page 32: S E C T I O N 4 � 2 - L E V E L I N G T H E W A T T / P U P P
If previously removed, re -install the WAT T atop the Puppy. Section 4.2—Leveling The WATT/Puppy The WAT T/Puppy comes equipped with a built-in bubble level found on the top of the Puppy. Look at that bubble level and determine if The WAT T/Puppy is level or which side of the enclosure is lower than the rest making the enclosure uneven. -
Page 33: S E C T I O N 4 � 3 - R E M O V I N G T H E P R O T E C T I V E F I L
4 � 3 — r e C T I o n e m o v I n G T h e r o T e C T I v e I l m Section 4.3—Removing the Protective Film To protect the finish of The WAT T/Puppy during manufacturing, shipment, and setup in your listen- ing room, we have applied a removable layer of protective film over the paint finish. - Page 34 A r e u I d e Note: Only Wilson Audio replacement resistors should be used in The WAT T/ Puppy. Changing the value or brand of resistor will have a potentially negative ef fec t on the sonic per formance of your loudspeakers and can void your Warrant y.
- Page 35 4.8 ohm Resistor 2.1 ohm Resistor Note: These specialized resistors can be ordered from your Authorized Wilson Audio Dealer or on the Wilson Audio Online Store. Only use Wilson Audio replacement resistors in The WAT T/Puppy. Note: If you notice the sonic qualities of your system degraded or worsen, you may have resistors that are damaged.
-
Page 37: P E C I F I C At I O N S
5— s e C T I o n P e C I F I C AT I o n s W i l s o n A u d i o S p e c i a l t i e s... -
Page 38: S E C T I O N 5 � 1 - S P E C I F I C A T I O N
WAT T/P u P P y n s TA l l AT I o n A n d A r e u I d e Section 5.1—Specifications Enclosure Type Woofer: Rear Por ted Enclosure Type Midrange: Rear Vented Enclosure Type Tweeter: Sealed Two—8 inches (20.32 cm) Paper Pulp Woofers:... -
Page 39: S E C T I O N 5 � 2 - G R A P H I C A L D I M E N S I O N
I m e n s I o n s Section 5.2—Graphical Dimensions THE INFORMATION CONTAINED IN THIS DRAWING IS THE SOLE PROPERTY OF REV. DESCR WILSON AUDIO SPECIALTIES. ANY REPRODUCTION IN PART OR WHOLE WITHOUT THE WRITTEN PERMISSION OF WILSON AUDIO SPECIALTIES IS PROHIBITED. 43.807in 111.27cm Variable 41.338in... -
Page 40: S E C T I O N 5 � 3 - T H E W A T T / P U P P Y P H A S E C U R V
TA l l AT I o n A n d A r e u I d e Section 5.3 —The WATT/Puppy Phase Curve A u t h e n t i c E x c e l l e n c e... -
Page 41: S E C T I O N 5 � 4 - T H E W A T T / P U P P Y I M P E D A N C E C U R V
P e d A n C e u r v e Minimum 2.87 ohms @ 86 Hz Section 5.4—The WATT/Puppy Impedance Curve W i l s o n A u d i o S p e c i a l t i e s... -
Page 43: C T I O N 6 - T I M E
6 —T e C T I o n I m e l I G n m e n T h A r T W i l s o n A u d i o S p e c i a l t i e s... - Page 44 WAT T/P u P P y n s TA l l AT I o n A n d A r e u I d e Section 6—Time Alignment Chart The WATT/Puppy Spike Position Listening Distance Ear Height ▼ ▼ ▼...
- Page 45 WAT T r e A r P I k e e n G T h Reading the Time Alignment Chart Symbols Numbers can be found in the spaces between the threads on the WAT T adjustable spike. Visual exam- ples of how to read the symbols found on the Time Alignment Char t can be found in the drawings below. Make sure both WAT Ts are angled and lifted by their adjustable spike exactly the same for best results.
- Page 46 WATT/Puppy Evolution WATT Series 1 WATT/Puppy Series 5.1 WATT/Puppy Series 8 The WATT/Puppy...
- Page 47 7—W e C T I o n A r r A n T y W i l s o n A u d i o S p e c i a l t i e s...
-
Page 48: W A R R A N T Y
1(801) 377-2233 for information on location of Wilson Audio Dealers and authorized ser vice and repair centers. Most repairs can be made in the field. In instances where return to Wilson Audio’s factor y is required, the Dealer or customer must first obtain a re - be made in the field. -
Page 49: T A I L
Wilson Audio by the Dealer at Dealer ’s sole expense. Wilson Audio will pay return freight of its choice. A returned product must be accompanied by a written at Dealer ’s sole expense. - Page 50 • New Grilles and Diffraction Blankets • WilsonGloss Care Products and Kits • Wilson Audio Signature Apparel • Upgrade Spikes and Binding Posts • . . . And More Visit our Ser vice Channel on YouTube to view How-To videos...
- Page 51 W i l s o n A u d i o S p e c i a l t i e s...
- Page 52 w w w . W i l s o n a u d i o . c o m W i l s o n Au d i o 2 2 3 3 M o u n ta i n V i s ta L a n e P r o v o, U ta h 8 4 6 0 6 U n i t e d S tat e s o f A m e r i c a...
Need help?
Do you have a question about the WATT/Puppy and is the answer not in the manual?
Questions and answers