Advertisement
Quick Links
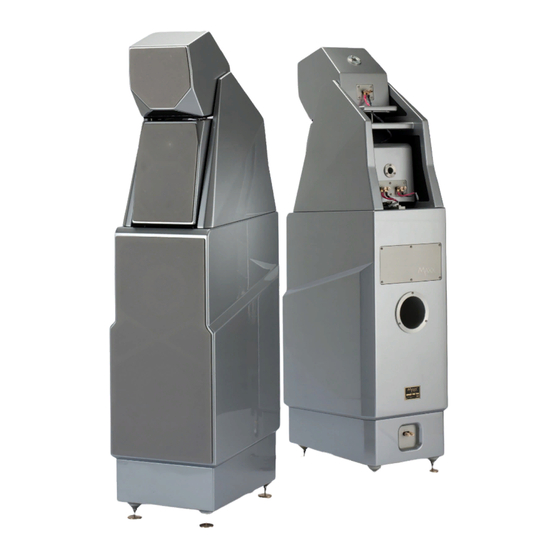
Advertisement

Related Manuals for WILSON AUDIO Maxx Series 3


Summary of Contents for WILSON AUDIO Maxx Series 3
- Page 1 M A X X S e r i e s 3 O w n e r ’ s M a n u a l...
- Page 2 M A X X S ’ e r i e S w n e r A n u A l W i l s o n A u d i o ® i s a r e g i s t e r e d t r a d e m a r k o f W i l s o n A u d i o S p e c i a l t i e s , I n c . C u b ®...
- Page 3 A b l e O f O n T e n T S C o n t e n t s M A X X S ’ � � � � � � � � � � � � � � � � � � � � � � � � � � � � � � � � � � � � � � � � 1 e r i e S w n e r A n u A l...
- Page 4 M A X X S ’ e r i e S w n e r A n u A l � � � � � � � � � � � � � � � � � � � � � � � � � � � � � � � � 3 2 n c r A t i n g t h e o o F e r o d u l e s...
- Page 5 A b l e O f O n T e n T S m A X X � � � � � � � � � � � � � � � � � � � � � � � � � � � � � � � � � � � � � � � � � � � � � � � 5 1 e V e l i n g t h e 4 �...
- Page 6 M A X X S ’ e r i e S w n e r A n u A l � � � � � � � � � � � � � � � � � � � � � � � � � � � � � � � � � � � � � � � � � � � � � � � � � 7 9 i m i t e d A r r A n t y �...
- Page 7 S e c t i o n 1 – I n t r o d u c t i o n...
- Page 8 M A X X S ’ e r i e S w n e r A n u A l W i l s o n A u d i o S p e c i a l t i e s...
- Page 9 Section 1.1 – Introduction ® From all of us at Wilson Audio Specialties — thank you for purchasing the MAXX Series 3 loudspeaker. The information contained within the pages of this manual will inform and instruct on the proper assembly, set up, and long term care of your MAXX Series 3s.
- Page 10 M A X X S ’ e r i e S w n e r A n u A l • New crossovers. Applying new technology adapted from the Series 2 Alexandria. Further work in reducing propagation delay jitter has lowered the noise floor and has increased overall resolution, par- ticularly in the time between transients.
- Page 11 1 . 1 – i e C T i O n n T r O d u C T i O n that allow the individual adjustment of the drivers in the time domain. Using this tech- nology, each driver’s waveform propagation “matches up” with the other drivers in the system in such a way as to create the sonic equivalent of a single point source.
- Page 12 With MAXX Series 3, you and others you listen with, will hear your favorite record- ings and soundtracks with true time coherency, full frequency range, unfettered dynam- ics, and vanishingly low distortion.
- Page 13 S e c t i o n 2 – I n Y o u r R o o m...
- Page 14 M A X X S ’ e r i e S w n e r A n u A l W i l s o n A u d i o S p e c i a l t i e s...
- Page 15 Final Listening Room Setup (Voicing) For a speaker system its size, the MAXX Series 3 is unmatched in its ability to repro- duce the musical event. It is truly state-of-the-art. However, room acoustics and bound- ary interactions affect the sound of a loudspeaker to such a large degree that poor setup can seriously degrade your enjoyment of even the finest loudspeaker.
- Page 16 M A X X S ’ e r i e S w n e r A n u A l cause of your proximity to the rear wall. While speaking, slowly move out into the room, progressing in a direction parallel to and at least two and half feet from the nearest sidewall.
- Page 17 2 . 2 – r e C T i O n O O M e f l e C T i O n S the opposite sidewall, progressing between the two pieces of tape. As above, listen for the point in the room where your voice transi- tions from bass-heavy and diffuse to neutral.
- Page 18 M A X X S ’ e r i e S w n e r A n u A l Slap Echo Probably the most obnoxious form of reflection is called “slap echo.” With slap- echo, primarily midrange and high frequency sounds reflect off of two parallel hard sur- faces.
- Page 19 2 . 2 – r e C T i O n O O M e f l e C T i O n S an accurate soundstage. Slap echo (see Figure 3) is a common acoustical problem in the typical domestic lis- tening room because most of these rooms have walls with a hard, reflective nature, only occasionally interrupted by curtains, wall art, or drapes.
- Page 20 M A X X S ’ e r i e S w n e r A n u A l room as much. Placed properly, diffusers create a smoother and more open sound. Some diffusers, due to their construction, create narrow midrange peaks and suck-out the warmth region. Do not use diffusers on the wall behind the speakers or on the sidewalls directly beside the speakers.
- Page 21 2 . 2 – r e C T i O n O O M e f l e C T i O n S ous low frequency accentuation usually requires a custom-designed bass trap system. Low frequency standing waves can be particularly troublesome in rooms construct- ed of concrete or brick.
- Page 22 M A X X S ’ e r i e S w n e r A n u A l • Smearing of lateral soundstage image focus and placement Comb filter effects are often caused by floor or ceiling reflection and sometimes side wall reflections. They are best controlled by very careful speaker placement and by ®...
- Page 23 2 . 4 – Y e C T i O n O u r O O M Volume Resonance The physical dimensions and volume of air in a room will also support standing wave modes and resonances at frequencies determined by the size of that room. Larger rooms will resonate at a lower frequency and have more complex (better) modal distri- butions than will smaller rooms. Volume resonances, wall panel resonances, and low frequency standing waves combine to form a low frequency coloration in the sound.
- Page 24 M A X X S ’ e r i e S w n e r A n u A l diminishing the listening experi- ence. Long, narrow, rectangu- lar rooms also pose their own special acoustical problems for speaker setup. They have the ability to create several stand- ing wave nodes, which will have different standing wave frequen-...
- Page 25 The asymmetry of the walls in L-shaped rooms resists the buildup of standing waves (see Figure 4). MAXX Series 3 in a Dedicated Home Theater Home theaters can be organized many different ways. Some use rows of couches. Others use rows of multiple chairs.
- Page 26 14” from a room boundary will diminish the sonic results of your listening. Decide where you want your favorite listening position to be. Please remember that your MAXX Series 3 will fill almost any room with the most beautiful sound available. Because the propagation delay is adjustable on the MAXXs, if you take care in placing your new speakers, you will optimize MAXX’s performance in your room.
- Page 27 In summary, for optimal tonal balance accuracy, resolution of low level detail, and soundstaging performance, the MAXX Series 3 should be positioned as outlined in this section. Ideally, the speakers should not be positioned too far from the listener if maximum resolution of low-level detail is required.
- Page 28 M A X X S ’ e r i e S w n e r A n u A l W i l s o n A u d i o S p e c i a l t i e s...
- Page 29 S e c t i o n 3 – U n c r a t i n g t h e M A X X...
- Page 30 M A X X S ’ e r i e S w n e r A n u A l W i l s o n A u d i o S p e c i a l t i e s...
- Page 31 Note: In order to realize the capabilities of the MAXX, we strongly recommend that you have it installed by a trained Wilson Audio installer. Your dealer will have a per- son trained in the art of the MAXX installation, including the safe method to unpack your loudspeakers.
- Page 32 M A X X S ’ e r i e S w n e r A n u A l Uncrating the Woofer Modules A minimum of two strong adults is required to set up the system. Locate the two largest crates labeled “Woofer Module.”...
- Page 33 3 . 1 – u M A X X e C T i O n n C r A T i n g T h e maining modules to avoid chipping the finish. Stage these items away from traffic flow, preferably against a wall with drivers facing the wall.
- Page 34 M A X X S ’ e r i e S w n e r A n u A l 3/8” Allen wrench 1/8” Allen wrench 3/32” Allen wrench 8 - “A” spikes 2 - “B” spikes 2 - “C” spikes 2 - “D”...
- Page 35 S e c t i o n 4 – A s s e m b l y...
- Page 36 M A X X S ’ e r i e S w n e r A n u A l W i l s o n A u d i o S p e c i a l t i e s...
- Page 37 In order to realize the capabilities of the MAXX, we strongly recommend that you have it installed by a trained Wilson Audio installer. Your dealer will have a person trained in the art of the MAXX installation. If you choose to do this installation yourself, here are some guidelines to assist you.
- Page 38 Section 4.2 – Geometric Time Domain Alignment Materials Required • Tape measure • Known listening position (see Section 2) • MAXX Propagation delay Alignment Tables from Section 8 Propagation delay Alignment Propagation delay alignment accuracy of the MAXX has been established and veri- fied by Wilson Audio. The graphs and charts used in this section are a result of this test- ing. eighT easured From loor isTening isTance...
- Page 39 To make correct in-home set up of the MAXX possible without test equipment, Wilson Audio has measured the correct geometric time domain alignment for different distance/ear height combinations. This information is provided in the Propagation de- lay Tables in Section 8. By measuring the ear...
- Page 40 M A X X S ’ e r i e S w n e r A n u A l on the front to back alignment of the lower module. This position is designated by the engraved num- bers in the Alignment Block mount- ing plate. Position by aligning the rear of the Alignment Block to the number indicated in the chart.
- Page 41 4 . 2 – g e C T i O n e O M e T r i C i M e O M A i n l i g n M e n T Remove the Propagation Delay Tables from Section 8 in this book- let and place them close by for easy reference. Make sure that you are in your intended listening position.
- Page 42 M A X X S ’ e r i e S w n e r A n u A l Module Block Step” table indicating the step on which the rear spike the lower module will rest. Set this information aside as you will refer to it in the next section.
- Page 43 4 . 3 – M e C T i O n O u n T i n g T h e O w e r w e e T e r i d r A n g e O d u l e Section 4.3 –...
- Page 44 M A X X S ’ e r i e S w n e r A n u A l Midrange Module Spike Length table and install (if necessary) the appropriate Propagation Delay Spike in the rear of the Lower Tweet- er/Midrange Module. • Refer to the table number 2, the Lower Tweeter/Midrange Module Block Position table. Using the rear edge of the Alignment Block as the guide, align the block to the proper front-to-back setting for this module (see Figure 9).
- Page 45 Section 4.5 – Connecting Upper Modules’ Signal Cable The MAXX uses binding posts that were designed in-house and are manufactured exclusively for Wilson Audio. The design goal was to create a connector with superior overall sound quality, consistency, and longevity.
- Page 46 M A X X S ’ e r i e S w n e r A n u A l • Locate the cable marked “Lower Mid,” and connect this cable to the Lower Tweeter/Midrange Module’s binding post, which is on the left side (see Figure 12).
- Page 47 MAXX on your own, before spiking your MAXX, refer to Sec- tion 2.1 which contains instruction on the Wilson Audio Setup Procedure (WASP). W i l s o n A u d i o S p e c i a l t i e s...
- Page 48 M A X X S ’ e r i e S w n e r A n u A l 14 - MAXX S igure pike And iOde SSeMblY Spike Assembly • Remove the mechanical diodes and move the nut to about two threads from the point. This will allow for greater movement when leveling the loudspeaker system.
- Page 49 4 . 8 – u e C T i O n S i n g T h e i f T T O n S T A l l p i k e S have to remove your MAXX spikes, you will be able to withdraw the set screw safely using the supplied Allen wrench.
- Page 50 M A X X S ’ e r i e S w n e r A n u A l Note: An assistant should stand to the rear of the MAXX to steady it. • Attach the wrench to the lift bolt and begin to slowly raise the front of the MAXX by turning the bolt clockwise. • After the front of the MAXX is high enough (you will need approxi- mately one and half inches of clearance beneath the caster), use the swivel caster wrench to loosen the casters.
- Page 51 4 . 8 – u e C T i O n S i n g T h e i f T T O n S T A l l p i k e S Note: The spike will go into a different hole than the caster. • With one person stabilizing the MAXX, lower the MAXX by turning the jack counterclockwise. Note that the MAXX will now sit lower in the front as the spike assembly is shorter than the caster.
- Page 52 (see Figure 17). These resistors serve several functions. Note: Only Wilson Audio replacement resistors should be used in your MAXXs. Chang- ing the value or brand of resistor will have a deleterious affect on the sonic perfor- mance of your loudspeakers and may void your Wilson Audio Warranty.
- Page 53 All audio equipment will sound its best after its components have been broken in for some period of use. Wilson Audio breaks in all woofers and mid-range drivers for a 12 hour period. All drivers are then tested, calibrated, and matched for their acoustical properties.
- Page 54 M A X X S ’ e r i e S w n e r A n u A l W i l s o n A u d i o S p e c i a l t i e s...
- Page 55 S e c t i o n 5 – C a r e o f M A X X...
- Page 56 M A X X S ’ e r i e S w n e r A n u A l W i l s o n A u d i o S p e c i a l t i e s...
- Page 57 A i n T e d i n i S h Section 5.1 – Care of the Painted Finish Your MAXX Series 3 loudspeakers are hand painted with WilsonGloss™ paint and hand polished to a high luster. While the finish seems quite dry to the touch, fi- nal curing and complete hardening takes place over a period of several weeks.
- Page 58 M A X X S ’ e r i e S w n e r A n u A l • Dust the finish, using linear motions in one direction parallel to the floor. Avoid using circular or vertical motions. Because the paint requires a period of several weeks to fully cure, we recommend that no cleaning fluids, such as glass cleaners, be used during this initial period of time.
- Page 59 In the construction of the MAXX Series 3, Wilson Audio uses two types of composites dubbed “X” material and “M” material. These strategic combina- tions of X and M materials are used in the two midrange modules, resulting in the most inert enclosures yet produced.
- Page 60 The MAXX’s performance is repeatable and is unaf- fected by different climatic conditions throughout the world. The MAXX Series 3 rede- fines the boundaries of what is possible in enclosure design.
- Page 61 S e c t i o n 6 – T r o u b l e s h o o t i n g...
- Page 62 M A X X S ’ e r i e S w n e r A n u A l W i l s o n A u d i o S p e c i a l t i e s...
- Page 63 6 . 1 – T e C T i O n r O u b l e S h O O T i n g Section 6.1 – Troubleshooting One channel is not operating: C h e c k t h e i n t e r c o n n e c t s f r o m s o u r c e . C h e c k t h e c o n n e c t i o n s o n t h e s p e a k - e r c a b l e s , b o t h a t t h e a m p l i f i e r a n d s p e a k e r...
- Page 64 M A X X S ’ e r i e S w n e r A n u A l p r i a t e r e s i s t o r . L o o s e n t h e b i n d i n g p o s t a n d r e m o v e t h e A l l e n b o l t a t -...
- Page 65 6 . 1 – T e C T i O n r O u b l e S h O O T i n g o r t h e s p e a k e r ’s i n t e r n a l w i r i n g . If the problem persists: C o n t i n u e t o t h e n e x t s t e p .
- Page 66 W i l s o n A u d i o S p e c i a l t i e s...
- Page 67 S e c t i o n 7 – S y s t e m S p e c i f i c a t i o n s...
- Page 68 M A X X S ’ e r i e S w n e r A n u A l W i l s o n A u d i o S p e c i a l t i e s...
- Page 69 7 . 1 – S e C T i O n p e C i f i C A T i O n S Section 7.1 – Specifications: Enclosure Type: Woofer: Rear Ported Upper Midrange: Rear Ported Tweeter/Lower Midrange: Rear Ported (Sealed Tweeter Drive Unit) Drivers: Woofers: One –...
- Page 70 M A X X S ’ e r i e S w n e r A n u A l Section 7.2 – MAXX Dimensions - 26 igure W i l s o n A u d i o S p e c i a l t i e s...
- Page 71 S e c t i o n 8 – P r o p a g a t i o n d e l a y T a b l e s...
- Page 72 M A X X S ’ e r i e S w n e r A n u A l W i l s o n A u d i o S p e c i a l t i e s...
- Page 73 8 – p e C T i O n r O p A g A T i O n d e l A Y A b l e S Number 1: Lower Tweeter/Midrange Module Spike Length Listening Distance Ear Height No Spike No Spike No Spike No Spike No Spike No Spike No Spike No Spike No Spike No Spike No Spike No Spike No Spike No Spike No Spike No Spike No Spike No Spike No Spike No Spike No Spike No Spike No Spike No Spike No Spike No Spike No Spike No Spike No Spike No Spike No Spike No Spike No Spike No Spike...
- Page 74 M A X X S ’ e r i e S w n e r A n u A l Number 3: Lower Tweeter/Midrange Module Block Step Listening Distance Ear Height W i l s o n A u d i o S p e c i a l t i e s...
- Page 75 4 : u u M b e r p p e r i d r A n g e O d u l e p i k e e n g T h Number 4: Upper Midrange Module Spike Length Listening Distance Ear Height Number 5: Upper Midrange Module Spike Detent Location...
- Page 76 M A X X S ’ e r i e S w n e r A n u A l W i l s o n A u d i o S p e c i a l t i e s...
- Page 77 S e c t i o n 9 – Wa r r a n t y S e c t i o n...
- Page 78 M A X X S ’ e r i e S w n e r A n u A l W i l s o n A u d i o S p e c i a l t i e s...
- Page 79 Wilson Audio, an authorized Wilson Audio Dealer Technician or a service or repair center authorized by Wilson Audio to service or repair the product. Contact Wilson Audio at (801) 377-2233 for information on location of Wilson Audio Dealers and authorized service and repair centers.
- Page 80 In instances where return to Wilson Audio’s factory is required, the dealer or customer must first obtain a return authorization. Purchaser must pay for shipping to Wilson Audio, and Wilson Audio will pay for shipping of its choice to return the product to purchaser. A RETURNED PRODUCT MUST BE ACCOMPANIED BY A WRITTEN DESCRIPTION OF THE DEFECT.
- Page 81 Wilson Audio by the dealer at dealer’s sole expense. Wilson Audio will pay return freight of its choice. A returned product must be accompanied by a written description of the defect.
- Page 82 M A X X S ’ e r i e S w n e r A n u A l W i l s o n A u d i o S p e c i a l t i e s...
Need help?
Do you have a question about the Maxx Series 3 and is the answer not in the manual?
Questions and answers