Table of Contents
Advertisement
Advertisement
Table of Contents

Related Manuals for Kenwood KDC-X7006


Summary of Contents for Kenwood KDC-X7006
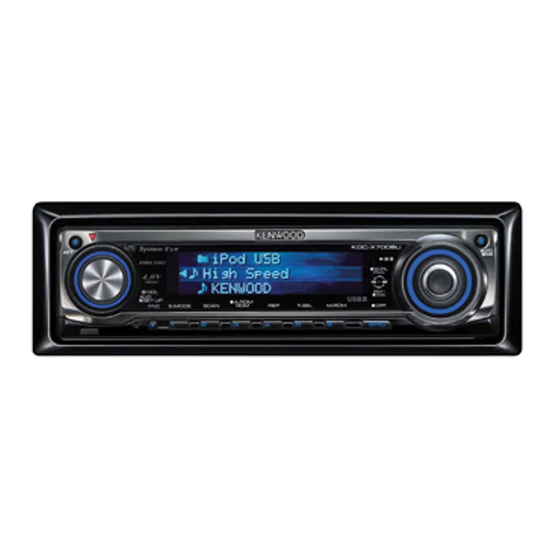
- Page 1 CD-RECEIVER KDC-X7006U KDC-X7006 INSTRUCTION MANUAL © B64-3627-00/00 (MW)
-
Page 2: Table Of Contents
Contents Safety precautions Notes General features Power Selecting the Source Volume Attenuator Audio Control Adjusting the detail of Audio Control Audio Setup Speaker Setting Subwoofer Output TEL Mute Function Control mode Display Type Selection Status Setting Graphic Display Selection Text Display Selection—Display Type B&E— Text Display Selection—... -
Page 3: Safety Precautions
Kenwood disc changers/ CD players released in 1998 or later can be connected to this unit. Refer to the catalog or consult your Kenwood dealer for connectable models of disc changers/ CD players. Note that any Kenwood disc changers/ CD players released in 1997 or earlier and disc changers made by other makers cannot be connected to this unit. -
Page 4: Notes
• If you experience problems during installation, consult your Kenwood dealer. • When you purchase optional accessories, check with your Kenwood dealer to make sure that they work with your model and in your area. • The characters conforming to ISO 8859-1 character set can be displayed. - Page 5 An online manual about audio files is put on the site, www.kenwood.com/audiofile/. On this online manual, detailed information and notes which are not written in this manual are provided. Make sure to read through the online manual as well. ⁄...
-
Page 6: General Features
General features ATT VOL Release button Power Turning ON the Power Press the [SRC] button. ⁄ • When the power is ON, the <Security Code> (page 25) is displayed as "CODE ON" or "CODE OFF". Turning OFF the Power Press the [SRC] button for at least 1 second. English Control knob ATT indicator... -
Page 7: Volume
⁄ • * Function of KDC-X7006U. • When connection of the iPod is recognized, the source display changes from "USB" to "iPod". • Switch between SRC Select mode 1 and 2 in <Source Select Mode> (page 25). • USB (iPod) source is recognized as CD source on the connected unit. -
Page 8: Adjusting The Detail Of Audio Control
General features Adjusting the detail of Audio Control Among the Basic Audio items, you can adjust the Bass level, Middle level, and Treble level in detail. Select the Basic Audio item Select the desired item to be set in detail from followings;... -
Page 9: Speaker Setting
Speaker Setting Fine-tuning so that the System Q value is optimal when setting the speaker type. Enter Standby Press the [SRC] button. Select the "STANDBY" display. Refer to <Selecting the Source> (page 6). Enter Speaker Setting mode Press the [VOL] knob. "SP SEL"... -
Page 10: Function Control Mode
General features Function Control mode To set up various functions of this unit, select tree- structured function items. Enter Function Control mode Press the [FNC] button. Select your desired setup item Select a setup item using the Control knob. Operation type Operation Movement between Turn the Control knob. -
Page 11: Graphic Display Selection
⁄ • To change the information by the Display Type, refer to the page on the following table for the methods to alternate by the Display Type. Display Type Graphic 1 Status 2 Text 3 — Upper 4 — — Middle 5 —... -
Page 12: Text Display Selection-Display Type B&E
• In the upper text display part, alternate information is displayed when display without information is selected. • In the middle text display part, the Kenwood logo is displayed if the contents of the information cannot be displayed. -
Page 13: The Text Display
Blank "Blank" In Auxiliary input source Information Auxiliary input name Spectrum Analyzer & Clock Condition Clock Clock Date Blank 34567 Function of KDC-X7006U. 34567 Function of KDC-X7006. Condition 34567 34567 34567 34567 34567 Condition 34567 34567 34567 34567 34567 34567... -
Page 14: Station/Disc Naming (Snps/Dnps)
Name Set mode closes. • Memory numbers - FM/AM: 30 stations - Internal CD player: 10 discs - External CD changer/ player: Varies according to the CD changer/ player. Refer to the CD changer/ player manual. -
Page 15: Theft Deterrent Faceplate
Theft Deterrent Faceplate The faceplate of the unit can be detached and taken with you, helping to deter theft. Removing the Faceplate Press the Release button. Drop open the faceplate. Drawing the faceplate to left side pull it to forward and remove it. ¤... -
Page 16: Tuner/Tv Control Features
Tuner/TV control features Tuning Selecting the station. Select tuner source Press the [SRC] button. Select the "TUNER" display. Refer to <Selecting the Source> (page 6). Select the band Push the Control knob towards [FM] or [AM]. Each time you push the knob toward [FM], it switches between the FM1, FM2, and FM3 bands. -
Page 17: Station Preset Memory
Enter the frequency Press the number buttons on the remote control. Example: Desired frequency Press button 92.1 MHz (FM) [0], [9], [2], [1] 810 kHz (AM) [0], [8], [1], [0] Cancelling Direct Access Tuning Press the [DIRECT] button on the remote control. -
Page 18: Tv Tuning
Tuner/TV control features Function of LX BUS Television TV Tuning Selecting the TV channel of a connected LX BUS Television (optional accessory). The action depends on the setting of the connected LX BUS Television. Refer to the user instruction of the LX BUS Television for details. -
Page 19: Cd/Usb Device/Audio File/External Disc Control Features
CD/USB device/Audio file/External disc control features Release button IN indicator Playing CD & Audio file When there is no disc inserted Drop open the faceplate Press the Release button. Insert a disc. Push the faceplate on the left side, and return it to its former position. -
Page 20: Playing Usb (Ipod) Device
In this case, "RESUMING" is displayed without displaying a folder name, etc. Changing the browse item will display a correct title, etc. • When the iPod is connected to this unit, "KENWOOD" or "✓" is displayed on the iPod to indicate that you cannot operate the iPod. -
Page 21: Playing External Disc
⁄ • There is no sound while the Audio file is being searched. • You cannot fast Forwarding and Reversing while AAC file is being played. (KDC-X7006) Music Search Switching between music contained in the disc or folder being played now. -
Page 22: Play Function Of Cd And Audio File
Return to first item Push the Control knob towards left for at least 1 second. Function of KDC-X7006U. Function of KDC-X7006. The "2" or "3" symbol shown beside the displayed item indicates that the item is preceded or followed by another item. -
Page 23: Text/Title Scroll
Text/Title Scroll Scrolling the displayed CD text, Audio file text, or MD title. Push the Control knob toward up for at least 2 seconds. ⁄ • When the <Display Illumination Control> (page 27) is set to OFF, the display may black out while scrolling. English... -
Page 24: English
Menu system Menu System Setting beep sound during operation, etc. functions. The Menu system basic operation method is explained here. The reference for the Menu items and their setting content is after this operation explanation. Enter Menu mode Using the Control knob, select "MENU". For the operation method, refer to <Function Control mode>... -
Page 25: Security Code
In Standby mode Security Code Activating the Security Code disables the usage of audio unit by someone else. Once the Security Code is activated, the entry of authorized Security Code is required to turn on the audio unit when it is removed from the vehicle. -
Page 26: Touch Sensor Tone
Menu system In Standby mode Touch Sensor Tone Setting the operation check sound (beep sound) ON/OFF. Display Setting "Beep : ON" Beep is heard. "Beep : OFF" Beep canceled. In Standby mode Manual Clock Adjustment Select Clock Adjustment mode Turn the Control knob. Select the "Clock Adjust"... -
Page 27: Dsi (Disabled System Indicator)
In Standby mode DSI (Disabled System Indicator) A red indicator will blink on the unit after the faceplate is removed, warning potential thieves. Display Setting "DSI : ON" LED flashes. "DSI : OFF" LED OFF. Display Illumination Control This function turns off the display when you perform no operation for 5 seconds. -
Page 28: Bass Management System)
Menu system Other than Standby mode B.M.S. (Bass Management System) Adjust the bass boost level of the external amplifier using the main unit. Display Setting "AMP Bass : Flat" Bass boost level is flat. "AMP Bass : +6" Bass boost level is low (+6dB). "AMP Bass : +12"... -
Page 29: Auxiliary Input Display Setting & Station/Disc
Auxiliary Input Display Setting & Station/Disc Naming Selecting the display when changing to Auxiliary input source. For the Station/Disc Naming refer to the <Station/Disc Naming (SNPS/DNPS)> (page 14). Select Auxiliary input source Press the [SRC] button. Select the "AUX"/"AUX EXT" display. Refer to <Selecting the Source>... -
Page 30: Audio Preset Memory
Menu system Other than Standby mode Audio Preset Memory Registering the value setup by Sound Control. The memory cannot be erased by the Reset button. Setup Sound Control Refer to the following operations to setup the Sound Control. - <Audio Control> (page 7) - <Audio Setup>... -
Page 31: Basic Operations Of Remote Control
Basic operations [VOL] buttons [SRC] button [ATT] button DIRECT : This button is used when Kenwood Bluetooth HANDS FREE BOX is connected. For more information, refer to the instruction manual of Bluetooth HANDS FREE BOX. Adjusts the volume. Each time you press the button, the source alternates. -
Page 32: Dual Zone System
Basic Operations of remote control Audio Control [AUD] button Selects the Audio item to be adjusted. [VOL] buttons Adjusts the Audio item. ⁄ • Refer to <Audio Control> (page 7) for the operation method, such as the procedures for Audio control and others operations. -
Page 33: Accessories/ Installation Procedure
Accessories/ Installation Procedure Accessories Installation Procedure 1. To prevent a short circuit, remove the key from the ignition and disconnect the - battery. 2. Make the proper input and output wire connections for each unit. 3. Connect the speaker wires of the wiring harness. 4. -
Page 34: Connecting Wires To Terminals
Connect to the terminal that is grounded when either the telephone rings or during conversation. MUTE To connect the Kenwood navigation system, consult your navigation manual. To car light control switch ILLUMI To "EXT.AMP.CONT. -
Page 35: Installation
Installation non-Japanese cars Metal mounting strap (commercially available) Firewall or metal support Bend the tabs of the mounting sleeve with a screwdriver or similar utensil and attach it in place. Self-tapping screw (commercially available) Screw (M4X8) (commercially available) ⁄ • Make sure that the unit is installed securely in place. If the unit is unstable, it may malfunction (for example, the sound may skip). -
Page 36: Removing The Unit
Installation Removing the hard rubber frame Engage the catch pins on the removal tool and remove the two locks on the upper level. Upper the frame and pull it forward as shown in the figure. Accessory2 Removal tool When the upper level is removed, remove the lower two locations. -
Page 37: Troubleshooting Guide
Troubleshooting Guide Some functions of this unit may be disabled by some settings made on this unit. Cannot switch to Aux source. • AUX is not turned on. ☞ <Built-in Auxiliary input Setting> (page 29) • AUX cannot be used when the KCA-iP200 is connected. - Page 38 • The file system of the connected USB device is broken. ➪ Copy the files and folders for the USB device again referring to http://www. kenwood.com/usb/. If the error message is still displayed, initialize the USB device or use other USB devices. Error 05: The disc is unreadable.
- Page 39 USB again. N/A Device: An unsupported USB device is connected. ➪ For the supported USB devices, refer to <http://www.kenwood.com/usb/>. No Music Data/ Error 15: • The connected USB device contains no playable audio file. • Media was played that doesn’t have data recorded that the unit can play.
-
Page 40: Specifications
: Below Measurable Limit Frequency response (±1 dB) : 10 Hz – 20 kHz Total harmonic distortion (1 kHz) : 0.008 % (KDC-X7006U) : 0.010 % (KDC-X7006) Signal to Noise ratio (1 kHz) : 110 dB (KDC-X7006U) : 105 dB (KDC-X7006) Dynamic range...